 Kendric adan
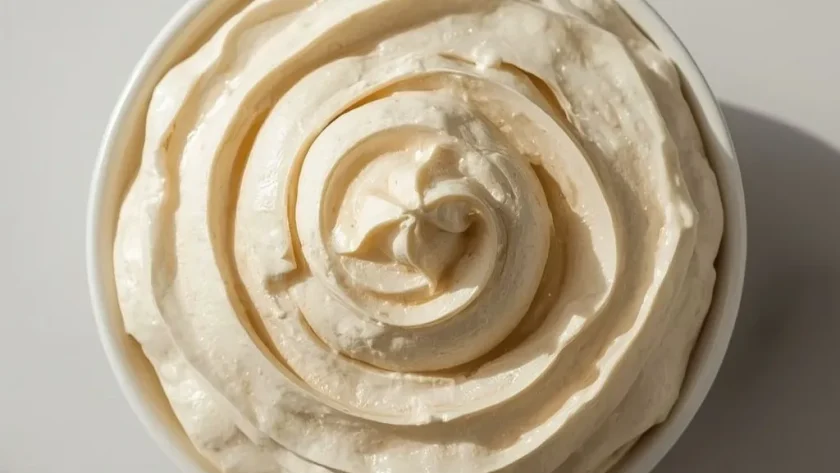
 Peanut Butter Whipping Cream brings together two classic pantry staples into one luscious topping. You get the nutty richness of peanut butter folded into a light, airy cream that barely takes effort to make.
This no-cook dessert topping takes about 10 minutes from start to finish, making it a beginner-friendly recipe. The only tricky moment comes when you add the peanut butter to the whipped cream — it can deflate quickly, but a steady hand and medium speed will get you through it. This cream is perfect for weeknight desserts or as a quick upgrade to store-bought cakes.
Why You’ll Love This Recipe
- Speed and simplicity — Just five ingredients and one bowl stand between you and a creamy peanut butter topping.
- Real peanut butter flavor — Processed creamy peanut butter blends seamlessly into the cream without leaving greasy spots or graininess.
- Versatile topping — This works on chocolate cake, banana pudding, ice cream sundaes, or a simple bowl of fresh fruit.
What Makes This Recipe Special
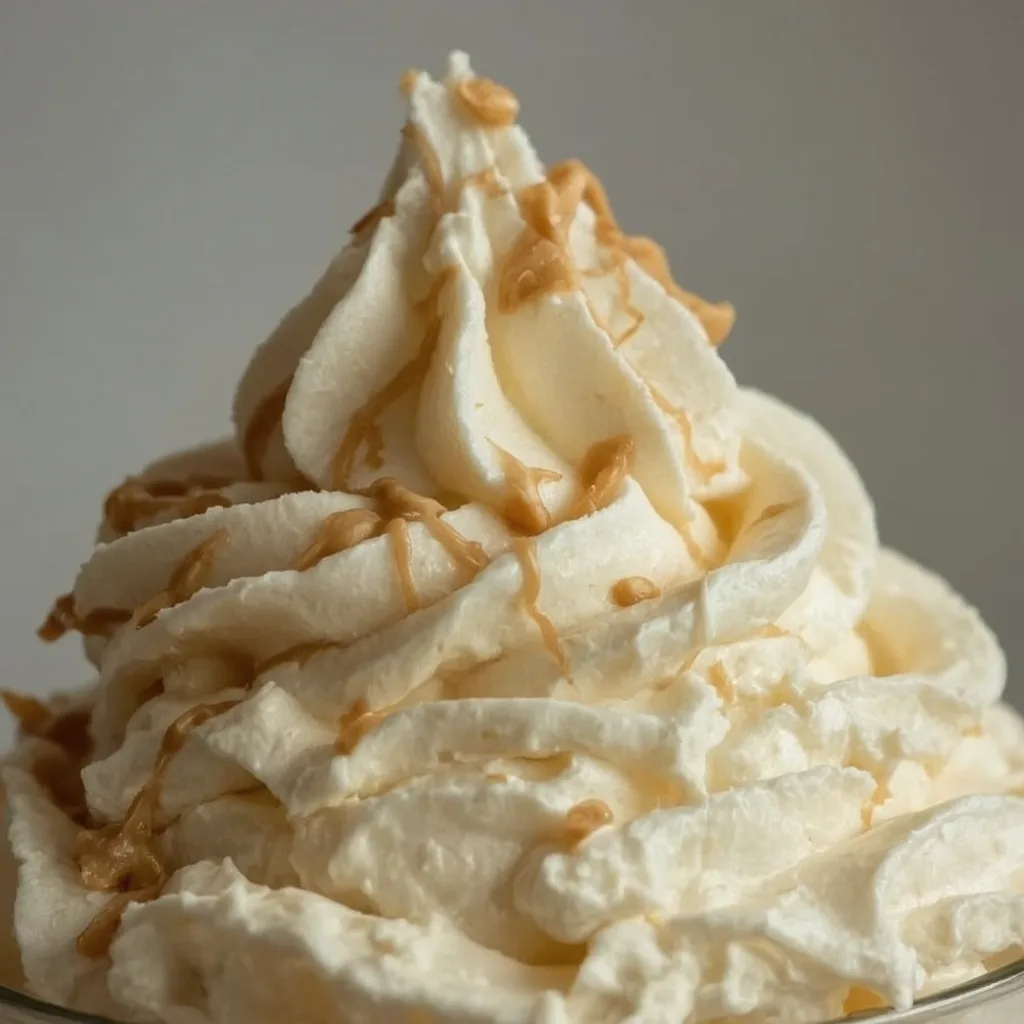
Most flavored whipped creams rely on extracts or syrups, but this one uses actual peanut butter for genuine depth. The texture stays light and airy from proper whipping technique, while the peanut butter adds a subtle savory note that balances the powdered sugar. You get a topping that tastes like a Reese’s cup melted into a cloud. Make it for birthday cakes, holiday pies, or a lazy Sunday hot chocolate.
Ingredients You’ll Need
Every ingredient here has a specific job. Here is what you need and why each one matters.
Main Ingredients
- 1 cup heavy cream, cold (36% fat recommended) — Cold heavy cream with high fat content whips up firmer and holds its shape longer than lower-fat creams. Do not substitute half-and-half or whipping cream with less than 36% fat.
- 3 tablespoons creamy peanut butter (no stir, processed peanut butter preferred) — Processed peanut butter like Skippy or Jif blends smoothly into the cream without oil separation. Natural peanut butter will work but may leave tiny grainier bits.
- 2 tablespoons powdered sugar — Powdered sugar dissolves instantly into the cream, unlike granulated sugar which can leave a gritty texture. It also adds structure to the whipped cream.
- 1/2 teaspoon vanilla extract — A small amount of vanilla rounds out the peanut butter flavor without competing with it.
Optional Ingredient
- Pinch of fine sea salt — A tiny pinch cuts the sweetness and deepens the peanut butter flavor. Skip it if your peanut butter is already salted.
Equipment Needed
- Large metal or glass mixing bowl — Metal and glass chill faster and hold cold better than plastic, giving your cream a cold environment to whip properly.
- Hand mixer or stand mixer with whisk attachment — A hand mixer works perfectly for small batches. A stand mixer frees your hands for adding ingredients.
- Freezer-safe space for the bowl and beaters — You need at least 15 minutes of freezer time before starting. Plan ahead or use a bowl that fits flat in your freezer.
- Small microwave-safe bowl — Warming the peanut butter for a few seconds prevents lumps. A regular bowl works fine as long as it is microwave-safe.
- Rubber spatula — A spatula helps scrape down the sides of the bowl and fold in any peanut butter streaks that the mixer missed.
Instructions to Prepare Peanut Butter Whipping Cream
Follow these steps in order and watch for the visual cues at each stage. The cream can go from soft to stiff quickly, so stay close to your mixer.
- Chill the equipment — Place a large metal or glass mixing bowl and the beaters in the freezer for at least 15 minutes. Cold equipment helps the cream whip faster and creates a stable foam that holds its shape.
- Whip the cream to soft peaks — Pour the cold heavy cream into the chilled bowl. Start on low speed to avoid splashing, then gradually increase to medium-high. Whip until the cream thickens and soft peaks form — when you lift the beaters, the cream should slump slightly but hold a soft mound.
- Warm the peanut butter — Place the peanut butter in a small microwave-safe bowl and heat for 10–15 seconds until just loosened. Do not melt it completely. Warming prevents the peanut butter from seizing and creating lumps when it hits the cold cream.
- Combine peanut butter with cream — Add the softened peanut butter to the whipped cream. Continue whipping on medium speed until the peanut butter is fully incorporated and the mixture begins to thicken again. The cream may deflate slightly at this point — this is normal, so keep going.
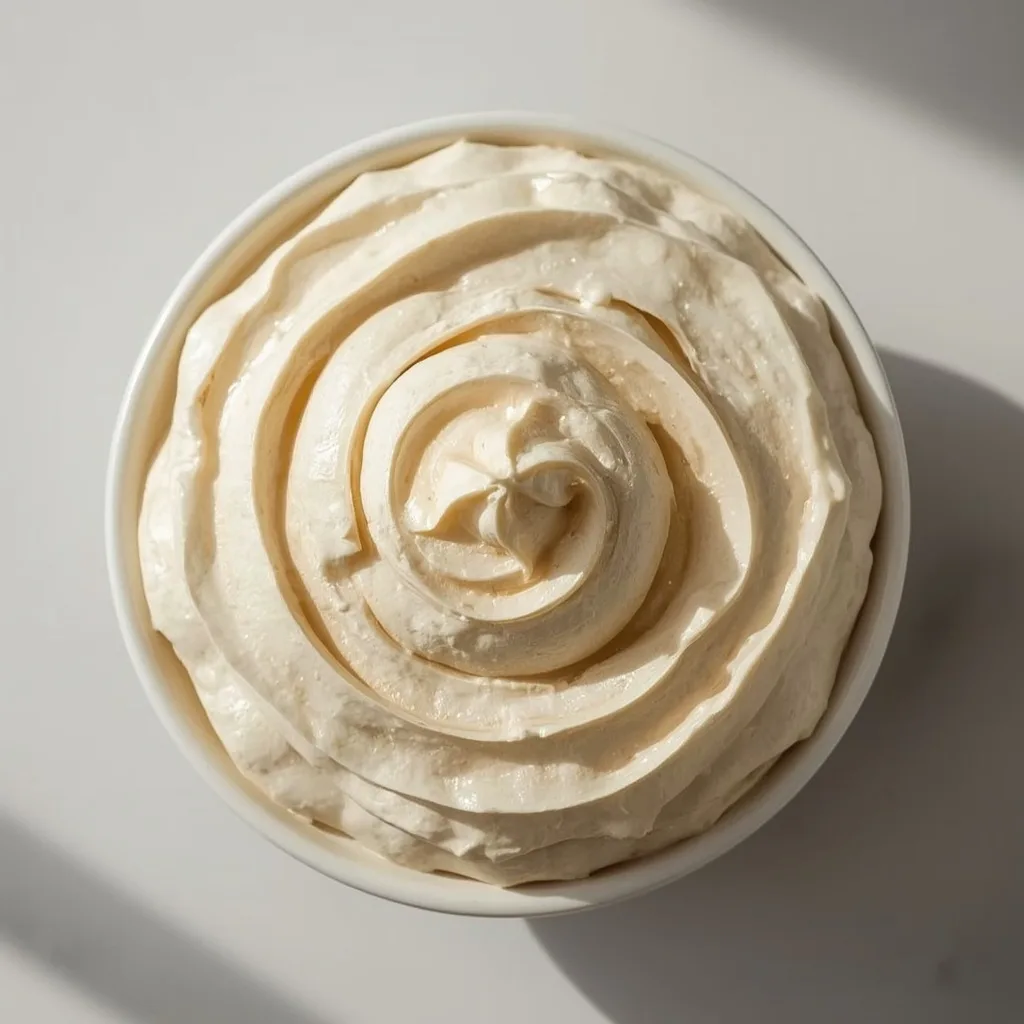
- Add sugar and vanilla — With the mixer running on low, gradually sprinkle in the powdered sugar and add the vanilla extract. Increase speed to medium-high and whip until stiff peaks form — when you lift the beaters, the cream stands upright without drooping. Be careful not to overwhip, or the cream will turn grainy and separate into butter.
- Add salt and finish — If using salt, add it and whip briefly for 5 seconds to distribute. Use the whipped cream immediately for best texture, or transfer to an airtight container and refrigerate for up to 2 hours. The cream may slightly deflate over time, so rewhip briefly before serving if needed.
Expert Tips for a Standout Peanut Butter Whipping Cream
- Chill everything thoroughly — Room temperature cream will not whip properly and will break quickly. A chilled bowl and beaters make a measurable difference in final volume.
- Use processed peanut butter for smooth results — Natural peanut butter separates into oil and solids over time, which can leave tiny gritty pieces in your cream. Processed brands like Jif or Skippy stay emulsified and blend seamlessly.
- Warm the peanut butter, not melt it — Ten to fifteen seconds in the microwave is enough to loosen the spread. Fully melted peanut butter will slide off the cream rather than incorporating.
- Whip on medium speed when adding peanut butter — High speed will splatter peanut butter everywhere and deflate the cream too much. Medium speed gives you controlled incorporation.
- Watch for stiff peaks carefully — The window between stiff peaks and overwhipped cream is about 15 seconds. Stop the mixer and check often once you see defined lines in the cream.
- Rewhip gently after refrigeration — The cream will lose some volume after sitting. A quick whisk by hand or 15–20 seconds on low speed restores the texture without turning it into butter.
Common Mistakes to Avoid
- Using warm cream — Warm cream will not hold peaks and may refuse to thicken at all. Always start with cream straight from the refrigerator and chilled equipment.
- Skipping the peanut butter warming step — Cold peanut butter straight from the jar will seize up when it hits the cold cream, creating stubborn lumps that are hard to smooth out.
- Overwhipping the cream — Whipping past stiff peaks causes the cream to break into grainy curds and liquid. Stop the moment the cream stands upright without drooping.
- Adding powdered sugar too quickly — Dumping all the sugar at once creates a cloud of dust and can deflate the cream. Sprinkle it gradually while the mixer runs on low.
- Storing without an airtight lid — This cream absorbs fridge odors easily and will pick up a faint onion or garlic taste if left uncovered. Always seal it tightly.
Variations & Ways to Customize Peanut Butter Whipping Cream
- Chocolate Peanut Butter Cream — Add 1 tablespoon of unsweetened cocoa powder along with the powdered sugar. Whisk it in gently to avoid clumps.
- Dairy-Free Version — Substitute chilled full-fat coconut cream (from one can, solidified) for the heavy cream. Use a dairy-free powdered sweetener like monk fruit or coconut sugar.
- Extra Nutty Cream — Fold in 2 tablespoons of finely chopped roasted peanuts after the cream reaches stiff peaks. This adds crunch and visual appeal.
- Honey-Roasted Twist — Replace the vanilla extract with 1/2 teaspoon of honey flavoring or a tiny splash of real honey (drizzled in slowly). The honey pairs beautifully with peanut butter.
- Spiced Peanut Butter Cream — Add 1/4 teaspoon of cinnamon or a pinch of nutmeg along with the powdered sugar. Warm spices complement the nutty flavor without overpowering it.
- Less Sweet Option — Reduce the powdered sugar to 1 tablespoon and add an extra pinch of salt. The cream will taste more savory but still holds structure thanks to the peanut butter.
What to Serve With Peanut Butter Whipping Cream
This cream can elevate everyday desserts into something special. Try it with any of these pairings for an instant upgrade.
- Chocolate cake or brownies — The classic combination of chocolate and peanut butter needs no introduction. Spread a thick layer on a slice of chocolate cake or a warm brownie.
- Banana pudding or banana split — Peanut butter and banana are a perfect match. Dollop the cream over banana pudding or use it as the topping for a banana split.
- Hot chocolate — Floating a spoonful of this cream on top of hot chocolate creates a melty, nutty layer that slowly dissolves. It turns a basic drink into a treat.
- Apple slices or pear slices — The creamy, nutty topping contrasts beautifully with the tartness and crunch of fresh fruit. Use it as a dip for a healthier dessert.
- Ice cream sundaes — Swap standard whipped cream for this version on any ice cream sundae. Vanilla, chocolate, or banana ice cream all work well.
- Graham crackers or vanilla wafers — This cream makes an excellent dip for cookies or crackers. A quick snack that feels indulgent with almost no effort.
Make-Ahead Instructions
- Refrigerate promptly — Transfer the cream to an airtight container and refrigerate immediately after whipping. Use within 2 hours for the best texture, or up to 2 days with a rewhip before serving.
- Rewhip before serving — The cream will deflate slightly during storage. Whisk gently by hand or use a mixer on low speed for 15–20 seconds to restore the volume and smoothness.
- Do not freeze — Freezing destroys the emulsion, leaving you with watery, separated cream that cannot be repaired. Make only what you plan to eat within a couple of days.
- Scale the recipe up — You can easily double or triple the ingredients. Just make sure your bowl is large enough to hold the increased volume without splashing.
Storage and Reheating
Storage
- Airtight container in the refrigerator — Place the cream in a container with a tight-fitting lid and refrigerate for up to 2 days. Press a piece of plastic wrap directly onto the surface of the cream before sealing to prevent a skin from forming.
- Rewhip before use — The cream will lose about 20% of its volume after 24 hours in the fridge. A quick 15-second rewhip on low speed brings back the airy texture.
- Avoid the freezer entirely — Freezing causes the water in the cream to separate from the fat, resulting in a grainy, watery mess when thawed. Make this fresh or not at all.
Reheating
- No heat is needed — This is a cold topping meant to be served chilled or at room temperature. Do not microwave or heat it, as the cream will liquefy.
- Let it sit at room temperature — If the cream feels too stiff straight from the fridge, let it sit on the counter for 5–10 minutes. Then whisk gently to loosen it.
- Use on warm desserts — The cream will soften and slightly melt when spooned over warm brownies, cake, or hot chocolate. That partial melt is actually the goal for some desserts.
Nutritional Breakdown (Per Serving)
Based on 1 serving = 1/4 of the total recipe (about 1/2 cup of whipped cream).
- Calories: 293
- Protein: 4.3g
- Fat: 28g
- Saturated Fat: around 14g
- Carbohydrates: 8.4g
- Fiber: 0g
- Sugar: 4g
- Sodium: roughly 73mg
Frequently Asked Questions
Can I make Peanut Butter Whipping Cream with natural peanut butter?
Yes, but natural peanut butter often separates into oil and solids. Stir it very well before using, and expect a slightly grainier texture. Processed peanut butter gives smoother results.
How long does Peanut Butter Whipping Cream last in the fridge?
Store it in an airtight container for up to 2 days. Rewhip for 15–20 seconds on low speed before serving to restore volume. It will not stay fluffy beyond that point.
Why did my cream deflate when I added the peanut butter?
This is normal. The peanut butter weighs down the cream temporarily. Keep whipping on medium speed and it will thicken back up within 30–45 seconds.
Can I use this cream as a frosting for a cake?
Absolutely, but keep the cake refrigerated until serving. This cream is softer than buttercream and may slide off if the cake sits at room temperature for too long.
Can I skip the powdered sugar?
You can, but the cream will be less stable and slightly less sweet. The powdered sugar helps stabilize the whipped cream structure, so omitting it may cause faster deflation.
Can I double this recipe for a party?
Yes, double or triple all ingredients. Make sure your bowl is large enough — the cream doubles in volume as it whips, so a 4-cup batch needs at least an 8-cup bowl.
Final Words
This Peanut Butter Whipping Cream is one of those recipes that feels much fancier than it actually is. Five ingredients, 10 minutes, and you have a topping that can transform a simple bowl of fruit into something memorable. Give it a try with your favourite dessert this week — I think you will be surprised how often you reach for it.
More Recipes
PrintPeanut Butter Whipping Cream
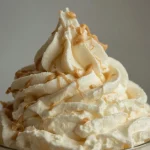
A rich and creamy whipped topping infused with smooth peanut butter, perfect for cakes, pies, or hot chocolate. This no-cook recipe delivers a luscious, airy texture with a nutty sweetness that complements any dessert.
- Prep Time: 10
- Total Time: 10
- Yield: 4 1x
- Category: Dessert
- Method: No-Cook
- Cuisine: American
Ingredients
- 1 cup heavy cream, cold (36% fat recommended)
- 3 tablespoons creamy peanut butter (no stir, processed peanut butter preferred)
- 2 tablespoons powdered sugar
- 1/2 teaspoon vanilla extract
- Pinch of fine sea salt (optional, to balance sweetness)
Instructions
- Chill a large metal or glass mixing bowl and the beaters of a hand mixer (or whisk attachment for a stand mixer) in the freezer for at least 15 minutes. Cold equipment and cream whip more efficiently, creating a stable foam that holds its shape.
- Pour the cold heavy cream into the chilled bowl. Begin whipping on low speed to avoid splashing, then gradually increase to medium-high speed. Whip until the cream thickens and soft peaks form—when you lift the beaters, the cream should slump slightly but hold a soft mound.
- In a small microwave-safe bowl, warm the peanut butter for 10–15 seconds until just loosened (do not melt). This prevents the peanut butter from seizing and creating lumps when introduced to the cold cream.
- Add the softened peanut butter to the whipped cream. Continue whipping on medium speed until the peanut butter is fully incorporated and the mixture begins to thicken again. The cream may deflate slightly—this is normal; keep going.
- With the mixer running on low, gradually sprinkle in the powdered sugar and add the vanilla extract. Increase speed to medium-high and whip until stiff peaks form—when you lift the beaters, the cream stands upright without drooping. Be careful not to overwhip, or the cream will turn grainy and separate (butter).
- If using salt, add it and whip briefly for 5 seconds to distribute. Use the whipped cream immediately for best texture, or transfer to an airtight container and refrigerate for up to 2 hours. The peanuts may slightly deflate over time, so rewhip briefly before serving if needed.
Notes
Store leftover peanut butter whipping cream in an airtight container in the refrigerator for up to 2 days. Before using, whisk gently by hand or with a mixer on low speed for 15–20 seconds to restore volume. Do not freeze, as thawing will cause separation and a watery texture. For a dairy-free version, substitute chilled full-fat coconut cream (1 can, solidified) for heavy cream and use a dairy-free powdered sweetener.
Nutrition
- Calories: 293
- Sugar: 4g
- Sodium: 73mg
- Unsaturated Fat: 15g
- Carbohydrates: 8.4g
- Fiber: 0g
- Protein: 4.3g
- Cholesterol: 82mg
Keywords: peanut butter whipped cream, peanut butter cream, whipped topping, no-cook dessert, peanut butter dessert, creamy topping, easy whipped cream, dessert topping, homemade whipped cream, peanut butter recipes