 Kendric adan
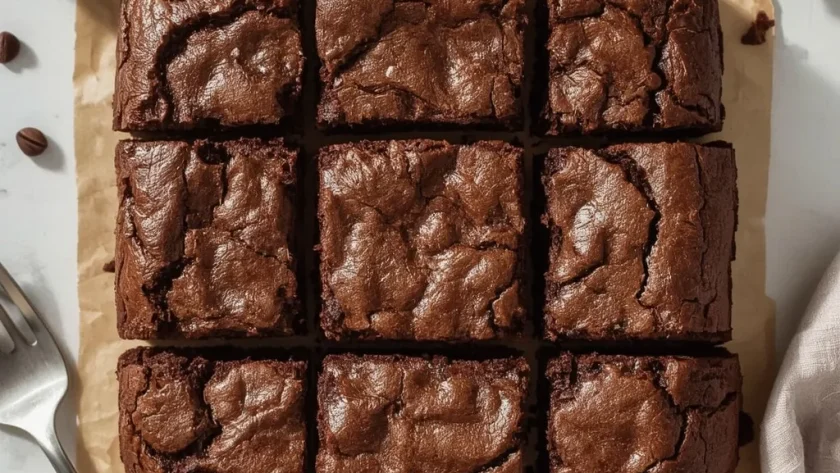
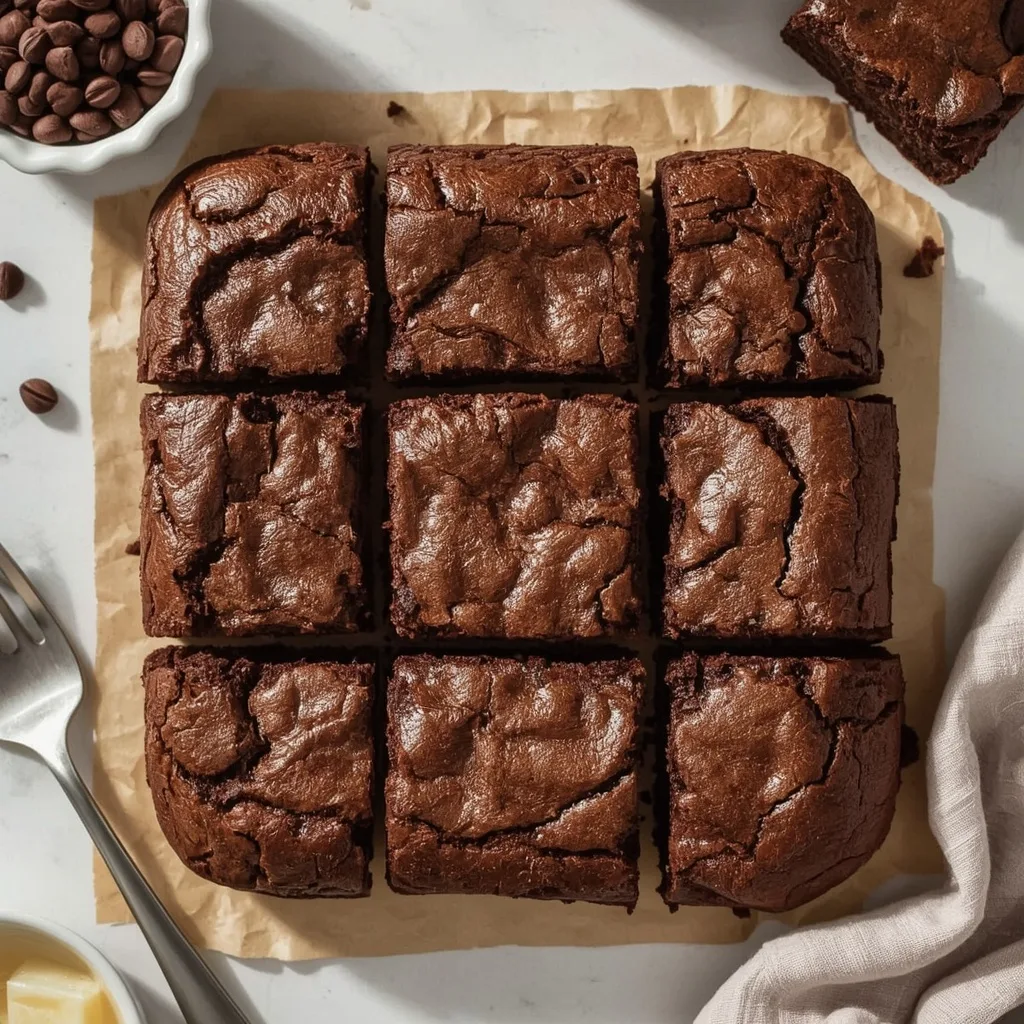
 These Gluten free bisquick brownies are a quick fix for those chocolate cravings when you want something fudgy and satisfying. They come together in one bowl with just eight ingredients and deliver a chewy center with that signature crackly top.
Total time is around 35 minutes, making this a beginner-friendly recipe perfect for a last-minute dessert. The only tricky part is whisking warm melted butter into the egg without scrambling it, but a steady hand and constant stirring take care of that.
Why You’ll Love This Recipe
- One-bowl mixing — The batter comes together in a single bowl, which means less cleanup and more time enjoying your treat.
- Real chocolate flavor — Cocoa powder and melted butter create a deep, rich taste that doesn’t rely on boxed mixes or artificial flavorings.
- Reliable texture every time — The gluten free Bisquick provides a stable structure, so you get a fudgy interior and slightly crispy edges without guesswork.
What Makes This Recipe Special
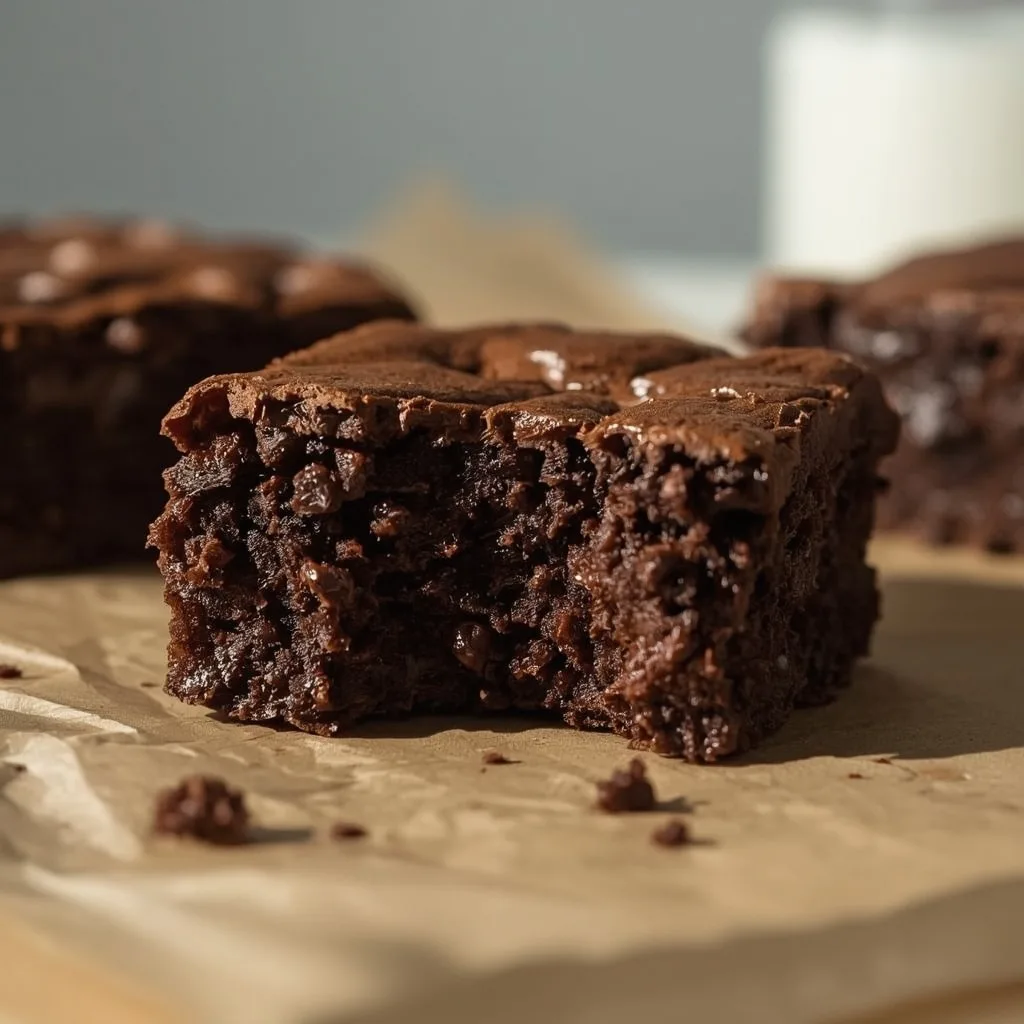
Using gluten-free Bisquick as the base keeps the brownies tender without turning gummy, a common problem with other gluten free flour blends. The combination of cocoa powder and melted butter gives a pronounced chocolate flavor that tastes more homemade than a standard boxed mix. You get a glossy, crackly top from a simple trick of sprinkling extra sugar crystals before baking.
Ingredients You’ll Need
Every ingredient here has a specific job. Here is what you need and why it matters.
Core Ingredients
- 1/2 cup gluten free Bisquick mix — This is the backbone of the brownies, providing structure and a soft crumb that holds together well.
- 1/4 cup unsweetened cocoa powder — Choose a natural cocoa powder for the best depth of flavor. Dutch-process will work but gives a milder, less acidic taste.
- 1/2 cup granulated sugar — White granulated sugar dissolves cleanly and contributes to that crackly top.
- 1/4 cup unsalted butter, melted — Unsalted butter lets you control the salt level. Make sure it is warm but not hot before adding it to the egg mixture.
- 1 large egg — The egg provides structure and moisture. For the best results, use a room-temperature egg so it blends more evenly.
- 1 teaspoon vanilla extract — A quality pure vanilla extract rounds out the chocolate flavor without overwhelming it.
- 2 tablespoons whole milk — Whole milk adds moisture and a touch of richness. You can substitute 2% milk, but avoid skim milk for the best texture.
- 1/8 teaspoon kosher salt — Salt balances the sweetness and enhances the chocolate notes. Regular table salt works if you reduce the amount to 1/16 teaspoon.
Equipment Needed
- 9×5-inch loaf pan — This is the exact pan size called for. A standard 8×8-inch square pan will produce thinner brownies that bake faster, so adjust the time accordingly.
- Parchment paper — Lining the pan with overhang on the long sides makes lifting the brownies out a breeze. You can also use nonstick spray, but parchment is more reliable.
- Medium mixing bowl — A medium-sized bowl is large enough for whisking the dry ingredients and folding in the wet mixture without splashing.
- Fine-mesh strainer — Sifting the cocoa powder and gluten free Bisquick through a strainer breaks up clumps and ensures a smooth, lump-free batter. A regular whisk works if you do not have a strainer.
- Rubber spatula — A flexible spatula helps you scrape the bowl clean and fold the batter gently without overmixing. Use a flat-edged one for spreading the batter evenly in the pan.
Instructions to Prepare Gluten-Free Bisquick Brownies
Follow these steps in order, and you will have fudgy brownies with a crackly top every time.
- Preheat and prep pan — Set the oven to 350°F (177°C). Line your 9×5-inch loaf pan with parchment paper, leaving overhang on the long sides so you can lift the brownies out later. Lightly greasing the parchment edges helps the brownies release cleanly.
- Whisk dry ingredients — In a medium bowl, whisk together the gluten free Bisquick mix, cocoa powder, and kosher salt. Sifting through a fine-mesh strainer right into the bowl breaks up any cocoa clumps and gives a smoother batter.
- Beat egg and sugar — In a separate small bowl, whisk the egg until frothy, about 30 seconds. Add the granulated sugar and vanilla extract, then whisk vigorously for 1 minute until the mixture lightens in color. This step aerates the batter slightly, which contributes to the crackly top.
- Add melted butter slowly — Pour the melted butter into the egg mixture while whisking constantly. Drizzling slowly prevents the warm butter from cooking the egg, which would create small, undesirable curds. If the butter feels hot, let it cool for 1 minute first.
- Combine dry and wet — Add the dry ingredients to the wet mixture in three additions, stirring gently with a rubber spatula after each. The batter will be very thick at this point — that is normal and intentional for fudgy brownies.
- Add milk for consistency — Stir in the whole milk, one tablespoon at a time, until the batter turns smooth and glossy. Stop mixing as soon as no dry streaks remain. Overmixing can make the brownies dense and tough.
- Transfer to pan — Pour the batter into the prepared pan and spread it into an even layer with an offset spatula or the back of a spoon. The layer will be about 1/2-inch thick.
- Bake to perfection — Bake for 20 to 25 minutes. Insert a toothpick into the center; it should come out with a few moist crumbs attached, not wet batter. The edges will look set and slightly pulled away from the pan.
- Cool completely — Place the pan on a wire rack and let the brownies cool completely in the pan, about 30 minutes. Cooling allows the structure to set and the fudgy interior to firm up for clean slicing. Lift the block using the parchment overhang, then slice into 4 bars.
- Optional glossy top — For that classic crackly, glossy crust, sprinkle a few extra sugar crystals over the batter just before baking. Also, avoid opening the oven door during the first 15 minutes of baking to let the top set properly.
Expert Tips for a Standout Gluten-Free Bisquick Brownies
- Room temperature egg — A cold egg can cause the butter to seize when you add it, leading to a lumpy batter. Let the egg sit out for 15 minutes or place it in a bowl of warm water for 5 minutes before starting.
- Sift the cocoa powder — Cocoa powder tends to clump when it sits. Sifting it together with the gluten free Bisquick and salt ensures an even distribution and a smoother final texture.
- Don’t skip the whisking step — Whisking the egg and sugar for a full minute creates air bubbles that help form the crackly top. Shortening this step results in a denser, less shiny surface.
- Check for doneness early — Ovens vary. Start checking at 20 minutes with a toothpick inserted in the center. If it comes out with wet batter, bake for another 2-3 minutes. If it comes out clean, the brownies are overbaked and will be cakey rather than fudgy.
- Use a serrated knife for slicing — A serrated knife glides through the brownies without dragging the fudgy interior. For the cleanest cuts, wipe the blade between each slice.
- Let them cool fully — Warm brownies are too soft to slice neatly. Waiting the full 30 minutes makes a noticeable difference in how the bars hold their shape.
Common Mistakes to Avoid
- Overmixing the batter — Stirring too much after adding the gluten free Bisquick develops gluten and makes the brownies tough. Mix only until the last trace of dry flour disappears, then stop.
- Using hot butter directly — If the melted butter is too hot, it will cook the egg on contact, creating small scrambled bits in the batter. Let it cool for one minute before adding it.
- Skipping the parchment paper — Without parchment, the brownies can stick to the pan, especially around the edges where they caramelize. The overhang also makes removal far easier.
- Overbaking for a “safe” result — Many home bakers pull brownies when the toothpick comes out clean, but that signals dry, cakey brownies. You want a few moist crumbs clinging to the toothpick for that fudgy texture.
- Cutting while still warm — Warm brownies crumble and fall apart. Patience is key here — letting them cool completely is the difference between a messy pile of crumbs and neat, presentable bars.
- Opening the oven door too early — Peeking before the first 15 minutes lets heat escape and stops the top from forming that glossy, crackly crust. Trust the process and wait.
Variations & Ways to Customise Gluten-Free Bisquick Brownies
- Nutty chocolate version — Fold in 1/4 cup of toasted chopped walnuts or pecans after adding the milk. The nuts add crunch and a toasty flavor that complements the chocolate.
- Salted caramel swirl — Drizzle 2 tablespoons of salted caramel sauce over the batter before baking. Use a knife to swirl it gently into the top layer for a marbled effect.
- Mint chocolate twist — Add 1/2 teaspoon of peppermint extract along with the vanilla extract. Stir in 2 tablespoons of mini chocolate chips for extra texture and a cooling aftertaste.
- Espresso kick — Dissolve 1 teaspoon of instant espresso powder in the milk before adding it to the batter. The coffee deepens the chocolate flavor without making the brownies taste like coffee.
- Chocolate chunk upgrade — Replace the milk with 2 tablespoons of heavy cream and fold in 1/4 cup of chopped dark chocolate. The extra fat makes the brownies even richer and fudgier.
- Peanut butter swirl — Drop 2 tablespoons of creamy peanut butter in small dollops on top of the batter after spreading it in the pan. Swirl gently with a toothpick for a classic peanut butter and chocolate pairing.
What to Serve With Gluten-Free Bisquick Brownies
These brownies are satisfying on their own, but a few accompaniments turn them into a full dessert experience.
- Vanilla ice cream — A scoop of good-quality vanilla ice cream balances the richness of the brownies and adds a cool, creamy contrast.
- Fresh berries — Raspberries or sliced strawberries add a bright, tart note that cuts through the sweetness and chocolate heaviness.
- Whipped cream — A dollop of lightly sweetened whipped cream adds airiness and a touch of elegance without overpowering the brownies.
- Hot coffee or espresso — A small cup of black coffee alongside the brownies enhances the chocolate flavor and provides a grown-up finishing touch.
- Spiced chai latte — The warm spices in chai — cinnamon, cardamom, ginger — pair surprisingly well with chocolate, creating a cozy flavor combination.
- Flaky sea salt — A light sprinkle of flaky sea salt over the brownies just before serving heightens the chocolate flavor and adds a subtle crunch.
Make-Ahead Instructions
- Bake the brownies 2 days ahead — The brownies actually taste better the next day, as the flavors meld and the texture settles. Store them in an airtight container at room temperature.
- Prepare the dry mix in advance — Whisk the gluten free Bisquick, cocoa powder, and salt together in a small bag or container up to 2 weeks ahead. When ready to bake, just add the wet ingredients.
- Freeze the baked brownies — Wrap each individual brownie tightly in plastic wrap, then place them in a zip-top freezer bag. They keep well for up to 3 months. Thaw at room temperature for about 1 hour before serving.
- Assemble the batter the night before — You can mix the batter, cover the bowl, and refrigerate it overnight. Let it sit at room temperature for 15 minutes before baking, as the cold batter may need an extra 2-3 minutes in the oven.
Storage and Reheating
Storage
- Room temperature in an airtight container — Place the brownies in a single layer or separated by parchment paper. They stay fresh for up to 3 days. Avoid refrigerating them, as cold dries out the fudgy texture.
- Individual plastic wrap wrap — Wrap each brownie tightly in plastic wrap, then place them in a zip-top bag for freezing. This prevents freezer burn and makes it easy to grab one serving at a time.
- Freezer with parchment layer — For a block of brownies, wrap the whole block in plastic wrap, then again in aluminum foil. Place in a freezer-safe bag for up to 3 months. Thaw the block at room temperature for 2 hours before slicing.
Reheating
- Microwave for a quick warm-up — Place a single brownie on a microwave-safe plate and heat for 15 seconds. The brownie will be warm and the center slightly soft. For a more intense experience, top with a scoop of ice cream right after reheating.
- Oven for batch reheating — Preheat the oven to 300°F (150°C). Place the brownies on a baking sheet lined with parchment and warm for 5 minutes. This method restores the edges to a slight crispness without drying out the center.
- Air fryer for a crispy edge — Set the air fryer to 300°F (150°C). Place brownies in the basket in a single layer and heat for 3 minutes. The air circulation crisps up the exterior while keeping the inside soft.
- Stovetop toaster for large pieces — Cut the brownies into thick slices and place them in a dry skillet over low heat. Cover with a lid and heat for 2 minutes on each side. This method creates a slightly caramelized crust on the outside.
Nutritional Breakdown (Per Serving)
Based on 1 serving = 1 brownie (recipe makes 4 servings).
- Calories: 342
- Protein: 5g
- Fat: 14g
- Carbohydrates: 51g
- Fiber: 3g
- Sugar: 29g
- Sodium: 380mg
Frequently Asked Questions
Can I use regular Bisquick instead of gluten free Bisquick for these brownies?
Regular Bisquick contains wheat flour and wheat starch, so it is not gluten free. Substituting it would change the texture and make the brownies unsuitable for anyone avoiding gluten. Stick with the gluten free version for the correct results.
How long do Gluten free bisquick brownies last at room temperature?
These brownies stay fresh in an airtight container at room temperature for up to 3 days. They are best within the first 48 hours for maximum moisture and softness. After that, the texture may dry out slightly, but they are still good.
Can I freeze Gluten free bisquick brownies?
Yes, freezing works well. Wrap each brownie individually in plastic wrap, then place them in a zip-top freezer bag. They last up to 3 months. Thaw at room temperature for about 1 hour before enjoying, or reheat from frozen in the microwave for 20 seconds.
Why did my brownies turn out cakey instead of fudgy?
The most common cause is overbaking. Remove the brownies from the oven when the toothpick still has a few moist crumbs attached. Baking until the toothpick comes out clean results in a dry, cakey texture. Overmixing the batter also adds too much air, which changes the structure.
Can I use a different pan size?
A 9×5-inch loaf pan is the recommended size for this recipe. If you use an 8×8-inch square pan, the batter will be thinner and bake faster, so check at 15 minutes. A standard 9-inch round pan also works, but you may need to reduce the baking time by about 5 minutes.
Can I substitute the whole milk with a non-dairy alternative?
You can use unsweetened almond milk or oat milk as a substitute. Both work well, but the brownies will be slightly less rich because you are reducing the fat content. Avoid sweetened varieties, as they can make the brownies overly sweet.
Final Words
These Gluten free bisquick brownies deliver a fudgy, chocolatey treat with minimal effort and simple ingredients. The recipe is reliable enough for a weeknight dessert but special enough to share with friends.
Give them a try, and you will see how easy it is to get that crackly top and chewy center at home.
More Recipes
PrintGluten Free Bisquick Brownies
These rich, fudgy brownies are made effortlessly with gluten free Bisquick mix, delivering a chewy center and crackly top with minimal effort. A touch of melted butter and cocoa powder intensifies the chocolate flavor, while the simple batter comes together in one bowl for a quick dessert fix.
- Prep Time: 10
- Cook Time: 25
- Total Time: 35
- Yield: 4 1x
- Category: Dessert
- Method: Baking
- Cuisine: American
Ingredients
- 1/2 cup gluten free Bisquick mix
- 1/4 cup unsweetened cocoa powder
- 1/2 cup granulated sugar
- 1/4 cup unsalted butter, melted
- 1 large egg
- 1 teaspoon vanilla extract
- 2 tablespoons whole milk
- 1/8 teaspoon kosher salt
Instructions
- Preheat the oven to 350°F (177°C). Line a 9×5-inch loaf pan with parchment paper, leaving overhang on the long sides for easy removal, or lightly grease with nonstick spray.
- In a medium mixing bowl, whisk together the gluten free Bisquick mix, unsweetened cocoa powder, and kosher salt. Sifting through a fine-mesh strainer will break up any cocoa clumps and ensure a smooth batter.
- In a separate small bowl, whisk the egg until frothy, about 30 seconds. Add the granulated sugar and vanilla extract, then whisk vigorously for 1 minute until the mixture lightens slightly in color.
- Pour the melted unsalted butter into the egg-sugar mixture, whisking constantly to prevent the egg from cooking. The butter should be warm but not hot; let it cool for 1 minute if necessary.
- Add the dry ingredients to the wet mixture in three additions, stirring gently with a rubber spatula after each addition. The batter will be very thick — this is correct for fudgy brownies.
- Stir in the whole milk, one tablespoon at a time, until the batter is smooth and glossy. Avoid overmixing; stop as soon as no dry streaks remain to keep the brownies tender.
- Pour the batter into the prepared pan and spread it into an even layer using an offset spatula or the back of a spoon. The layer will be about 1/2-inch thick.
- Bake for 20 to 25 minutes, or until a toothpick inserted into the center comes out with a few moist crumbs attached. The edges should look set and slightly pulled away from the pan.
- Place the pan on a wire rack and let the brownies cool completely in the pan, about 30 minutes. This allows the structure to set and the fudgy interior to firm up for clean slicing. Use the parchment overhang to lift the block onto a cutting board before slicing into 4 bars.
- For a glossy, crackly top, sprinkle a few extra sugar crystals over the batter just before baking and avoid opening the oven door during the first 15 minutes.
Notes
Store brownies in an airtight container at room temperature for up to 3 days. For longer storage, wrap individually in plastic wrap and freeze in a zip-top bag for up to 3 months. To reheat, microwave a single brownie on a microwave-safe plate for 15 seconds, or warm in a 300°F (150°C) oven for 5 minutes. These brownies are best enjoyed within 48 hours for maximum moisture.
Nutrition
- Calories: 342
- Sugar: 29g
- Sodium: 380mg
- Unsaturated Fat: 8g
- Carbohydrates: 51g
- Fiber: 3g
- Protein: 5g
- Cholesterol: 75mg
Keywords: gluten free brownies, Bisquick brownies, easy brownie recipe, fudgy brownies, gluten free dessert, chocolate brownies, one bowl brownies, gluten free baking, quick brownies, gluten free Bisquick recipe, homemade brownies, crackle top brownies