 Kendric adan
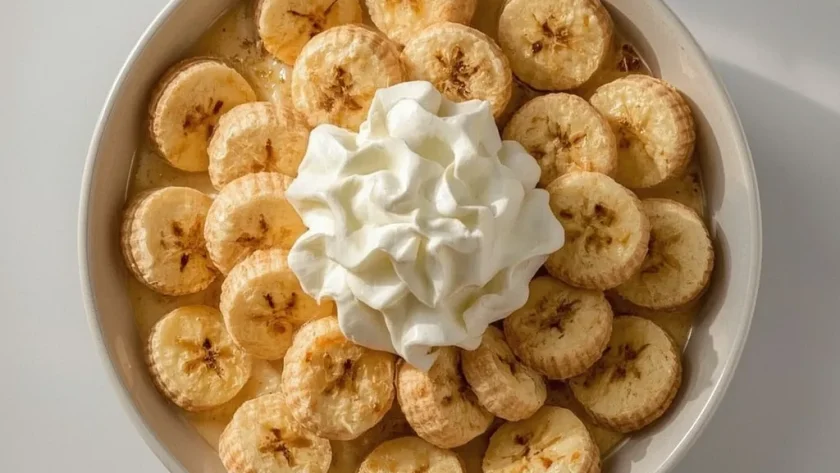
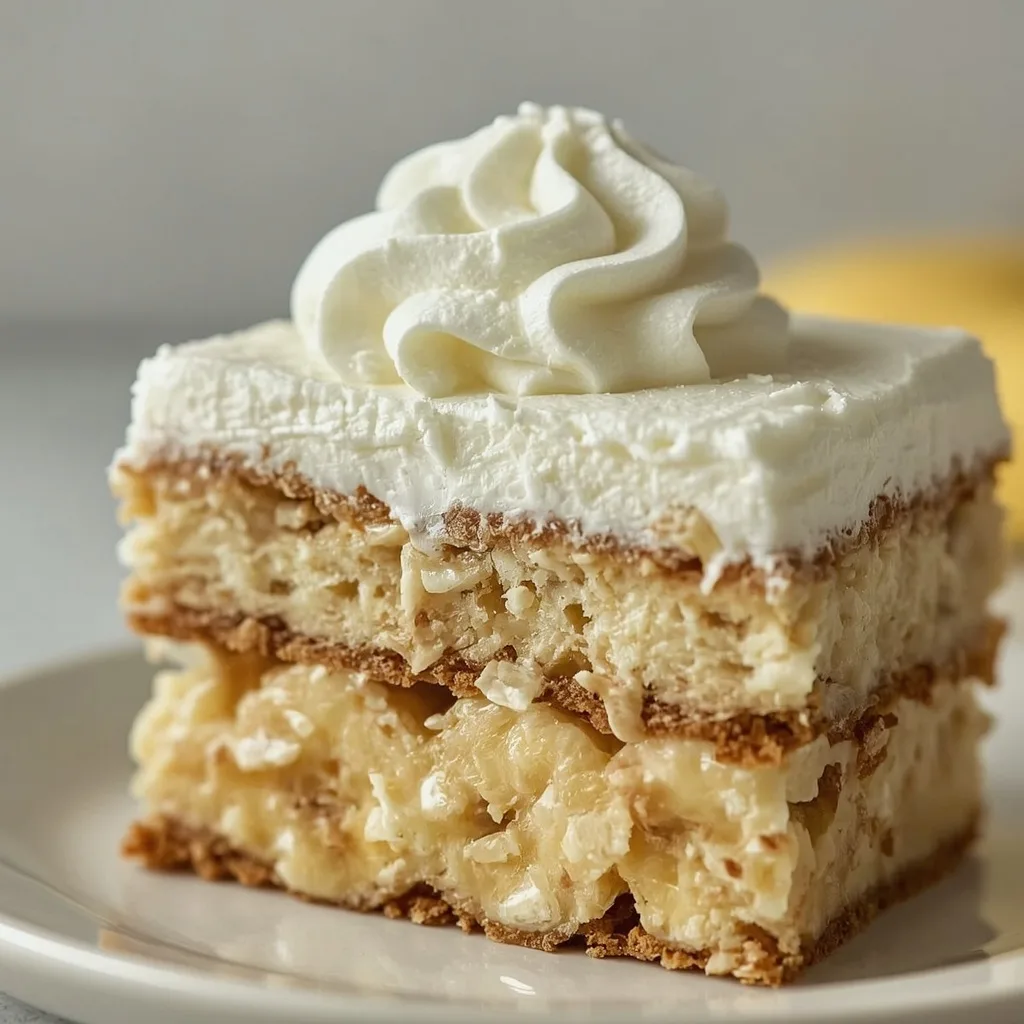
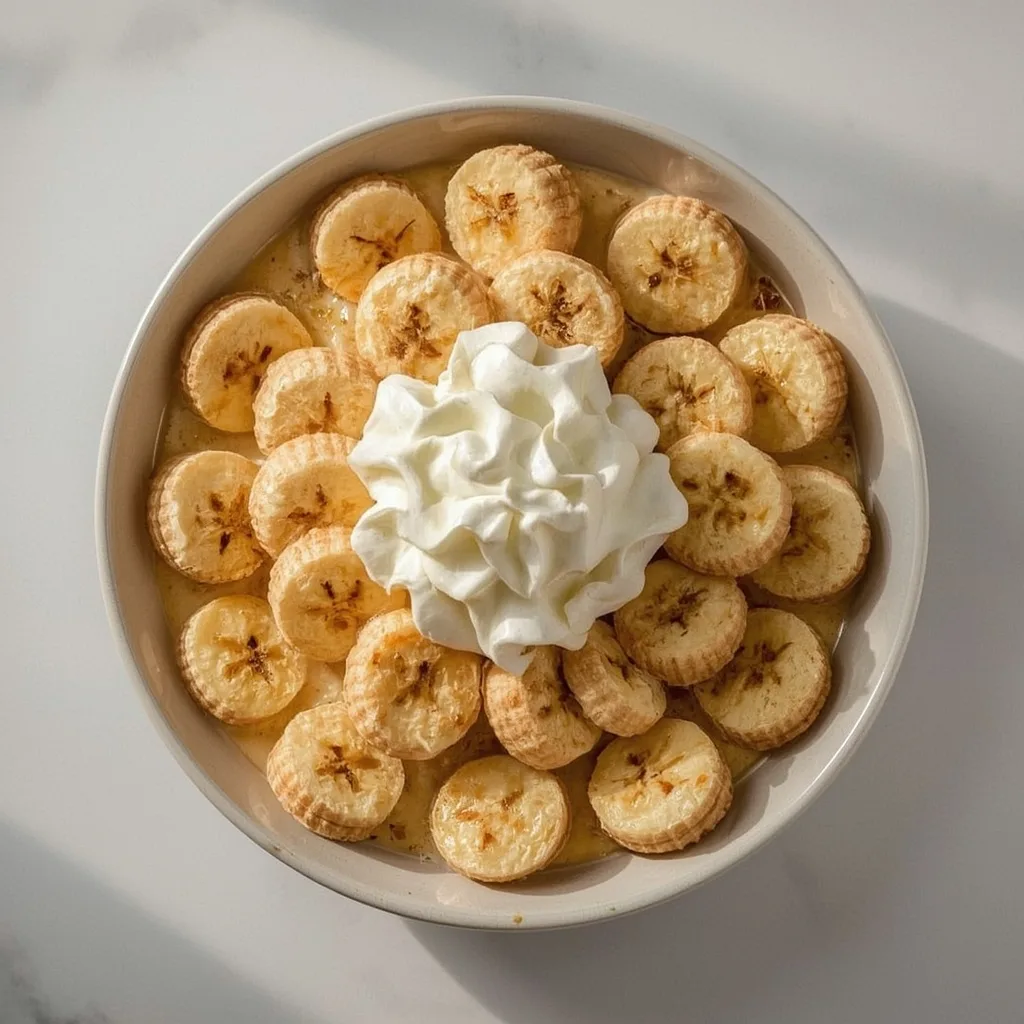
 Magnolia Bakery Banana Pudding is a no-bake dessert that layers creamy vanilla pudding, ripe bananas, and crisp Nilla wafers. After a good chill, those wafers soften into a cake-like texture, making each spoonful sweet, silky, and a little bit crunchy.
Total time is about 4 hours 35 minutes (mostly inactive chilling), and I’d call it intermediate — the stovetop pudding requires steady stirring to avoid lumps. This is perfect for a summer cookout, a holiday potluck, or any time you want a crowd-pleasing Southern classic.
Why You’ll Love This Recipe
- No oven required — Everything comes together on the stovetop, then sets in the fridge. Great for hot days or when your oven is occupied.
- Simple ingredients — You probably have most of these in your pantry already. No boxed mixes or specialty items needed.
- Make-ahead friendly — The flavor and texture actually improve after a day in the fridge, so you can prep it the night before a gathering.
- Customizable — Easy to tweak for dietary needs or to add your own twist (see the variations section).
What Makes This Recipe Special
What sets this apart from other banana puddings is the from-scratch vanilla pudding made with whole milk, egg, and real butter. It’s rich without being heavy, and the layers of wafer, banana, and pudding meld perfectly after chilling. The homemade whipped cream on top adds a light, airy finish that balances the creamy base. This version comes from the famous Magnolia Bakery, and it’s become a staple for good reason.
Ingredients You’ll Need
Here is everything you need to make this recipe. Grouping them by component makes prep easier.
For the Pudding
- 1/2 cup granulated sugar — Provides sweetness and helps the pudding thicken. No need to adjust; this is the right level.
- 1/4 cup all-purpose flour — Acts as the thickening agent. Use standard white flour, not self-rising or whole wheat.
- 1/4 teaspoon kosher salt — Balances sweetness and enhances flavor. Table salt can be substituted, but use a scant 1/4 teaspoon.
- 1 cup whole milk — Full fat gives the creamiest texture. Low-fat works in a pinch but won’t be as luscious.
- 1 large egg — Adds richness and helps set the pudding. Make sure it’s at room temperature for smooth mixing.
- 1 teaspoon pure vanilla extract — Use the real stuff, not imitation, for the best flavor.
- 1 tablespoon unsalted butter, cut into pieces — Melted in at the end for shine and a velvety finish. Salted butter can work; just omit the added salt.
For the Layers
- 2 medium ripe bananas, sliced into 1/4-inch rounds — Choose bananas with some brown spots for sweetness, but not mushy. Slice evenly for consistent texture.
- 1 cup (about 40) Nilla wafer cookies — Classic vanilla wafers are the standard. Generic brands work, but the texture and flavor differ slightly.
For the Whipped Cream
- 1/2 cup heavy cream, cold — Chilling the bowl and cream helps it whip faster and hold peaks longer.
- 2 tablespoons powdered sugar — Dissolves easily into the cream without grittiness.
- 1/2 teaspoon pure vanilla extract — Doubles down on the vanilla flavor. You can skip it, but I wouldn’t.
Equipment Needed
- Medium heavy-bottomed saucepan — Distributes heat evenly to prevent scorching the pudding. A nonstick saucepan works too, but use a wooden spoon to avoid scratches.
- Whisk and wooden spoon (or heatproof spatula) — The whisk for combining dry and wet ingredients; the spoon for stirring the pudding as it cooks.
- 1-quart serving dish or four 8-ounce cups — Glass or ceramic is best for showing off the layers. Individual cups make serving easy.
- Hand mixer or stand mixer with whisk attachment — For whipping the cream. You can do it by hand with a whisk, but it will take several minutes of elbow grease.
- Plastic wrap — Pressed directly onto the pudding surface prevents a skin from forming. Also needed for covering the assembled dish.
Instructions to Prepare Magnolia Bakery Banana Pudding
Follow these steps carefully. The stovetop pudding is the most hands-on part, but it’s manageable with constant attention.
- Make the dry base — In a medium heavy-bottomed saucepan, whisk together the sugar, flour, and salt until thoroughly combined. This dry base ensures the pudding thickens evenly without lumps.
- Whisk the egg and milk — In a separate small bowl, whisk the egg and whole milk until smooth and uniform. Tempering the egg mixture later prevents it from scrambling when added to the hot saucepan.
- Combine wet and dry — Gradually pour the egg-milk mixture into the saucepan with the dry ingredients, whisking constantly to create a smooth slurry. Make sure no dry pockets remain at the bottom.
- Cook the pudding — Place the saucepan over medium heat and cook, stirring constantly with a wooden spoon or heatproof spatula. Use a figure-eight motion to scrape the bottom and corners to prevent scorching. Continue until the mixture thickens and begins to bubble at the edges, about 6-8 minutes. The pudding should coat the back of the spoon and leave a clear trail when you run your finger through it.
- Finish with butter and vanilla — Immediately remove the pan from heat. Add the vanilla extract and butter pieces, stirring until the butter melts fully and the pudding is glossy and smooth. The residual heat will incorporate the butter without affecting the texture.
- Cool the pudding — Transfer the pudding to a clean bowl and press a piece of plastic wrap directly onto the surface to prevent a skin from forming. Let it cool at room temperature for 20 minutes, then set aside. The pudding will continue to thicken as it cools.
- Slice the bananas — While the pudding cools, slice the bananas into uniform 1/4-inch rounds. Avoid slicing too thin or they will turn mushy; too thick and they won’t soften properly during chilling.
- Layer the dessert — Begin layering in a 1-quart serving dish or four individual 8-ounce cups. Start with a single layer of Nilla wafers (about 10 per layer), then a layer of banana slices, then a generous layer of pudding (about 1/3 of the total). Repeat until all ingredients are used, finishing with a final pudding layer on top.
- Whip the cream — In a chilled bowl, combine the cold heavy cream, powdered sugar, and 1/2 teaspoon vanilla. Using a hand mixer or whisk, beat on medium-high speed until soft peaks form that hold their shape but are still luscious, about 2-3 minutes. Do not overbeat or the cream will turn grainy.
- Top and chill — Spread or pipe the whipped cream evenly over the top pudding layer. Cover the dish tightly with plastic wrap or a lid.
- Rest in the fridge — Refrigerate for at least 4 hours, but ideally overnight (12-24 hours). This resting time allows the wafers to absorb moisture and transform into a soft, cake-like consistency while the flavors meld together. Serve chilled.
Expert Tips for a Standout Magnolia Bakery Banana Pudding
- Stir constantly while cooking — The pudding can scorch quickly if left unattended. Use a figure-eight motion to reach every corner of the pot.
- Press plastic wrap directly onto the pudding — This is non-negotiable. A skin will form if air touches the surface, ruining the silky texture.
- Slice bananas just before layering — They brown quickly once cut. Wait until you are ready to assemble to keep them looking fresh.
- Use ripe but firm bananas — Overripe bananas turn mushy in the layers. Look for yellow with a few brown spots, still firm to the touch.
- Let it rest overnight — Four hours is the minimum, but 12-24 hours transforms the wafers into a tender, almost cake-like texture. The flavor deepens too.
- Keep the cream cold — Chill your bowl and beaters before whipping. Cold cream whips faster and holds peaks longer without turning into butter.
- Don’t overbeat the whipped cream — Stop at soft peaks (they droop slightly when you lift the beater). Overbeaten cream becomes grainy and separates.
Common Mistakes to Avoid
- Lumpy pudding — This happens when the dry ingredients aren’t fully whisked into the liquid before cooking. Whisk the slurry until completely smooth, then cook gently.
- Scorched bottom — Using high heat or walking away while stirring leads to burnt pudding. Keep the heat at medium and stir constantly.
- Watery pudding — Under-cooking the pudding will leave it too thin. Look for bubbling at the edges and a coating that leaves a clear trail on the spoon.
- Soggy bananas — Slicing too thin or using overripe bananas makes them disintegrate into mush. Stick to 1/4-inch slices and ripe-but-firm fruit.
- Grainy whipped cream — Overbeating is the culprit. Watch closely and stop as soon as soft peaks form. If you go too far, add a tablespoon of cold cream and gently fold.
- Skipping the chill time — This pudding needs at least 4 hours to set. Rushing it results in a loose, soupy texture. Plan ahead—overnight is best.
Variations & Ways to Customize Magnolia Bakery Banana Pudding
- Chocolate banana pudding — Add 2 tablespoons of unsweetened cocoa powder to the dry ingredients along with the sugar and flour. The chocolate pairs beautifully with the bananas.
- Peanut butter twist — Swirl 2 tablespoons of creamy peanut butter into the finished pudding before layering. Add a sprinkle of chopped peanuts on top.
- Dairy-free version — Substitute whole milk with oat milk, butter with vegan butter, and use chilled coconut cream for the topping. The texture will be less rich but still satisfying.
- Berry banana pudding — Add a layer of fresh strawberries or raspberries between the banana slices. The tartness cuts the sweetness nicely.
- Individual parfaits — Layer everything in small mason jars or clear cups for a portable, party-friendly presentation. Great for picnics.
- Spiced banana pudding — Add 1/2 teaspoon of cinnamon and a pinch of nutmeg to the dry ingredients. It gives a warm, cozy flavor perfect for fall.
What to Serve With Magnolia Bakery Banana Pudding
This dessert is rich and creamy, so pair it with something light or a contrasting flavor. Here are some ideas.
- Fresh fruit salad — A mix of berries, kiwi, and citrus cuts through the pudding’s sweetness and adds brightness.
- Shortbread cookies — The buttery crunch of shortbread complements the soft layers. Serve on the side for added texture.
- Iced coffee or cold brew — The bitterness of coffee balances the sweet, creamy pudding perfectly.
- Mint tea — A refreshing herbal tea cleanses the palate between rich bites.
- Whipped cream dollop — Extra whipped cream on top? Absolutely. It’s already there, but more never hurts.
- Caramel or chocolate sauce — Drizzle over individual servings for a decadent touch. Homemade caramel is ideal, but store-bought works too.
Make-Ahead Instructions
- Pudding base — Cook the pudding up to 2 days ahead, cool, cover with plastic wrap, and refrigerate. Assemble the layers when ready.
- Sliced bananas — Do not slice them in advance; they brown quickly. Cut them just before layering.
- Whipped cream — Whip the cream up to 4 hours ahead and store it in the fridge in a covered bowl. Give it a quick whisk before spreading if it deflates slightly.
- Fully assembled dessert — Assemble the entire pudding (with whipped cream on top) up to 24 hours ahead. Cover tightly and refrigerate. The wafers will be perfectly soft.
Storage and Reheating
Storage
- Covered in the refrigerator — Store leftovers in the original dish tightly wrapped with plastic wrap or a lid. It will keep for up to 3 days. The bananas may darken slightly, but the flavor stays good.
- Do not freeze — Freezing ruins the texture. Defrosting makes the pudding watery and the wafers mushy.
- Individual portions — If you made parfaits in cups, cover each with plastic wrap or a reusable lid for easy grab-and-go snacks.
Reheating
- Not recommended — This dessert is meant to be served cold. Reheating will melt the whipped cream and turn the wafers into a soggy mess. Enjoy it straight from the fridge.
- If you must warm it slightly — Let a portion sit at room temperature for 10-15 minutes before serving. That takes off the chill without cooking it.
Nutritional Breakdown (Per Serving)
Based on 1 serving = 1/4 of the recipe (one generous portion).
- Calories: 504
- Protein: 6g
- Fat: 23g
- Carbohydrates: 69g
- Fiber: 2g
- Sugar: about 45g
- Sodium: around 326mg
Frequently Asked Questions
Can I freeze Magnolia Bakery Banana Pudding?
No, I would avoid freezing. The pudding becomes watery upon defrosting, and the wafers turn into a mushy paste. It’s best enjoyed fresh from the fridge.
How long does Magnolia Bakery Banana Pudding last in the fridge?
Covered tightly, it stays good for up to 3 days. The bananas will darken a bit, but the flavor remains intact. After that, the texture starts to decline.
Can I use instant pudding mix instead of making it from scratch?
You can, but the texture and flavor will be noticeably different. The homemade pudding is richer, silkier, and less sweet than boxed mixes. If you’re short on time, use a good-quality vanilla pudding mix and follow the package directions.
What if I don’t have Nilla wafers?
Shortbread cookies or graham crackers can substitute, though the flavor and texture will change slightly. Ladyfingers also work, but they are more cake-like.
Why is my pudding lumpy?
Lumps usually come from not whisking the dry ingredients into the milk mixture thoroughly before cooking. Make sure the slurry is completely smooth before heating. If lumps appear, whisk vigorously or press through a fine-mesh sieve.
Final Words
This Magnolia Bakery Banana Pudding is one of those desserts that disappears fast at any gathering. The combination of silky homemade pudding, soft wafers, and fresh bananas is hard to beat. Give it a try for your next get-together — I promise you will get requests for the recipe.
More Recipes
PrintMagnolia Bakery Banana Pudding

A luscious, no-bake dessert featuring layers of creamy vanilla pudding, ripe bananas, and crisp Nilla wafers that soften into a cake-like texture when chilled. Topped with homemade whipped cream, this Southern classic delivers the perfect balance of sweet, silky, and crunchy elements in every spoonful.
- Prep Time: 25
- Cook Time: 10
- Total Time: 275
- Yield: 4 1x
- Category: Dessert
- Method: Stovetop
- Cuisine: American
Ingredients
- 1/2 cup granulated sugar
- 1/4 cup all-purpose flour
- 1/4 teaspoon kosher salt
- 1 cup whole milk
- 1 large egg
- 1 teaspoon pure vanilla extract
- 1 tablespoon unsalted butter, cut into pieces
- 2 medium ripe bananas, sliced into 1/4-inch rounds
- 1 cup (about 40) Nilla wafer cookies
- 1/2 cup heavy cream, cold
- 2 tablespoons powdered sugar
- 1/2 teaspoon pure vanilla extract (for whipped cream)
Instructions
- In a medium heavy-bottomed saucepan, whisk together the sugar, flour, and salt until thoroughly combined. This dry base ensures the pudding thickens evenly without lumps.
- In a separate small bowl, whisk the egg and whole milk until smooth and uniform. Tempering the egg mixture later prevents it from scrambling when added to the hot saucepan.
- Gradually pour the egg-milk mixture into the saucepan with the dry ingredients, whisking constantly to create a smooth slurry. Make sure no dry pockets remain at the bottom.
- Place the saucepan over medium heat and cook, stirring constantly with a wooden spoon or heatproof spatula. Use a figure-eight motion to scrape the bottom and corners to prevent scorching. Continue until the mixture thickens and begins to bubble at the edges, about 6-8 minutes. The pudding should coat the back of the spoon and leave a clear trail when you run your finger through it.
- Immediately remove the pan from heat. Add the vanilla extract and butter pieces, stirring until the butter melts fully and the pudding is glossy and smooth. The residual heat will incorporate the butter without affecting the texture.
- Transfer the pudding to a clean bowl and press a piece of plastic wrap directly onto the surface to prevent a skin from forming. Let it cool at room temperature for 20 minutes, then set aside. The pudding will continue to thicken as it cools.
- While the pudding cools, slice the bananas into uniform 1/4-inch rounds. Avoid slicing too thin or they will turn mushy; too thick and they won’t soften properly during chilling.
- Begin layering in a 1-quart serving dish or four individual 8-ounce cups. Start with a single layer of Nilla wafers (about 10 per layer), then a layer of banana slices, then a generous layer of pudding (about 1/3 of the total). Repeat until all ingredients are used, finishing with a final pudding layer on top.
- For the whipped cream: In a chilled bowl, combine the cold heavy cream, powdered sugar, and 1/2 teaspoon vanilla. Using a hand mixer or whisk, beat on medium-high speed until soft peaks form that hold their shape but are still luscious, about 2-3 minutes. Do not overbeat or the cream will turn grainy.
- Spread or pipe the whipped cream evenly over the top pudding layer. Cover the dish tightly with plastic wrap or a lid.
- Refrigerate for at least 4 hours, but ideally overnight (12-24 hours). This resting time allows the wafers to absorb moisture and transform into a soft, cake-like consistency while the flavors meld together. Serve chilled.
Notes
Store leftovers covered in the refrigerator for up to 3 days. The bananas will darken slightly but flavor remains good. Do not freeze; defrosted pudding becomes watery and wafers turn mushy. If preparing in advance, assemble the pudding and whipped cream separately, then top with cream just before serving to maintain the best texture. For a dairy-free version, substitute whole milk with oat milk, butter with vegan butter, and use coconut cream for topping, though the texture will be less rich.
Nutrition
- Calories: 504
- Sugar: 45g
- Sodium: 326mg
- Saturated Fat: 12g
- Carbohydrates: 69g
- Fiber: 2g
- Protein: 6g
- Cholesterol: 101mg
Keywords: banana pudding, Magnolia Bakery recipe, Southern dessert, no-bake pudding, vanilla pudding, Nilla wafers, layered banana dessert, classic American pudding, easy banana pudding, whipped cream dessert, comfort food, banana dessert