
 Kendric adan
 These Cream Cheese Mints are soft, creamy, and melt-in-your-mouth smooth, with a refreshing peppermint flavor and a gentle sweetness. They are a perfect no-bake treat for candy trays, bridal showers, or holiday gifts.
This recipe is beginner-friendly and takes about 75 minutes total, including at least one hour of drying time. The only tricky part is getting the dough consistency right — it should be stiff but pliable, similar to play-dough.
Why You’ll Love This Recipe
- No baking required — Just mix, roll, and let them set at room temperature.
- Minimal ingredients — You only need five items, most of which you might already have on hand.
- Incredibly versatile — Color them for any occasion, from pastel pink for baby showers to red and green for Christmas.
- Make-ahead friendly — They store well for weeks, making them perfect for preparing in advance.
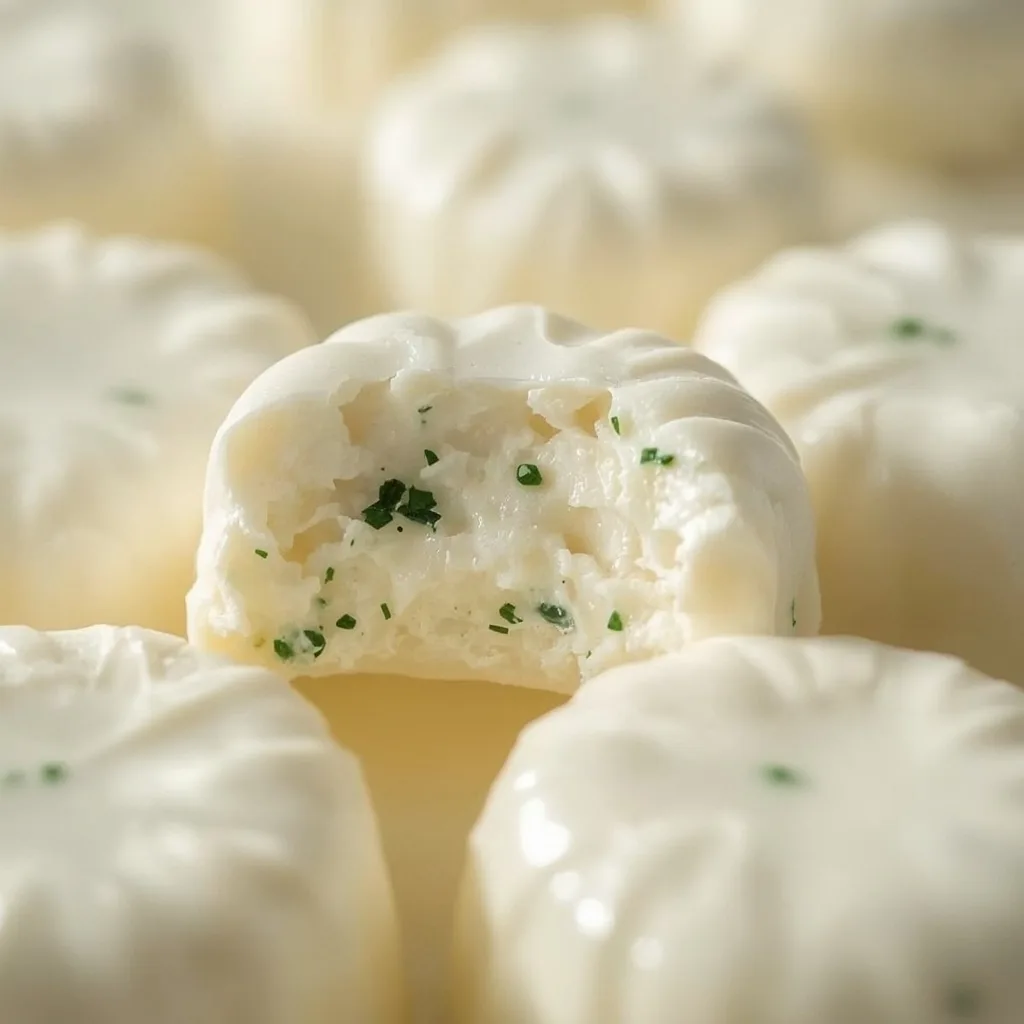
What Makes This Recipe Special
This recipe relies on a simple base of cream cheese and powdered sugar, giving these mints a uniquely creamy interior that melts on your tongue. The peppermint extract provides a clean, cool flavor that isn’t overly sweet, while the granulated sugar coating adds a subtle crunch. It is a classic American confection that has been a staple at weddings and parties for decades.
Ingredients You’ll Need
You likely have everything you need already. Here is exactly what to grab for this batch of Cream Cheese Mints.
The Base
- 4 oz (113g) full-fat cream cheese, softened to room temperature — This is the backbone of the recipe. Full-fat is essential for the creamy texture; do not use low-fat or whipped versions as they contain too much water.
- 3 cups (360g) powdered sugar, sifted, plus more for dusting — Sifting is crucial to avoid lumps. The powdered sugar sweetens and thickens the dough.
The Flavor & Color
- 1/2 teaspoon peppermint extract (not mint extract) — Peppermint extract gives the clean, classic mint flavor. Mint extract is a blend of different mints and can taste artificial.
- 2 drops red food coloring (optional, for pink mints; or any color of choice) — This is purely for appearance. Omit it for white mints or use any gel color you like.
The Coating
- 1 tablespoon granulated sugar, for coating — This gives the mints a sparkly, slightly crunchy exterior that contrasts with the soft interior.
Equipment Needed
Here are the tools that make the process smooth and easy.
- Hand mixer or stand mixer with paddle attachment — A hand mixer works perfectly, but a stand mixer makes the dough even easier. You can mix by hand with a wooden spoon, but it takes more elbow grease.
- Medium mixing bowl — Any bowl will do, but a wide, shallow bowl makes it easier to scrape down the sides.
- Baking sheet lined with parchment paper or wax paper — This provides a non-stick surface for the mints to set on.
- Small shallow bowl — For holding the granulated sugar for coating the dough balls.
- Fork or the bottom of a glass — Used to create the classic pressed pattern on top of each mint.
Instructions to Prepare Cream Cheese Mints
Follow these steps carefully to get the perfect texture and flavor. Work at a steady pace so the dough does not dry out.
- Beat the cream cheese — Place the softened 4 oz cream cheese in a medium mixing bowl. Beat with a hand mixer on medium speed for 1 minute until it is perfectly smooth. No lumps should remain; if they do, scrape down the bowl and beat another 30 seconds.
- Add the sugar gradually — Add 1 cup of the sifted powdered sugar and mix on low speed until just combined. This prevents a sugar cloud. Then add the remaining 2 cups, one cup at a time, mixing on low after each addition. The dough will be stiff and slightly sticky, similar to play-dough.
- Mix in flavor and color — Add the 1/2 teaspoon peppermint extract and the 2 drops of food coloring (if using). Beat on low speed until the color is evenly distributed with no streaks. If the dough seems too wet or sticky, add an additional 1 tablespoon of sifted powdered sugar and mix.
- Knead and shape the dough — Dust your work surface lightly with about 1 tablespoon of powdered sugar. Turn the dough out onto the surface. Gently knead it 2-3 times to bring it together, then shape it into a disc about 1 inch thick. The dough should feel smooth, pliable, and not sticky to the touch.
- Roll and coat each mint — Line a baking sheet with parchment paper or wax paper. In a small shallow bowl, place the 1 tablespoon of granulated sugar. Take a heaping 1/2 teaspoon of dough and roll it between your palms into a smooth ball, about 1 inch in diameter. Roll it in the granulated sugar to coat evenly, then place it on the prepared baking sheet.
- Work quickly through the batch — Repeat the rolling and coating for the remaining dough, working quickly to prevent the dough from drying out. If the dough becomes too firm to roll, microwave it for 5-7 seconds to soften slightly, then continue. You should get about 48 to 60 mints total, depending on size.
- Create the classic pattern — Once all mints are rolled and sugared, press each one gently with the tines of a fork to create a classic mint pattern. Alternatively, press with the bottom of a floured glass for a smooth top. This step also flattens the mints slightly, helping them set evenly.
- Let them set — Let the mints dry and set at room temperature, uncovered, for at least 1 hour. They should feel firm on the outside but still creamy inside. For best results, let them sit for 4-8 hours (or overnight) to develop a firmer texture and deeper flavor.
- Store properly — After setting, transfer the mints to an airtight container, separating layers with wax paper. They will keep at room temperature for up to 2 weeks, in the refrigerator for 1 month, or in the freezer for up to 3 months. If frozen, thaw at room temperature for 1 hour before serving.
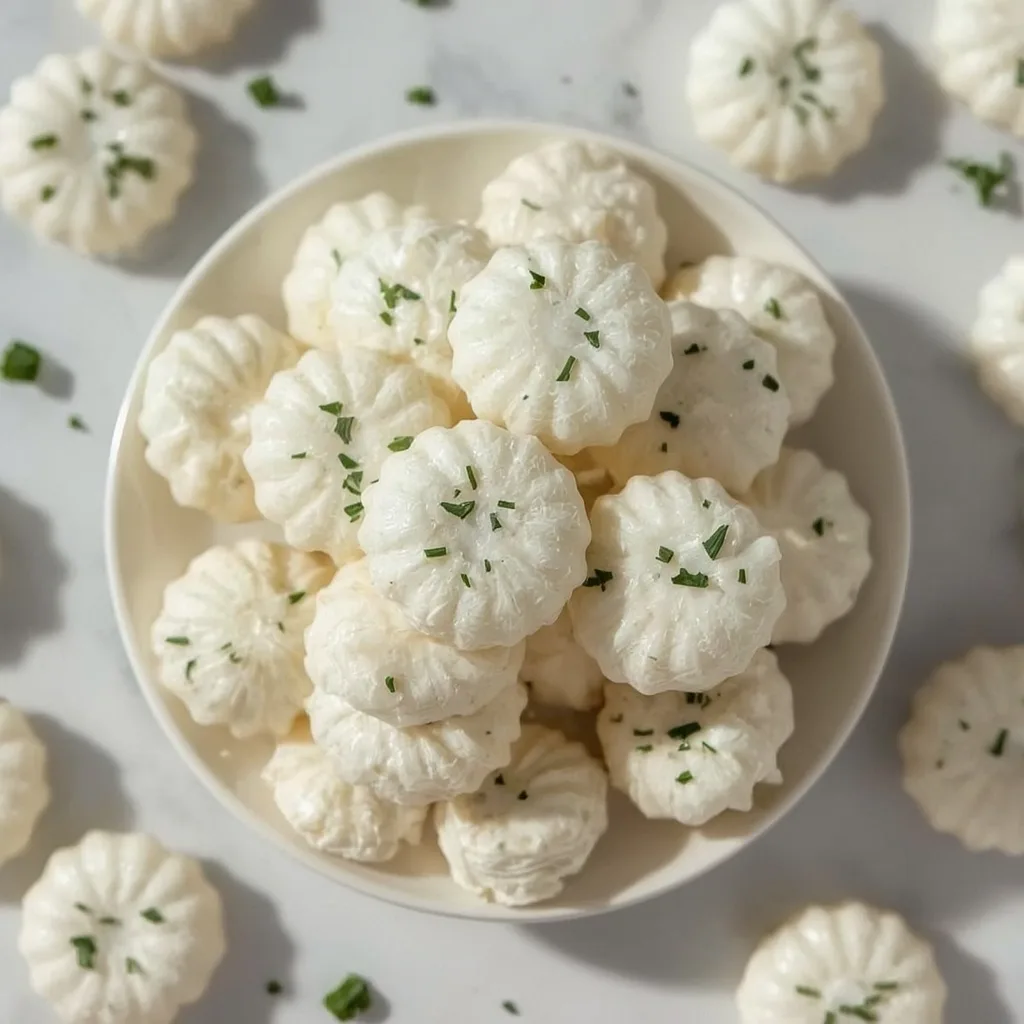
Expert Tips for a Standout Cream Cheese Mints
Here is what tripped me up the first few times I made these. A few small adjustments make a big difference.
- Soften the cream cheese fully — Room temperature cream cheese blends smoothly and prevents lumps. Leave it out on the counter for about 30 minutes. If it is too cold, the dough will be lumpy and hard to roll.
- Sift the powdered sugar — This is non-negotiable. Unsifted sugar will create small, hard lumps that ruin the smooth texture. I use a fine-mesh strainer over the bowl.
- Use peppermint extract, not mint extract — Peppermint extract delivers a clean, cool flavor. Mint extract is a blend and can taste soapy or artificial. Stick to the labeled ingredient.
- Adjust wetness as you go — Humidity affects the dough. If it feels sticky after adding all the sugar, add another tablespoon of sifted powdered sugar. If it seems dry and crumbly, add a drop of water or milk.
- Work in batches if the dough firms up — The dough dries out fast when exposed to air. Cover the bowl with a damp paper towel while you roll individual mints. If it stiffens, a quick 5-7 seconds in the microwave softens it right up.
- Press the pattern gently — A fork or glass bottom should mark the mint, not squish it flat. Aim for a gentle, even pressure that leaves an imprint about 1/4 inch deep.
- Let them set overnight for best texture — One hour gives you a soft mint. Overnight (8-12 hours) yields a slightly firmer exterior with a creamy center and a more developed peppermint flavor.
Common Mistakes to Avoid
Even experienced bakers can run into these issues. Here is how to spot and fix them.
- Using cold cream cheese — Cold cream cheese will not beat smoothly, leaving lumps in the dough. Let it sit at room temperature for 30 minutes until it is soft to the touch.
- Skipping the sifting step — Unsifted powdered sugar creates tiny lumps that are impossible to remove later. Always sift it directly into the bowl.
- Over-mixing after adding sugar — Mixing too long after the sugar is incorporated can make the dough tough and greasy. Mix just until combined and stop.
- Making the dough too dry — If the dough cracks when you roll it, it is too dry. Add a drop of water or milk and knead gently until it comes together.
- Rolling the balls too large — A heaping 1/2 teaspoon is the right size. Bigger mints will not set properly and may feel gooey inside. Use a small cookie scoop for consistency.
- Storing in a humid environment — Humidity makes the sugar coating sticky. If your mints become tacky, re-roll them in fresh granulated sugar right before serving.
Variations & Ways to Customize Cream Cheese Mints
This base recipe is a blank canvas. Here are some of my favorite ways to change it up.
- Peppermint Swirl Mints — Divide the dough in half. Leave one half white and tint the other half red or green. Roll the two colors together into a ball before coating in sugar. The swirl appears as you flatten each mint.
- Chocolate Mint Mints — Swap the peppermint extract for 1/2 teaspoon of mint extract and add 2 tablespoons of unsweetened cocoa powder with the sugar. You get a chocolate-mint flavor that tastes like a thin mint cookie.
- Lemon Cream Cheese Mints — Replace the peppermint extract with 1/2 teaspoon of lemon extract and use yellow food coloring. These are bright, tangy, and perfect for spring celebrations.
- Almond Cream Cheese Mints — Use 1/2 teaspoon of almond extract instead of peppermint. The nutty, floral flavor pairs beautifully with the cream cheese. Skip the food coloring or use a pale pink.
- Holiday Spice Mints — Add 1/4 teaspoon of ground cinnamon and 1/4 teaspoon of ground ginger along with the sugar. Use orange or red food coloring for a festive look. These taste like gingerbread meets a mint.
- Vegan Cream Cheese Mints — Use a vegan cream cheese block (like Tofutti or Violife) and ensure your powdered sugar is vegan (most are). The texture will be slightly softer, so refrigerate the mints for 2 hours after shaping to help them set.
What to Serve With Cream Cheese Mints
These mints are often the star of a candy table, but they pair nicely with other treats too. Here is what I like to serve alongside them.
- Hot coffee or espresso — The strong, bitter notes of coffee balance the sweetness of the mints. A small espresso alongside two or three mints makes a lovely after-dinner moment.
- Chocolate-dipped strawberries — The freshness of the strawberries and the richness of chocolate create a beautiful contrast with the cool mint flavor. They are a classic pairing at bridal showers.
- Mini cheesecakes — Both have cream cheese in common, but the dense, tangy cheesecake complements the light, sweet mints. Serve them side by side on a dessert platter.
- Herbal tea, particularly peppermint or chamomile — A warm cup of peppermint tea doubles down on the mint flavor, while chamomile provides a gentle floral note that does not compete.
- Shortbread cookies — The buttery, crumbly texture of shortbread is a nice contrast to the creamy, soft mints. They also look pretty together on a plate.
- Sparkling water with a twist of lime — For a non-alcoholic option, the bubbles and citrus cut through the sweetness. It is refreshing and keeps the palate clean between bites.
Make-Ahead Instructions
One of the best things about this recipe is how well it works in advance. Here is how to plan ahead.
- Make the dough up to 3 days ahead — Prepare the dough, shape it into a disc, and wrap it tightly in plastic wrap. Keep it in the refrigerator. Let it sit at room temperature for 15-20 minutes before rolling and shaping.
- Roll and shape the mints a week ahead — Once the mints are shaped, pressed, and set (after the 1-hour drying time), place them on a baking sheet in the freezer for 30 minutes. Then transfer to an airtight container with wax paper layers. They will keep in the refrigerator for up to 1 month.
- Freeze for up to 3 months — Follow the same process as above but store them in the freezer. Freeze them on a baking sheet first to prevent sticking, then transfer to a freezer-safe container. Thaw at room temperature for 1 hour before serving.
- Prepare the sugar coating fresh — If you make the mints ahead, the sugar coating can absorb moisture over time. Right before serving, re-roll the mints in fresh granulated sugar to restore their sparkly appearance and crunchy texture.
Storage and Reheating
These mints do not need reheating, but proper storage is key to keeping them fresh. Here is everything you need to know.
Storage
- Room temperature — Store in an airtight container with wax paper separating the layers. They will stay fresh for up to 2 weeks. Avoid high humidity, which can make the coating sticky.
- Refrigerator — Place in an airtight container with wax paper layers. They will keep for up to 1 month. Bring to room temperature for 15 minutes before serving for the best texture.
- Freezer — Freeze in a single layer on a baking sheet for 30 minutes, then transfer to a freezer-safe container with wax paper layers. They will keep for up to 3 months. Thaw at room temperature for 1 hour before serving.
- If the coating becomes tacky — Simply re-roll the mints in fresh granulated sugar right before serving. This restores the sparkly appearance and crunchy exterior.
Reheating
These mints are meant to be served at room temperature and do not require reheating. If you store them in the refrigerator or freezer, just pull them out and let them come to room temperature. For frozen mints, let them sit at room temperature for about 1 hour. Do not microwave them, as this will melt the cream cheese base and ruin the texture. If you prefer them slightly cool, serve them straight from the refrigerator after a 10-minute rest on the counter.
Nutritional Breakdown (Per Serving)
Based on one serving (about 12 mints, which is 1/4 of the full recipe).
- Calories: 287
- Protein: 2g
- Fat: 8g
- Saturated Fat: close to 5g
- Carbohydrates: 52g
- Fiber: 0g
- Sugar: about 48g
- Sodium: 60mg
- Cholesterol: roughly 25mg
Frequently Asked Questions
Can I freeze Cream Cheese Mints?
Yes, absolutely. Freeze them in a single layer on a baking sheet for 30 minutes, then transfer to a freezer-safe container with wax paper layers. They will keep for up to 3 months. Thaw at room temperature for 1 hour before serving.
How long does Cream Cheese Mints last in the fridge?
They will last up to 1 month in the refrigerator when stored in an airtight container with wax paper between layers. Bring them to room temperature for 15 minutes before serving for the best creamy texture.
Why are my mints sticky?
Stickiness usually comes from high humidity or not letting them set long enough. Let them dry uncovered at room temperature for at least 4-8 hours (overnight is better). If they are still sticky, re-roll them in fresh granulated sugar before serving.
Can I use mint extract instead of peppermint extract?
I do not recommend it. Peppermint extract is made from peppermint oil and has a clean, sharp flavor. Mint extract is a blend of different mints and often contains spearmint, which can taste artificial or soapy in this recipe.
How do I get the dough to the right consistency?
The dough should feel like soft play-dough — smooth, pliable, and not sticky. If it is too sticky, add sifted powdered sugar 1 tablespoon at a time. If it is too dry and crumbly, add a drop of water or milk and knead gently. The dough firms up as it rests, so work quickly.
Can I make these without a mixer?
Yes, you can. Beat the cream cheese with a wooden spoon until smooth, then sift in the powdered sugar gradually. It takes more effort, but it works. The texture will be slightly less smooth, but still delicious.
Final Words
These Cream Cheese Mints are one of the easiest and most rewarding recipes I know. They require almost no active time, use simple ingredients, and produce a beautiful, professional-looking candy. I hope you give them a try for your next celebration or gift-giving occasion.
More Recipes
- Texas Roadhouse Chicken Fried Sirloin
- Longhorn Steakhouse Mac and Cheese
- Chilis Southwest Egg Rolls
- Wingstop Cajun Wings
- Chick-fil-A Spicy Chicken Sandwich
Cream Cheese Mints

These Cream Cheese Mints are soft, creamy, and melt-in-your-mouth smooth, with a refreshing mint flavor and a hint of sweetness. Perfect for candy trays, bridal showers, or holiday gifts, they require no baking and come together in minutes with just a few ingredients.
- Prep Time: 15
- Total Time: 75
- Yield: 4 1x
- Category: Dessert
- Method: No-Cook
- Cuisine: American
Ingredients
- 4 oz (113g) full-fat cream cheese, softened to room temperature
- 3 cups (360g) powdered sugar, sifted, plus more for dusting
- 1/2 teaspoon peppermint extract (not mint extract, for a clean, cool flavor)
- 2 drops red food coloring (optional, for pink mints; or any color of choice)
- 1 tablespoon granulated sugar, for coating
Instructions
- Place the softened 4 oz cream cheese in a medium mixing bowl. Using a hand mixer or stand mixer with paddle attachment, beat on medium speed for 1 minute until smooth and free of lumps. No lumps should remain; if they do, scrape down the bowl and beat another 30 seconds.
- Add 1 cup of the sifted powdered sugar to the cream cheese, and mix on low speed until just combined. This prevents a sugar cloud. Then add the remaining 2 cups of powdered sugar, one cup at a time, mixing on low after each addition until incorporated. The dough will be stiff and slightly sticky, similar to play-dough.
- Add the 1/2 teaspoon peppermint extract and the 2 drops of food coloring (if using) to the mixture. Beat on low speed until the color is evenly distributed throughout the dough. The color should be uniform with no streaks. If the dough seems too wet or sticky, add an additional 1 tablespoon of sifted powdered sugar and mix.
- Dust your work surface lightly with about 1 tablespoon of powdered sugar. Turn the dough out onto the surface. Gently knead the dough 2-3 times to bring it together, then shape it into a disc about 1 inch thick. The dough should feel smooth, pliable, and not sticky to the touch.
- Line a baking sheet with parchment paper or wax paper. In a small shallow bowl, place the 1 tablespoon of granulated sugar for coating. Take a heaping 1/2 teaspoon of dough and roll it between your palms into a smooth ball, about 1 inch in diameter. Place the ball in the granulated sugar, roll to coat evenly, then place on the prepared baking sheet.
- Repeat step 5 for the remaining dough, working quickly to prevent the dough from drying out. If the dough becomes too firm to roll, microwave it for 5-7 seconds to soften slightly, then continue. You should get about 48 to 60 mints total, depending on size.
- Once all mints are rolled and sugared, press each one gently with the tines of a fork to create a classic mint pattern. Alternatively, press with the bottom of a floured glass for a smooth top. This step also flattens the mints slightly, helping them set evenly.
- Let the mints dry and set at room temperature, uncovered, for at least 1 hour. They should feel firm on the outside but still creamy inside. For best results, let them sit for 4-8 hours (or overnight) to develop a firmer texture and deeper flavor.
- After setting, transfer the mints to an airtight container, separating layers with wax paper. They will keep at room temperature for up to 2 weeks, in the refrigerator for 1 month, or in the freezer for up to 3 months. If frozen, thaw at room temperature for 1 hour before serving.
Notes
Storage: Store in an airtight container at room temperature for up to 2 weeks, or refrigerate for up to 1 month. For longer storage, freeze for up to 3 months—thaw at room temperature for 1 hour before serving. No reheating required. Avoid high humidity, which can make mints sticky; if coating becomes tacky, re-roll in granulated sugar before serving.
Nutrition
- Calories: 287
- Sugar: 48g
- Sodium: 60mg
- Saturated Fat: 5g
- Carbohydrates: 52g
- Fiber: 0g
- Protein: 2g
- Cholesterol: 26mg
Keywords: cream cheese mints, no bake mints, peppermint candy, holiday candy, easy mint recipe, cream cheese candy, pastel mints, bridal shower mints