 Kendric adan
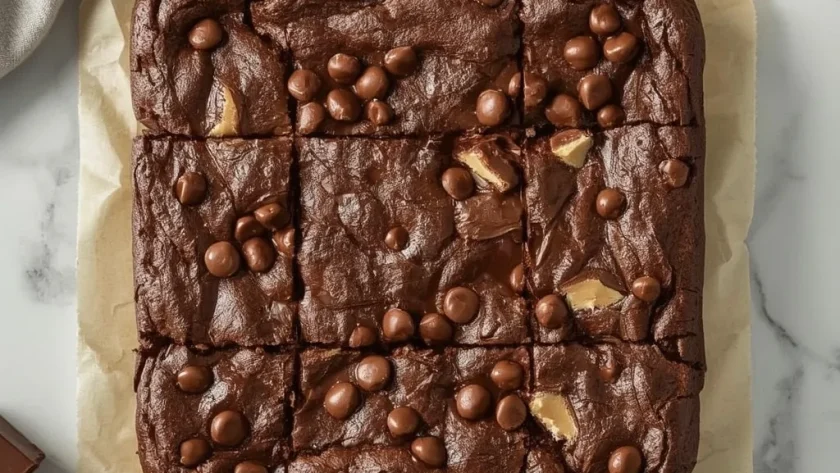
 Milky Way Brownies are the kind of dessert that disappears faster than you can explain what is inside them. A deeply fudgy cocoa base packs chewy chunks of caramel and nougat into every single bite, creating pockets of gooey sweetness that make plain brownies feel boring afterward.
From start to finish, you are looking at about 50 minutes of active work plus cooling time, and the difficulty lands firmly at beginner level. The only step that needs a little patience is judging doneness — the center should look slightly underbaked when the edges are set, which is exactly what gives these their dense, fudgy texture.
Why You’ll Love This Recipe
- Fudgy, not cakey — The high butter-to-flour ratio keeps the crumb dense and moist, so every square feels rich without being dry.
- Gooey candy pockets — Chopped Milky Way pieces melt into caramel and nougat clusters that stay soft and sticky even after the brownies cool completely.
- Simple pantry staples — You need just eight ingredients, and most of them are probably already sitting in your kitchen right now.
- Crackly shiny top — Whisking the eggs and sugar vigorously creates that signature glossy crust that brownie lovers look for first.
What Makes This Recipe Special
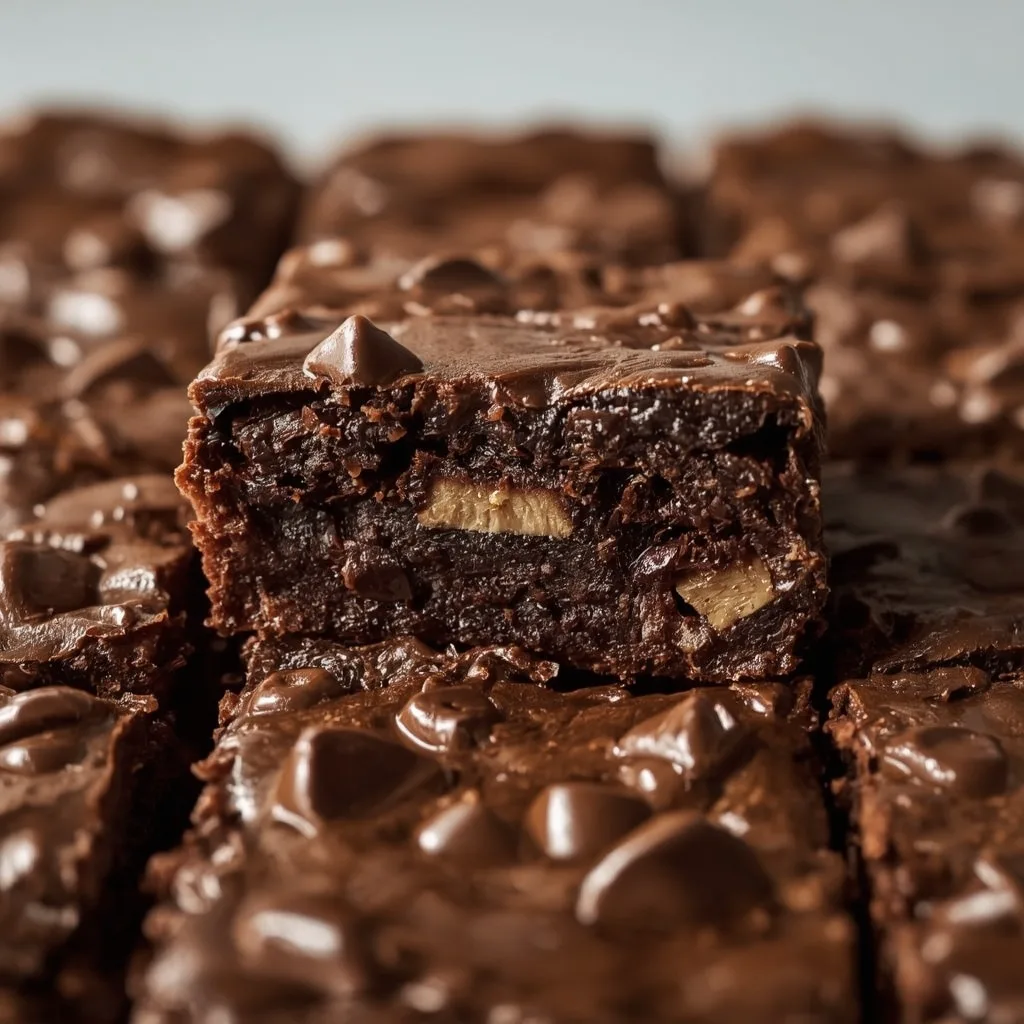
The melted butter and cocoa powder base gives these brownies a deep, almost fudgy chocolate flavor that pairs beautifully with the sweet caramel from the candy bars. When you bite into a warm square, you get a crisp top layer, a dense center, and those sticky nougat bits that stretch as you pull the piece apart. This is a straightforward American dessert that works for birthdays, holiday cookie trays, or just a Tuesday night treat when you need something chocolatey.
Ingredients You’ll Need
Everything on this list does a specific job, and none of it is complicated to find. Here is what goes into the batter, plus what each ingredient brings to the finished texture.
Core Brownie Base
- 1/2 cup (1 stick / 113g) unsalted butter — Melted and slightly cooled, this provides the moisture that makes the crumb fudgy rather than cakey. Use real butter here, not margarine, for the best flavor.
- 1 cup (200g) granulated sugar — This does more than sweeten; it helps create that crackly top when whisked vigorously with the eggs. Regular white sugar works perfectly.
- 2 large eggs, at room temperature — Room-temperature eggs emulsify into the butter more smoothly, which gives the batter that glossy, thickened texture you want before baking.
- 1 teaspoon vanilla extract — A small amount that rounds out the chocolate flavor and keeps the brownies from tasting flat one-dimensional.
Dry Ingredients
- 1/3 cup (40g) unsweetened cocoa powder, sifted — Sifting removes lumps so the cocoa distributes evenly through the batter without streaks. Dutch-process or natural both work here.
- 1/2 cup (65g) all-purpose flour — Just enough structure to hold the brownies together while keeping them dense. Do not swap in bread flour or whole wheat.
- 1/4 teaspoon kosher salt — This balances the sweetness and makes the chocolate taste deeper. If you only have fine table salt, use half the amount.
The Star Ingredient
- 4 fun-size Milky Way bars (about 1.7 oz / 48g total), chopped into 1/2-inch pieces — These provide the caramel and nougat pockets that make this recipe unique. Chop them into even pieces so they distribute throughout the batter rather than sinking to the bottom in one spot.
Equipment Needed
You probably own most of this already, but here is what makes the process smoother.
- 8×8-inch metal baking pan — A metal pan conducts heat more evenly than glass, which helps the brownies bake through without burning the edges. Glass will work in a pinch but may need a few extra minutes.
- Parchment paper with overhang — This is your best friend for lifting the entire block of brownies out cleanly. Leave two opposite sides long enough to grab.
- Large microwave-safe bowl — You will melt the butter in this same bowl, so make sure it has room for all the other ingredients too.
- Rubber spatula — The only tool you should use for folding the dry ingredients and candy pieces in. A whisk here can overmix the batter and make the brownies tough.
- Offset spatula — Spreads the thick batter into an even layer across the pan, though a regular spatula or the back of a spoon works fine as a backup.
Instructions to Prepare Milky Way Brownies
The method follows a classic one-bowl brownie approach, but a few steps deserve extra attention so you do not end up with tough or dry squares.
- Preheat and Prep — Preheat your oven to 350°F (177°C). Line an 8×8-inch metal baking pan with parchment paper, leaving overhang on two opposite sides for easy lifting. This ensures the brownies release cleanly after baking.
- Melt the Butter — In a large microwave-safe bowl, melt the butter in 20-second bursts until fully melted. Let it cool slightly for about 2 minutes, so it is warm but not hot — this prevents the eggs from cooking when added.
- Whisk in Sugar — Whisk the granulated sugar into the melted butter until fully combined. The mixture should look smooth and slightly grainy but well incorporated.
- Add Eggs One at a Time — Add the eggs one at a time, whisking vigorously after each addition until the mixture becomes glossy and slightly thickened. This creates the shiny, crackly top that defines a perfect brownie.
- Stir in Vanilla — Stir in the vanilla extract until evenly distributed.
- Fold Dry Ingredients — Sprinkle the sifted cocoa powder, all-purpose flour, and kosher salt over the wet mixture. Use a rubber spatula to fold gently until just combined — do not overmix, as this can develop gluten and make the brownies tough instead of fudgy.
- Add the Candy — Gently fold in the chopped Milky Way pieces, reserving about 2 tablespoons for the top. The candy adds pockets of caramel and nougat that become gooey during baking.
- Spread and Top — Pour the batter into the prepared pan and spread it into an even layer with an offset spatula. Sprinkle the reserved Milky Way pieces over the top, pressing them in lightly so they do not burn.
- Bake and Check — Bake at 350°F (177°C) for 28–30 minutes, until the edges are set and the center is just slightly jiggly when the pan is gently shaken. A toothpick inserted into the center should come out with a few moist crumbs, not wet batter — this indicates the brownies are fudgy, not underbaked.
- Cool Completely — Cool the brownies completely in the pan on a wire rack, about 1 full hour. This resting time lets the chocolate set and the caramel cool and stabilize, making them easier to slice cleanly.
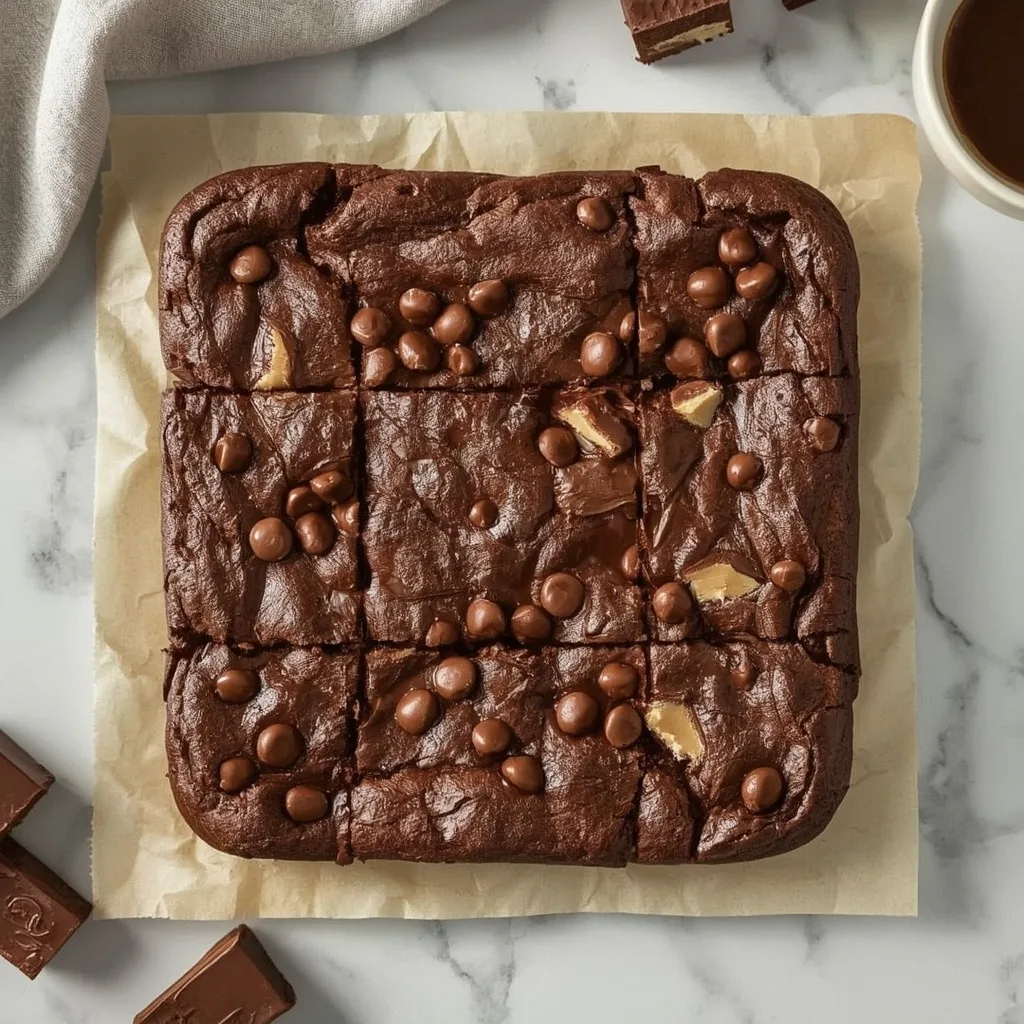
- Slice and Serve — Once cooled, lift the brownies out using the parchment overhang and place on a cutting board. Use a sharp knife to cut into 4 equal squares, wiping the knife between cuts for neat edges. Serve at room temperature.
Expert Tips for a Standout Milky Way Brownies
These are the small details that separate a good brownie from one people ask about later. A few of them took me a couple of batches to figure out.
- Cool the melted butter — Wait those 2 minutes after microwaving. If the butter is still hot, it can scramble the eggs the moment they hit the bowl, leaving you with tiny cooked bits in the batter.
- Chop the candy evenly — Aim for 1/2-inch pieces rather than tiny crumbs. Bigger chunks create distinct caramel pockets instead of dissolving into the batter and disappearing.
- Whisk eggs and sugar longer than feels necessary — The glossy, thickened stage happens right around the 1-minute mark of vigorous whisking. This aeration is what forms the crackly crust on top.
- Reserve some candy for the surface — Those 2 tablespoons you hold back give the top visible caramel pieces that get slightly crispy on the edges while the centers stay chewy.
- Trust the toothpick with moist crumbs — If the toothpick comes out completely clean, the brownies are likely overbaked and dry. A few moist crumbs clinging to it means the center is set but still fudgy.
- Wipe the knife between cuts — The caramel from the candy sticks to the blade and drags through the next slice. A quick wipe keeps your edges clean and your squares presentable.
Common Mistakes to Avoid
Even experienced bakers hit some of these pitfalls now and then. Here is what goes wrong and how to steer around it.
- Overmixing the batter — Folding too vigorously develops gluten, which turns these fudgy brownies into dense, rubbery blocks. Stop mixing the moment you no longer see dry flour streaks.
- Using cold eggs — Cold eggs seize the melted butter into clumps, making the batter grainy instead of smooth. Set them out 30 minutes before you start, or warm them in a bowl of lukewarm water.
- Baking until a clean toothpick — That clean toothpick means the center is fully cooked through, which translates to a dry crumb. Pull them at the moist-crumb stage and trust the residual heat to finish the job.
- Skipping the parchment overhang — Without it, you will be digging brownies out of the pan with a spatula and breaking the corners. Two long strips of parchment make removal effortless.
- Cutting while still warm — Warm brownies smush and the caramel smears everywhere. That full hour of cooling is not optional; it is what gives you clean, sharp edges.
- Chopping the candy into dust — Tiny candy pieces melt completely into the batter and leave no visible pockets. Keep them at 1/2-inch or slightly larger for that satisfying stretchy bite.
Variations & Ways to Customize Milky Way Brownies
This base recipe is forgiving enough to play with, so do not be afraid to tweak it around. Here are some ideas that work well with the existing batter.
- Swap in different candy bars — Snickers adds peanuts for crunch, while Twix brings a shortbread layer that stays slightly crisp. Any chocolate-caramel bar works with the same chopping method.
- Add a sprinkle of flaky sea salt — A pinch of Maldon salt on top right before baking cuts through the sweetness and makes the chocolate taste richer.
- Fold in chopped nuts — Toasted pecans or walnuts add crunch that contrasts nicely with the gooey caramel pockets. Add about 1/4 cup with the candy pieces.
- Use dark chocolate Milky Way instead — The dark chocolate version brings a less sweet caramel note that pairs well if you prefer desserts on the less sugary side.
- Top with a drizzle of melted chocolate — After cooling, drizzle some melted dark chocolate over the top for a bakery-style finish that also helps hide any uneven cutting.
What to Serve With Milky Way Brownies
These brownies hold their own on a plate, but the right pairing can turn them into a full dessert experience.
- Vanilla bean ice cream — The cold, creamy vanilla cuts through the dense chocolate and caramel, giving you that classic warm-brownie-cold-ice-cream contrast if you warm them slightly.
- Cold milk — A tall glass of whole milk is the simplest pairing, and it is the one that makes the chocolate taste more balanced and less heavy.
- Shot of espresso — The bitterness of a freshly pulled shot offsets the sweetness and highlights the cocoa notes in the brownie.
- Fresh strawberries — Bright, tart berries break up the richness and add a little color to the plate. Slice them thin so they fan out nicely.
- Salted caramel sauce — A drizzle of warm caramel sauce on top amplifies the candy flavor without overpowering the nougat pieces already inside.
- Whipped cream — A light dollop of unsweetened whipped cream adds airiness that contrasts with the dense texture of the brownie itself.
Make-Ahead Instructions
You can get a jump on this recipe without sacrificing texture. Here is how to plan ahead.
- Prep the pan in advance — Line your baking pan with parchment the night before and store it covered. That saves you a few minutes of prep when you are ready to bake.
- Chop the candy ahead — Cut the Milky Way bars into pieces and keep them in an airtight container in the fridge for up to 2 days. They will not stick together if chopped and stored properly.
- Bake and freeze the whole pan — Cool the brownies completely, wrap the entire pan tightly in plastic wrap and foil, and freeze for up to 3 months. Thaw overnight in the fridge before slicing.
- Make the batter a day early — You can mix the batter and refrigerate it in the pan for up to 24 hours. Bake straight from the fridge, adding 3–4 minutes to the total baking time.
Storage and Reheating
Leftovers are rarely a problem, but if you do have some, here is how to keep them tasting fresh.
Storage
- Room temperature — Store leftover brownies in an airtight container at room temperature for up to 3 days. Keep them away from direct sunlight or heat sources that could melt the caramel.
- Refrigerator — For longer storage, refrigerate for up to 5 days. The colder temperature firms up the caramel, so let the brownies come to room temperature before serving for the best texture.
- Freezer — Wrap individual brownies tightly in plastic wrap, then place them in a freezer bag or airtight container for up to 3 months. Double-wrapping prevents freezer burn and odor absorption.
Reheating
- Microwave — Reheat a frozen brownie in a microwave on 50% power for 15–20 seconds, or 10 seconds for a room-temperature one. This warms the caramel back to gooey without overcooking the chocolate.
- Oven — For a larger batch, warm them in a 300°F oven for 5–7 minutes until just heated through. Watch carefully, as the caramel can bubble and burn if left too long.
- Air fryer — Place brownies in an air fryer at 320°F for 2–3 minutes. This reheats the edges slightly crisp while keeping the center soft and fudgy.
Nutritional Breakdown (Per Serving)
Based on 1 serving = 1 square out of the 4 total servings this recipe makes.
- Calories — 452
- Protein — 6g
- Fat — 24g
- Carbohydrates — 50g
- Fiber — about 2g
- Sugar — 35g
- Sodium — around 170mg
Frequently Asked Questions
Can I freeze Milky Way Brownies?
Yes, they freeze beautifully for up to 3 months. Wrap each square individually in plastic wrap and place them in a freezer bag to keep them airtight.
How long does Milky Way Brownies last in the fridge?
They stay fresh in an airtight container in the refrigerator for up to 5 days. Let them sit at room temperature for about 15 minutes before serving so the caramel softens again.
Why did my brownies turn out cakey instead of fudgy?
The most likely culprit is overmixing the batter after adding the flour, which develops gluten and creates a lighter, cake-like structure. Another possibility is baking them too long — pull them when the toothpick shows moist crumbs.
Can I use full-size Milky Way bars instead of fun-size?
Yes, just weigh out about 1.7 ounces total. That is roughly 1.5 full-size bars, depending on the brand and size, and you will chop them the same way.
Do I really need to cool the brownies for a full hour?
Yes, the full hour is important. The caramel needs time to set and stabilize; cutting too early causes the bars to smush and the caramel to run out of the squares.
Can I double this Milky Way Brownies recipe?
You can, but use a 9×13-inch pan instead of two 8×8 pans and add about 5–7 minutes to the baking time. Check for doneness with the same toothpick test.
Final Words
These Milky Way Brownies are exactly what you want when a plain chocolate brownie just is not enough. The fudgy base, the gooey caramel pockets, and that crackly top come together in one bowl with minimal fuss.
Give them a try the next time you need a dessert that feels special without requiring a pastry degree. I think you will find yourself making them again before the first batch is even gone.
PrintTwix Bar Recipe
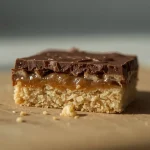
A homemade Twix bar with a buttery shortbread crust, a thick layer of chewy caramel, and a smooth milk chocolate coating. The contrast of crumbly, gooey, and snappy textures makes this an irresistible treat.
- Prep Time: 30
- Cook Time: 25
- Total Time: 55
- Yield: 4 1x
- Category: Dessert
- Method: Baking
- Cuisine: American
Ingredients
- 1/2 cup unsalted butter, softened (1 stick)
- 1/4 cup powdered sugar
- 1/4 teaspoon fine sea salt
- 1 cup all-purpose flour
- 1/4 cup heavy cream
- 1/2 cup light corn syrup
- 1/2 cup granulated sugar
- 2 tablespoons unsalted butter
- 1/2 teaspoon vanilla extract
- 1/2 teaspoon fine sea salt
- 1 cup milk chocolate chips (about 6 oz)
Instructions
- Preheat the oven to 350°F (177°C). Line an 8×8-inch baking pan with parchment paper, leaving overhang on two sides for easy removal. The parchment prevents sticking and makes lifting the bars out a breeze.
- In a medium bowl, beat 1/2 cup softened butter, powdered sugar, and 1/4 teaspoon salt with an electric mixer until light and fluffy, about 2 minutes. Scrape down the sides to ensure even mixing.
- Add the flour and mix on low until the dough just comes together. It will look crumbly but should press together when pinched.
- Press the dough evenly into the bottom of the prepared pan. Use your fingers or the bottom of a measuring cup to create a uniform, compact layer. Prick the dough with a fork all over to prevent bubbling.
- Bake the shortbread for 18-20 minutes, until the edges are just golden and the surface looks dry. Remove from the oven and let cool completely in the pan on a wire rack, about 20 minutes. Cooling prevents the caramel from melting the crust.
- In a small saucepan, combine heavy cream, corn syrup, granulated sugar, and 2 tablespoons butter. Stir over medium heat until the butter melts and the sugar dissolves, about 3 minutes.
- Clip a candy thermometer to the pan and continue cooking, without stirring, until the mixture reaches 240°F (115°C), soft-ball stage. This will take about 8-10 minutes. Watch carefully—the temperature rises quickly once it starts boiling.
- Once at temperature, remove the pan from heat and stir in vanilla and 1/2 teaspoon salt. The caramel will bubble vigorously—let it settle for a few seconds.
- Pour the hot caramel over the cooled shortbread, tilting the pan to spread it evenly. Let it sit at room temperature until set, about 30 minutes. Do not refrigerate yet, as the caramel needs to firm slowly.
- While the caramel sets, melt the milk chocolate chips in a heatproof bowl set over simmering water, stirring until smooth. Alternatively, microwave in 20-second bursts, stirring between each, until just melted. Avoid overheating the chocolate to keep it glossy.
- Spread the melted chocolate over the caramel layer, smoothing the top with an offset spatula. Refrigerate the pan for 30 minutes, or until the chocolate is firm, before cutting.
- Use the parchment overhang to lift the bar out of the pan onto a cutting board. Use a sharp knife to cut into 4 equal bars. For clean cuts, wipe the knife between slices.
- For the best texture, let the bars sit at room temperature for 5 minutes before serving—they’ll be easier to bite through, with the shortbread staying crisp and the caramel slightly chewy.
Notes
Store in an airtight container in the refrigerator for up to 1 week, separating layers with parchment. For longer storage, freeze the wrapped bars for up to 3 months. Thaw in the refrigerator before serving. To re-crisp the shortbread, place bars on a baking sheet in a 300°F (149°C) oven for 5 minutes, then let cool.
Nutrition
- Calories: 560
- Sugar: 47g
- Sodium: 480mg
- Unsaturated Fat: 20g
- Carbohydrates: 63g
- Fiber: 2g
- Protein: 4g
- Cholesterol: 60mg
Keywords: Twix bars, homemade Twix, caramel shortbread, chocolate caramel bars, shortbread cookie bars, dessert bars, baking, homemade candy bar, milk chocolate, caramel
Milky Way Brownies
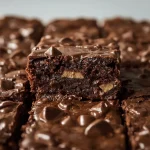
These indulgent Milky Way brownies are a chocolate lover’s dream, featuring an intensely fudgy, rich cocoa base studded with chunks of chewy Milky Way bars and crowned with a glossy, crackly top. The combination of chocolate caramel and nougat creates gooey pockets that melt in your mouth, making every bite a decadent experience.
- Prep Time: 20
- Cook Time: 30
- Total Time: 50
- Yield: 4 1x
- Category: Dessert
- Method: Baking
- Cuisine: American
Ingredients
- 1/2 cup (1 stick / 113g) unsalted butter, melted and slightly cooled
- 1 cup (200g) granulated sugar
- 2 large eggs, at room temperature
- 1 teaspoon vanilla extract
- 1/3 cup (40g) unsweetened cocoa powder, sifted
- 1/2 cup (65g) all-purpose flour
- 1/4 teaspoon kosher salt
- 4 fun-size Milky Way bars (about 1.7 oz / 48g total), chopped into 1/2-inch pieces
Instructions
- Preheat your oven to 350°F (177°C). Line an 8×8-inch metal baking pan with parchment paper, leaving overhang on two opposite sides for easy lifting. This ensures the brownies release cleanly after baking.
- In a large microwave-safe bowl, melt the butter in 20-second bursts until fully melted. Let it cool slightly for about 2 minutes, so it’s warm but not hot—this prevents the eggs from cooking when added.
- Whisk the granulated sugar into the melted butter until fully combined. The mixture should look smooth and slightly grainy but well incorporated.
- Add the eggs one at a time, whisking vigorously after each addition until the mixture becomes glossy and slightly thickened. This creates the shiny, crackly top that defines a perfect brownie.
- Stir in the vanilla extract until evenly distributed.
- Sprinkle the sifted cocoa powder, all-purpose flour, and kosher salt over the wet mixture. Use a rubber spatula to fold gently until just combined—do not overmix, as this can develop gluten and make the brownies tough instead of fudgy.
- Gently fold in the chopped Milky Way pieces, reserving about 2 tablespoons for the top. The candy adds pockets of caramel and nougat that become gooey during baking.
- Pour the batter into the prepared pan and spread it into an even layer with an offset spatula. Sprinkle the reserved Milky Way pieces over the top, pressing them in lightly so they don’t burn.
- Bake at 350°F (177°C) for 28–30 minutes, until the edges are set and the center is just slightly jiggly when the pan is gently shaken. A toothpick inserted into the center should come out with a few moist crumbs, not wet batter—this indicates the brownies are fudgy, not underbaked.
- Cool the brownies completely in the pan on a wire rack, about 1 full hour. This resting time lets the chocolate set and the caramel cool and stabilize, making them easier to slice cleanly.
- Once cooled, lift the brownies out using the parchment overhang and place on a cutting board. Use a sharp knife to cut into 4 equal squares, wiping the knife between cuts for neat edges.
- Serve at room temperature. If desired, warm a brownie in the microwave for 10 seconds to re-melt the caramel chunks for a gooey, just-baked experience.
Notes
Store leftover brownies in an airtight container at room temperature for up to 3 days, or refrigerate for up to 5 days (let them come to room temperature before serving for best texture). To freeze, wrap individual brownies tightly in plastic wrap, then place in a freezer bag or airtight container for up to 3 months. Thaw at room temperature for 1–2 hours, or reheat a frozen brownie in a microwave on 50% power for 15–20 seconds for a gooey treat.
Nutrition
- Calories: 452
- Sugar: 35g
- Sodium: 170mg
- Unsaturated Fat: 14g
- Carbohydrates: 50g
- Fiber: 2g
- Protein: 6g
- Cholesterol: 125mg
Keywords: Milky Way brownies, chocolate caramel brownies, candy bar brownies, fudgy brownies, nougat brownies, easy dessert, homemade brownies, baking, chocolate dessert, candy-filled brownies