 Kendric adan
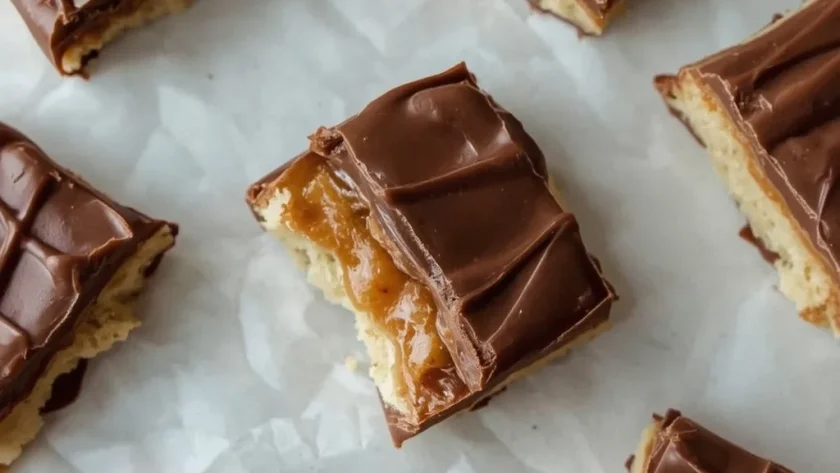
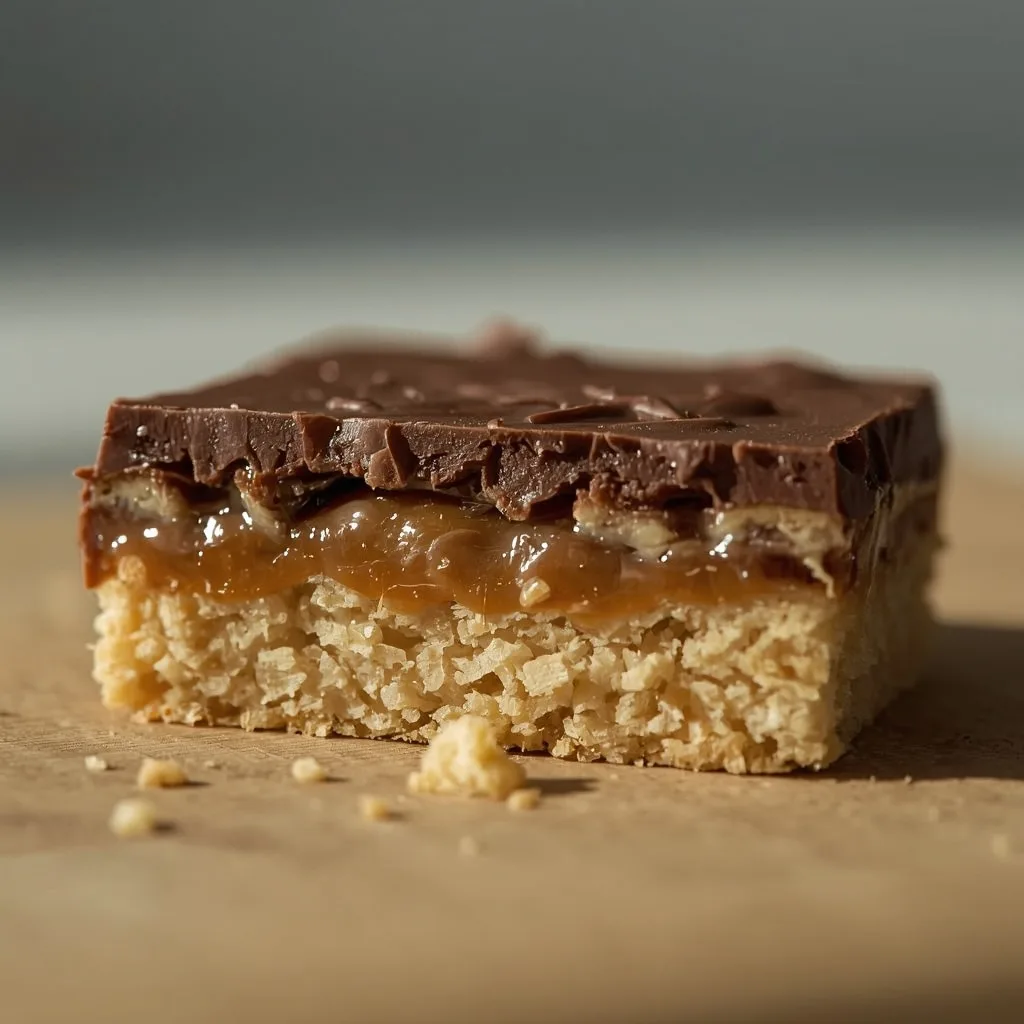
 If you have ever wished you could make a Twix Bar Recipe at home that tastes just as good as the store-bought version, this is the one to try. It has a buttery shortbread crust, a thick layer of chewy caramel, and a smooth milk chocolate coating that snaps when you bite into it.
This dessert falls somewhere between beginner and intermediate — the caramel needs a candy thermometer, but everything else is straightforward. You can have it finished in about 55 minutes, which makes it a great weekend baking project or a homemade gift for someone who loves chocolate and caramel.
Why You’ll Love This Recipe
Here is what sold me on making these bars from scratch instead of buying them.
- Texture contrast — The shortbread stays crisp, the caramel turns chewy, and the chocolate coating gives that satisfying snap with every bite.
- Simple ingredients — You probably have most of these in your pantry already — flour, butter, sugar, corn syrup, and chocolate chips are all easy to find.
- Better than store-bought — The homemade caramel has a deeper, richer flavor than the factory version, and the shortbread is noticeably more buttery.
What Makes This Recipe Special
The three layers each get their own treatment — the shortbread bakes until golden, the caramel cooks to the soft-ball stage at 240°F (115°C), and the chocolate melts gently so it stays glossy. Biting into one gives you a crumbly base, a sticky middle, and a smooth top that all work together. These taste like an elevated version of the candy bar, and they are perfect for birthdays, holidays, or just a weekend treat when you want something impressive.
Ingredients You’ll Need
Everything here is straightforward, but a few choices matter more than you might think. Here is what goes into each layer.
For the Shortbread Crust
- 1/2 cup unsalted butter, softened (1 stick) — Room-temperature butter creams much smoother than cold butter, which gives the crust a tender crumb. If you forgot to take it out, microwave it in 10-second bursts until soft but not melted.
- 1/4 cup powdered sugar — This dissolves into the butter easily and keeps the crust from tasting gritty, unlike granulated sugar would.
- 1/4 teaspoon fine sea salt — A small amount balances the sweetness of the caramel and chocolate above it.
- 1 cup all-purpose flour — Standard all-purpose flour gives the shortbread structure without making it tough. Do not substitute bread flour here.
For the Caramel Layer
- 1/4 cup heavy cream — The fat in the cream helps the caramel stay soft and chewy rather than hardening into brittle.
- 1/2 cup light corn syrup — Corn syrup prevents the sugar from crystallizing, which keeps the caramel smooth. Do not skip it and do not swap it for honey — the texture will change.
- 1/2 cup granulated sugar — This caramelizes to give the layer its golden color and classic sweetness.
- 2 tablespoons unsalted butter — Added at the start, this enriches the caramel and contributes to that buttery flavor.
- 1/2 teaspoon vanilla extract — Added after the caramel comes off the heat, vanilla rounds out the sweetness and adds depth.
- 1/2 teaspoon fine sea salt — The second hit of salt in the caramel keeps the bar from tasting one-dimensional.
For the Chocolate Coating
- 1 cup milk chocolate chips (about 6 oz) — Milk chocolate gives that classic candy bar flavor. If you prefer dark chocolate, you can swap it, but the sweetness balance will shift.
Equipment Needed
You do not need any specialty gear beyond a few standard kitchen tools. Here is what I used.
- 8×8-inch baking pan — This exact size matters because it determines how thick each layer ends up. A different pan size will change the proportions.
- Candy thermometer — This is the one tool you cannot skip. Guessing the caramel temperature means risking a layer that is too soft or turns to hard toffee.
- Parchment paper — Leaving overhang on two sides lets you lift the whole slab out cleanly without breaking the layers.
- Electric mixer — A hand mixer works fine for creaming the butter and sugar. You can also do it by hand with a wooden spoon, but it takes longer.
- Offset spatula — Spreading the warm caramel and melted chocolate evenly is much easier with one of these, though a regular spatula will do in a pinch.
Instructions to Prepare Twix Bar Recipe
Take your time with the caramel — it is the one step where rushing causes problems. Everything else moves quickly.
- Prep the pan — Preheat the oven to 350°F (177°C) and line an 8×8-inch baking pan with parchment paper, leaving overhang on two sides for easy removal. The parchment prevents sticking and makes lifting the bars out a breeze.
- Cream the butter — In a medium bowl, beat 1/2 cup softened butter, powdered sugar, and 1/4 teaspoon salt with an electric mixer until light and fluffy, about 2 minutes. Scrape down the sides to ensure even mixing.
- Add the flour — Add the flour and mix on low until the dough just comes together. It will look crumbly but should press together when pinched.
- Press and dock the crust — Press the dough evenly into the bottom of the prepared pan. Use your fingers or the bottom of a measuring cup to create a uniform, compact layer. Prick the dough with a fork all over to prevent bubbling.
- Bake the shortbread — Bake for 18-20 minutes, until the edges are just golden and the surface looks dry. Remove from the oven and let cool completely in the pan on a wire rack, about 20 minutes. Cooling prevents the caramel from melting the crust.
- Start the caramel — In a small saucepan, combine heavy cream, corn syrup, granulated sugar, and 2 tablespoons butter. Stir over medium heat until the butter melts and the sugar dissolves, about 3 minutes.
- Cook to soft-ball stage — Clip a candy thermometer to the pan and continue cooking, without stirring, until the mixture reaches 240°F (115°C), soft-ball stage. This will take about 8-10 minutes. Watch carefully — the temperature rises quickly once it starts boiling.
- Flavor the caramel — Once at temperature, remove the pan from heat and stir in vanilla and 1/2 teaspoon salt. The caramel will bubble vigorously — let it settle for a few seconds.
- Pour over the crust — Pour the hot caramel over the cooled shortbread, tilting the pan to spread it evenly. Let it sit at room temperature until set, about 30 minutes. Do not refrigerate yet, as the caramel needs to firm slowly.
- Melt the chocolate — While the caramel sets, melt the milk chocolate chips in a heatproof bowl set over simmering water, stirring until smooth. Alternatively, microwave in 20-second bursts, stirring between each, until just melted. Avoid overheating the chocolate to keep it glossy.
- Top with chocolate — Spread the melted chocolate over the caramel layer, smoothing the top with an offset spatula. Refrigerate the pan for 30 minutes, or until the chocolate is firm, before cutting.
- Slice into bars — Use the parchment overhang to lift the bar out of the pan onto a cutting board. Use a sharp knife to cut into 4 equal bars. For clean cuts, wipe the knife between slices.
- Rest before serving — For the best texture, let the bars sit at room temperature for 5 minutes before serving — they will be easier to bite through, with the shortbread staying crisp and the caramel slightly chewy.

Expert Tips for a Standout Twix Bar Recipe
A few small adjustments made a big difference for me. Here is what I learned after testing this a few times.
- Cool the crust completely — If the shortbread is even slightly warm, the caramel will soak into it and turn it soggy. Give it the full 20 minutes.
- Do not stir the caramel — Once the caramel starts boiling, stirring can cause the sugar to crystallize and turn grainy. Let it cook undisturbed.
- Let the caramel settle before pouring — The vanilla and salt will make it bubble up aggressively. Give it a few seconds to calm down so it does not splash.
- Trim the edges if needed — The outer edges sometimes have a thin caramel drip. Trimming them with a warm knife gives you cleaner-looking bars.
- Wipe the knife between cuts — Chocolate and caramel stick to the blade and drag through the layers. A quick wipe keeps each slice clean.
- Use good-quality chocolate chips — The chocolate is the first thing you taste, so cheaper chips with more wax will not melt as smoothly or taste as rich.
- Let the bars rest before eating — Straight from the fridge, the caramel is too firm. Five minutes at room temperature makes everything biteable.
Common Mistakes to Avoid
These are the pitfalls I have seen (and hit myself) when making layered bars like this one.
- Overbaking the shortbread — The crust will keep cooking from residual heat. Pull it out when the edges just turn golden, not when the whole surface browns.
- Undercooking the caramel — If you pull it off the heat below 240°F (115°C), the caramel will stay too soft and may slide off the crust. Use the thermometer, not your eyes.
- Adding cold ingredients to hot caramel — The heavy cream and butter must come to room temperature first, or the caramel can seize and turn lumpy.
- Refrigerating the caramel to speed it up — Chilling the caramel too fast can make it grainy and hard. Room temperature for 30 minutes is the way forward.
- Melting chocolate in the microwave too fast — Burnt chocolate turns dull and thick. Use 20-second bursts and stop as soon as it is mostly melted, then stir.
- Cutting before the chocolate firms — Soft chocolate will smear across the caramel and ruin the layered look. Wait the full 30 minutes in the fridge.
Variations & Ways to Customize Twix Bar Recipe
This recipe is a solid base, but you can twist it in several directions depending on your mood.
- Dark chocolate coating — Swap the milk chocolate chips for dark chocolate (around 60-70% cocoa) for a less sweet, more intense finish.
- Salted caramel version — Sprinkle a pinch of flaky sea salt over the caramel layer before adding the chocolate. The salt cuts through the sweetness beautifully.
- Peanut butter swirl — Drop small spoonfuls of peanut butter onto the caramel while it is still warm, then gently swirl it in with a knife.
- Gluten-free adaptation — Substitute the all-purpose flour with a 1:1 gluten-free baking blend. The crust will be slightly crumblier but still delicious.
- White chocolate topping — Use white chocolate chips instead of milk chocolate for a sweeter, creamier bar that pairs well with the caramel.
- Mini bite versions — Cut the slab into 1-inch squares instead of 4 large bars. These are perfect for party platters or lunchbox treats.
What to Serve With Twix Bar Recipe
These bars are rich on their own, but a few pairings turn them into a full dessert moment.
- Vanilla ice cream — The cold creaminess of vanilla ice cream is a natural counterpoint to the chewy caramel and crisp shortbread.
- Strong black coffee — A bitter espresso or dark roast cuts through the sweetness and cleanses your palate between bites.
- Whipped cream — A light, barely-sweetened dollop softens the richness and adds an airy texture contrast.
- Fresh berries — Raspberries or sliced strawberries bring a tart brightness that balances the chocolate and caramel.
- Milk — The classic pairing for a candy bar, and it works just as well here. Cold milk washes down the richness perfectly.
- Salted popcorn — A savory, crunchy snack alongside makes for a fun sweet-and-savory snack board.
Make-Ahead Instructions
If you want to get ahead for a party or gathering, these bars handle advance prep very well.
- Prepare the crust in advance — You can bake the shortbread a day ahead and keep it covered at room temperature. Add the caramel and chocolate when you are ready.
- Make the full bars 2-3 days early — Complete all three layers and store the bars in an airtight container in the fridge. They hold up well for several days.
- Freeze for up to 3 months — Wrap each bar individually in plastic wrap, then place them in a freezer bag. Thaw overnight in the fridge before serving.
- Re-crisp before serving — If the shortbread loses its crunch after storage, put the bars on a baking sheet in a 300°F (149°C) oven for 5 minutes, then let them cool.
Storage and Reheating
Storing these bars properly makes a big difference in how they hold their texture.
Storage
Keep them cold, but give them a few minutes at room temperature before eating.
- Refrigerator — Store in an airtight container in the refrigerator for up to 1 week, separating layers with parchment to prevent sticking.
- Freezer — Wrap the bars individually in plastic wrap and place in a freezer-safe bag for up to 3 months. Thaw in the refrigerator before serving.
- Countertop — If the room is cool, these can sit out for a day or two, but the chocolate may soften and the caramel can get too sticky in warm weather.
Reheating
These are usually best at room temperature, but sometimes you want to bring back the crunch.
- Oven (best for re-crisping) — Place bars on a baking sheet in a 300°F (149°C) oven for 5 minutes, then let cool completely. This revives the shortbread without melting the chocolate entirely.
- Microwave (quick, but risky) — Heat for 10-15 seconds only, just to soften the caramel. Anything longer will melt the chocolate and turn everything gooey.
- Room temperature — Simply let the bars sit out for 10-15 minutes. The caramel softens naturally and the shortbread keeps most of its crispness.
Nutritional Breakdown (Per Serving)
Based on 1 serving = 1 bar out of 4 total. These are indulgent treats, so portion accordingly.
- Calories — 560 per bar
- Protein — 4g
- Fat — 33g
- Saturated Fat — about 20g
- Carbohydrates — 63g
- Fiber — 2g
- Sugar — 47g
- Sodium — around 480mg
- Cholesterol — roughly 95mg
Frequently Asked Questions
Can I freeze Twix Bar Recipe?
Yes, you can freeze these bars for up to 3 months. Wrap each bar tightly in plastic wrap and place them in a freezer-safe container, then thaw them in the refrigerator before serving.
How long does Twix Bar Recipe last in the fridge?
Stored properly in an airtight container with parchment paper between layers, the bars will keep for up to 1 week in the refrigerator. They are best within the first 3-4 days when the shortbread still has some crunch.
Why is my caramel not setting?
Your caramel likely did not reach the correct temperature. It needs to hit 240°F (115°C) — the soft-ball stage. If it is below that, it will stay runny and slide off the shortbread.
Can I use light corn syrup substitutes?
Corn syrup helps prevent sugar crystallization. Agave syrup or honey can work but will change the flavor and might make the caramel darker. If you can, stick with corn syrup for the most reliable results.
Why did my shortbread turn soggy?
The shortbread was probably still warm when you poured the caramel over it. Always cool the crust completely, about 20 minutes, before adding the hot caramel layer.
How do I get clean, even cuts?
Use a sharp knife and wipe it clean between each cut. Chilling the bars fully before slicing helps too, since the chocolate firms up and does not drag through the layers.
Final Words
Homemade candy bars are one of those projects that feels more rewarding than the effort suggests. This Twix Bar Recipe delivers all the nostalgia of the store-bought treat with the freshness of a from-scratch dessert.
Take your time with the caramel, cool the crust fully, and let the bars rest a few minutes before eating. The reward is a perfectly layered bar with a crisp, chewy, and snappy texture in every bite.
PrintTwix Bar Recipe
A homemade Twix bar with a buttery shortbread crust, a thick layer of chewy caramel, and a smooth milk chocolate coating. The contrast of crumbly, gooey, and snappy textures makes this an irresistible treat.
- Prep Time: 30
- Cook Time: 25
- Total Time: 55
- Yield: 4 1x
- Category: Dessert
- Method: Baking
- Cuisine: American
Ingredients
- 1/2 cup unsalted butter, softened (1 stick)
- 1/4 cup powdered sugar
- 1/4 teaspoon fine sea salt
- 1 cup all-purpose flour
- 1/4 cup heavy cream
- 1/2 cup light corn syrup
- 1/2 cup granulated sugar
- 2 tablespoons unsalted butter
- 1/2 teaspoon vanilla extract
- 1/2 teaspoon fine sea salt
- 1 cup milk chocolate chips (about 6 oz)
Instructions
- Preheat the oven to 350°F (177°C). Line an 8×8-inch baking pan with parchment paper, leaving overhang on two sides for easy removal. The parchment prevents sticking and makes lifting the bars out a breeze.
- In a medium bowl, beat 1/2 cup softened butter, powdered sugar, and 1/4 teaspoon salt with an electric mixer until light and fluffy, about 2 minutes. Scrape down the sides to ensure even mixing.
- Add the flour and mix on low until the dough just comes together. It will look crumbly but should press together when pinched.
- Press the dough evenly into the bottom of the prepared pan. Use your fingers or the bottom of a measuring cup to create a uniform, compact layer. Prick the dough with a fork all over to prevent bubbling.
- Bake the shortbread for 18-20 minutes, until the edges are just golden and the surface looks dry. Remove from the oven and let cool completely in the pan on a wire rack, about 20 minutes. Cooling prevents the caramel from melting the crust.
- In a small saucepan, combine heavy cream, corn syrup, granulated sugar, and 2 tablespoons butter. Stir over medium heat until the butter melts and the sugar dissolves, about 3 minutes.
- Clip a candy thermometer to the pan and continue cooking, without stirring, until the mixture reaches 240°F (115°C), soft-ball stage. This will take about 8-10 minutes. Watch carefully—the temperature rises quickly once it starts boiling.
- Once at temperature, remove the pan from heat and stir in vanilla and 1/2 teaspoon salt. The caramel will bubble vigorously—let it settle for a few seconds.
- Pour the hot caramel over the cooled shortbread, tilting the pan to spread it evenly. Let it sit at room temperature until set, about 30 minutes. Do not refrigerate yet, as the caramel needs to firm slowly.
- While the caramel sets, melt the milk chocolate chips in a heatproof bowl set over simmering water, stirring until smooth. Alternatively, microwave in 20-second bursts, stirring between each, until just melted. Avoid overheating the chocolate to keep it glossy.
- Spread the melted chocolate over the caramel layer, smoothing the top with an offset spatula. Refrigerate the pan for 30 minutes, or until the chocolate is firm, before cutting.
- Use the parchment overhang to lift the bar out of the pan onto a cutting board. Use a sharp knife to cut into 4 equal bars. For clean cuts, wipe the knife between slices.
- For the best texture, let the bars sit at room temperature for 5 minutes before serving—they’ll be easier to bite through, with the shortbread staying crisp and the caramel slightly chewy.
Notes
Store in an airtight container in the refrigerator for up to 1 week, separating layers with parchment. For longer storage, freeze the wrapped bars for up to 3 months. Thaw in the refrigerator before serving. To re-crisp the shortbread, place bars on a baking sheet in a 300°F (149°C) oven for 5 minutes, then let cool.
Nutrition
- Calories: 560
- Sugar: 47g
- Sodium: 480mg
- Unsaturated Fat: 20g
- Carbohydrates: 63g
- Fiber: 2g
- Protein: 4g
- Cholesterol: 60mg
Keywords: Twix bars, homemade Twix, caramel shortbread, chocolate caramel bars, shortbread cookie bars, dessert bars, baking, homemade candy bar, milk chocolate, caramel