 Kendric adan
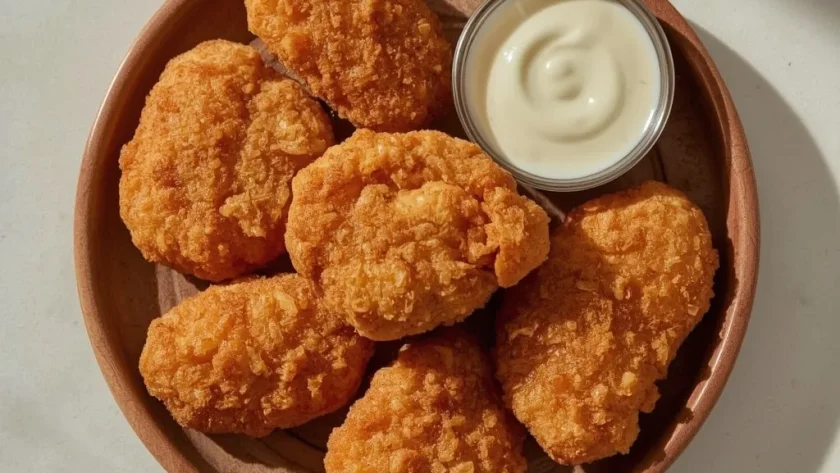
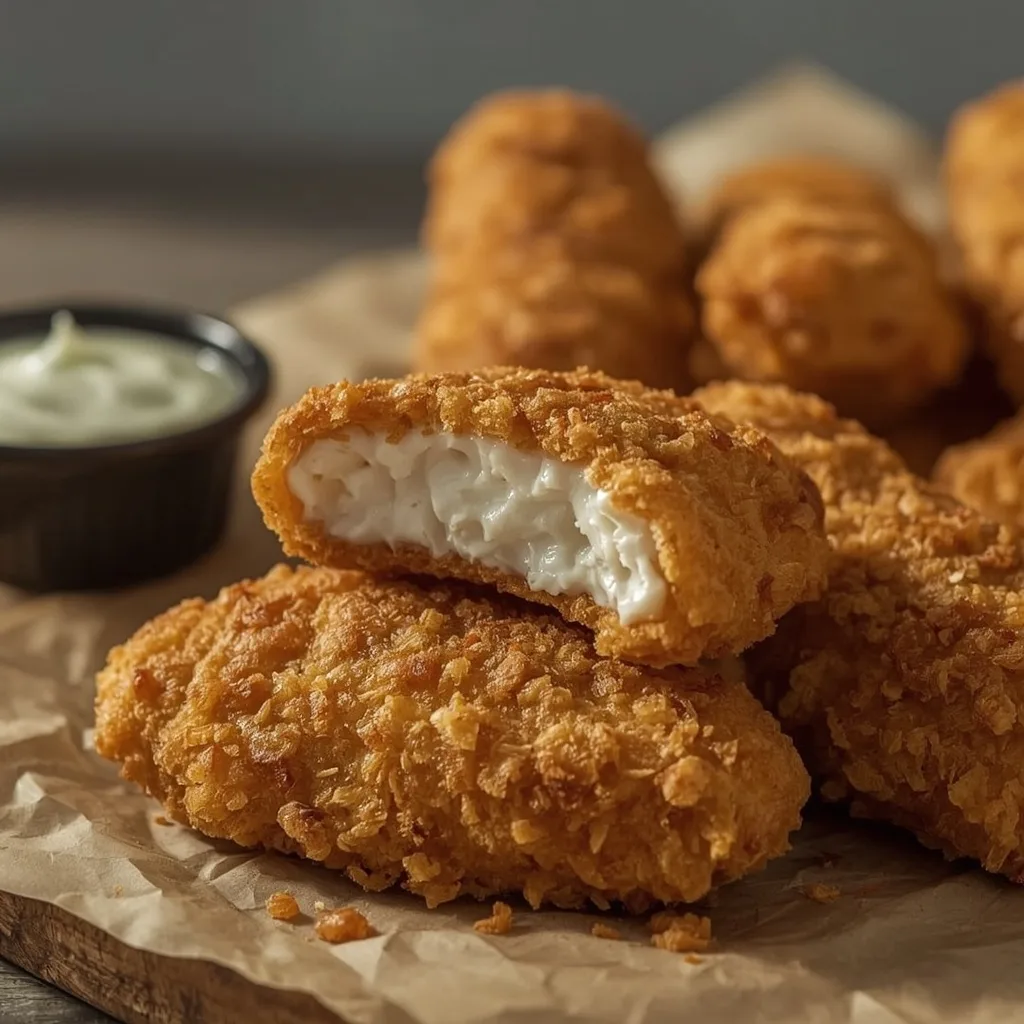
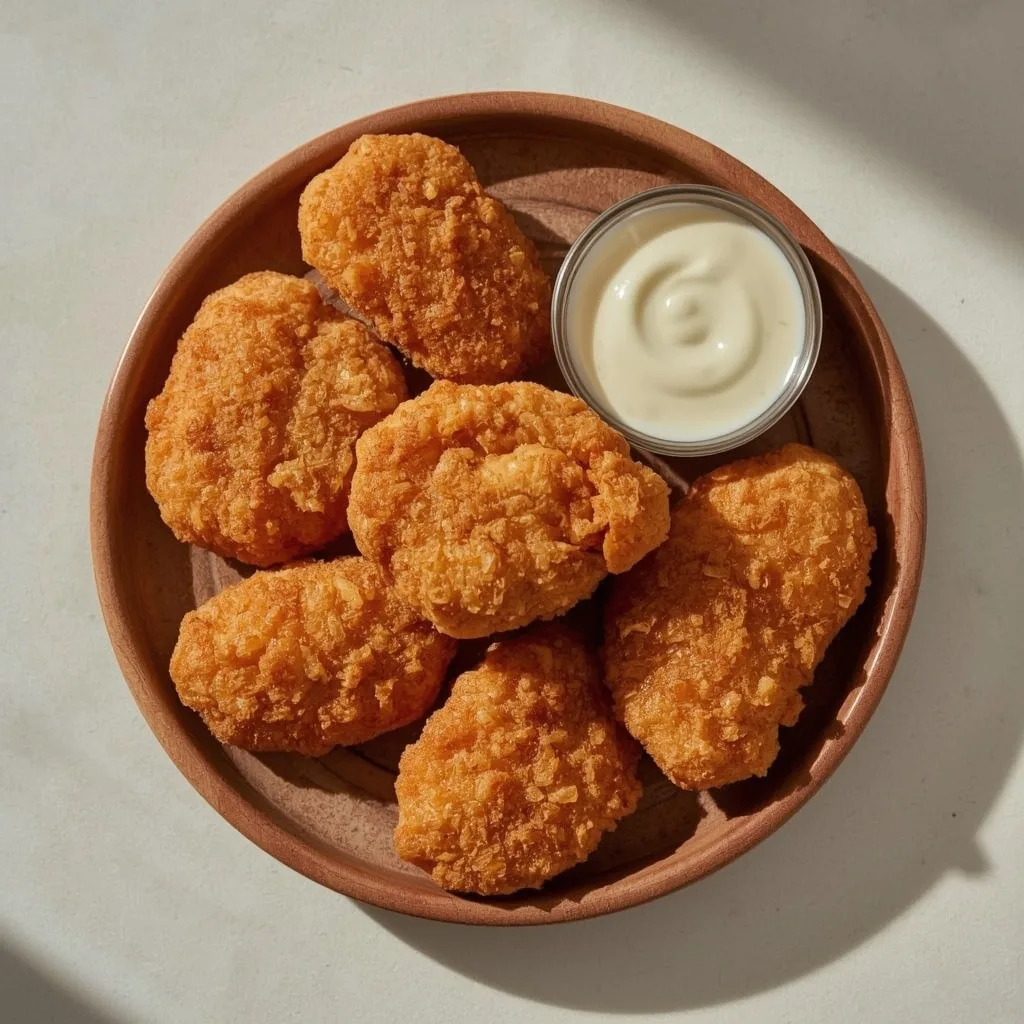
 Crispy, juicy, and perfectly seasoned, these Raising Cane’s Chicken Fingers (Gluten Free Version) bring that iconic fast-food crunch right to your own kitchen. The buttermilk marinade keeps the meat tender, while the gluten-free flour and cornstarch coating delivers that signature golden, craggy crust.
You can have these on the table in about 32 minutes, and the recipe is beginner-friendly. The only real trick is letting the coated tenders rest before frying — that short pause is what keeps the crust from slipping off in the hot oil.
Why You’ll Love This Recipe
- Crispy, Not Crumbly — The cornstarch in the coating creates that light, shattering crunch that gluten-free flours often lack on their own.
- Genuinely Tender Chicken — A quick soak in seasoned buttermilk guarantees the chicken stays moist and flavorful even after frying.
- Spice That’s Just Right — The blend of garlic, onion, and a whisper of cayenne delivers that savory kick without overpowering the chicken.
What Makes This Recipe Special
The buttermilk marinade does double duty here: it tenderizes the chicken and gives the coating something to cling to. What you get is a crust that’s shatteringly crisp on the outside while the meat inside stays juicy and tender. It’s the kind of comfort food that works for a weeknight dinner or a game-day spread.
Ingredients You’ll Need
Most of these ingredients are pantry staples, but a couple deserve a closer look before you start.
For the Marinade
- 1 1/2 lb chicken breast tenders — Look for about 8-10 tenders. If you can only find breasts, slice them into strips of even thickness so they cook at the same rate.
- 1 cup full-fat buttermilk — Full-fat gives the most tender results. Low-fat will work, but the marinade is thinner.
- 1 large egg — Helps the seasoned coating stick to the chicken during the dredging step.
- 1 tsp kosher salt — This seasons the chicken from the inside out during the marinade.
- 1/2 tsp black pepper — Adds a gentle bite that balances the other seasonings.
- 1/2 tsp garlic powder — A subtle savory note that doesn’t go sharp when fried.
- 1/2 tsp onion powder — Brings a mild sweetness that rounds out the garlic.
- 1/4 tsp paprika — Mostly for color, but it adds a faint warmth too.
- 1/4 tsp cayenne pepper (optional) — Skip this if you want zero heat. Include it if you like a gentle tingle on the finish.
For the Coating
- 1 cup gluten-free all-purpose flour blend — Make sure it contains xanthan gum; it helps the coating bind together properly.
- 1/2 cup cornstarch — This is the secret to the extra-crispy texture. Don’t skip it.
- 1 tsp baking powder — Creates tiny air pockets in the crust for a lighter bite.
- 1 tsp kosher salt — Seasons the breading so the crust tastes as good as the chicken.
- 1/2 tsp black pepper — Adds a sharp counterpoint to the other spices.
- 1/2 tsp garlic powder — Doubles down on the garlic flavor in the crust.
- 1/2 tsp onion powder — Works with the garlic to mimic that classic seasoning blend.
- 1/4 tsp paprika — Gives the crust its warm, golden color.
- 2 cups vegetable oil — Enough for about 1/2 inch of oil in a wide skillet. Peanut or canola oil works great too.
Equipment Needed
Here’s what you’ll want within reach before the oil heats up.
- Large mixing bowl — Big enough to toss the tenders in the marinade without splashing.
- Shallow dish or pie plate — Perfect for the flour coating so you can dredge each tender easily.
- Baking sheet with wire rack — Holds the coated tenders during the resting phase and lets fried chicken drain without sitting in oil.
- Heavy-bottomed skillet or Dutch oven — Holds temperature better than thin pans, which means more even frying.
- Tongs — Use these to turn the chicken; forks or spatulas can tear the delicate crust.
Instructions to Prepare Raising Cane’s Chicken Fingers (Gluten Free Version)
Follow these steps in order, and you’ll have restaurant-quality tenders at home. The resting periods matter more than they seem.
- Marinate the Chicken — Whisk the buttermilk, egg, salt, pepper, garlic powder, onion powder, paprika, and cayenne in a large bowl. Add the tenders, making sure each one is fully coated. Cover and refrigerate for at least 30 minutes, or up to 4 hours for deeper flavor.
- Mix the Dry Coating — In a shallow dish, combine the gluten-free flour, cornstarch, baking powder, salt, pepper, garlic powder, onion powder, and paprika. Whisk until there are no visible streaks.
- Dredge Each Tender — Pull a tender from the marinade, letting the excess drip off. Press it firmly into the flour mixture, coating every side. Shake off any loose flour and place it on the wire rack.
- Let the Coating Set — Leave the breaded tenders on the rack for 10 minutes. This step is crucial; it lets the flour absorb some moisture from the marinade so it stays put in the oil.
- Heat the Oil — Pour the vegetable oil into the skillet to about 1/2 inch deep. Warm it over medium-high heat until it shimmers and a pinch of flour sizzles immediately on contact.
- Fry in Batches — Gently lay 3-4 tenders into the hot oil, making sure they don’t touch. Cook for 3-4 minutes per side, turning once, until deep golden brown. The internal temperature should hit 165°F / 74°C.
- Drain and Repeat — Transfer the finished tenders to the clean wire rack. Let the oil come back up to temperature before starting the next batch.
- Oven Alternative — Preheat the oven to 400°F / 204°C. Place the coated tenders on a wire rack over a baking sheet, brush lightly with oil, and bake for 20-25 minutes, flipping halfway. Finish with 2 minutes under the broiler for extra crunch.
Expert Tips for a Standout Raising Cane’s Chicken Fingers (Gluten Free Version)
These are the little details that separate good fried chicken from great fried chicken.
- Splash of Cold Marinade — The chilled buttermilk mixture keeps the coating from over-thickening and helps the flour cling evenly.
- Resting Time Rules — Don’t rush the 10-minute rest before frying. It’s the single most effective way to prevent the coating from slipping off in the hot oil.
- Oil Temperature Check — Between batches, let the oil reheat fully. Adding cold chicken drops the temperature quickly, and low heat means greasy, soft coating.
- Single Layer Only — Overcrowding the pan steams the tenders instead of frying them. Work in small batches — it takes longer but the crust will be far crispier.
- Gentle Turning — Use tongs to flip the chicken, not a fork. Piercing the crust can tear it right off the chicken.
- Season Immediately — A sprinkle of salt right after frying seasons the crust while it’s still hot and the oil is still slick.
Common Mistakes to Avoid
A few small missteps can turn a great recipe into a frustrating one. Here’s what to watch for.
- Shortcutting the Marinade — Skipping the 30-minute soak means the seasonings stay on the surface instead of penetrating the meat. The chicken will taste flat.
- Soggy Coating — Frying before the coating has rested causes the flour to wash off into the oil. You end up with bare spots and a muddled crust.
- Oil Not Hot Enough — If the tenders bubble weakly, the oil is too cool. The coating will absorb oil and turn greasy instead of crisp. Wait for that shimmer.
- Turning Too Early — The crust needs time to set. If you flip before it firms up, it tears. Let the first side cook until it’s clearly golden before touching it.
- Using a Cold Rack — A room-temperature wire rack lets condensation form under the chicken. A slightly warm rack keeps things crisper.
Variations & Ways to Customize Raising Cane’s Chicken Fingers (Gluten Free Version)
The base recipe is great as-is, but here are ways to make it your own.
- Extra Heat — Bump the cayenne up to 1/2 tsp in both the marinade and the coating for a serious kick.
- Herb Crust — Add 1 tsp of dried oregano and 1/2 tsp of dried thyme to the flour mixture for an herby twist.
- Baked Version — Skip the stovetop and use the oven method in step 7. Spray the tenders generously with oil so the coating crisps up properly.
- Spicy Marinade — Mix a tablespoon of hot sauce into the buttermilk mixture for a tangy heat that doesn’t overpower the chicken.
- Double Coating — Dip the breaded tenders back into the marinade and coat again for an extra-thick, extra-crunchy crust. This is messy but worth it.
What to Serve With Raising Cane’s Chicken Fingers (Gluten Free Version)
These tenders pair well with simple sides. Keep it classic or switch things up.
- Crinkle-Cut Fries — The crispy texture of the fries matches the tenders, and they’re perfect for dipping in the same sauce.
- Coleslaw — The cool, creamy crunch balances the fried chicken and adds a fresh element to the plate.
- Texas Toast — A thick slice of buttery toast soaks up any extra sauce and adds a soft contrast to the crisp chicken.
- Pickle Spears — The tangy acidity cuts through the richness of the fried coating, cleaning your palate between bites.
- Cane’s-Style Sauce — Mix ketchup, mayonnaise, garlic powder, and gluten-free Worcestershire sauce for that signature tangy-sweet dip.
Make-Ahead Instructions
These tenders adapt well to a little planning ahead, which makes them great for busy weeks.
- Marinate Overnight — Mix the buttermilk marinade and soak the chicken up to 4 hours. Any longer and the texture starts to break down. Keep it covered in the fridge.
- Pre-Bread and Chill — Dredge and rest the tenders, then store them on a baking sheet covered in plastic wrap for up to 4 hours before frying.
- Freeze Before Frying — Bread the tenders, freeze them on a baking sheet in a single layer, then transfer to a freezer bag for up to 3 months. Fry straight from frozen, adding a minute or two to the cooking time.
- Prep the Dry Mix — Whisk the flour coating ingredients together and store in an airtight container for up to a month. When you’re ready, just dredge.
Storage and Reheating
Leftovers are inevitable unless you’re feeding a crowd. Here’s how to keep them tasting fresh.
Storage
- Refrigerator — Store cooled tenders in an airtight container for up to 3 days. Layer them between paper towels to absorb any excess moisture.
- Freezer — Place the cooled tenders in a single layer on a baking sheet and freeze until solid. Transfer to a freezer bag for up to 3 months. Label with the date.
- Room Temperature Rule — Don’t leave fried chicken out for more than 2 hours. After that, get it into the fridge immediately.
Reheating
- Air Fryer — Heat at 375°F / 190°C for 4-6 minutes. This brings back the most crunch. Check halfway through.
- Oven — Preheat to 400°F / 204°C and bake for 8-10 minutes on a wire rack over a baking sheet. This keeps the bottom from getting soggy.
- Avoid the Microwave — It steams the coating and turns it rubbery. Only use it if you’re desperate and don’t care about texture.
Nutritional Breakdown (Per Serving)
Based on 1 serving = 2-3 tenders, out of 4 total servings.
- Calories — 485
- Protein — 34g
- Fat — 24g
- Carbohydrates — 35g
- Fiber — 2g
- Sugar — 2g
- Sodium — 840mg
Frequently Asked Questions
Can I make Raising Cane’s Chicken Fingers (Gluten Free Version) without buttermilk?
Yes, in a pinch. Mix 1 cup of milk with 1 tablespoon of lemon juice or white vinegar and let it sit for 5 minutes. It won’t be quite as thick, but it works fine.
What gluten-free flour blend works best?
A store-bought 1:1 blend that contains xanthan gum works best here. Rice flour blends tend to be crispiest. Avoid blends with heavy bean flours, which can taste gritty.
How long does Raising Cane’s Chicken Fingers (Gluten Free Version) last in the fridge?
Cooked tenders stay fresh for up to 3 days in an airtight container in the refrigerator. Reheat them in the air fryer or oven to restore the crunch.
Can I use chicken thighs instead of breast tenders?
You can, and thighs will be even juicier. Just note they take a little longer to cook through, so adjust the frying time by a minute or two.
Why did my coating fall off?
Usually it’s because the coating didn’t rest long enough before frying. The 10-minute rest allows the flour to adhere properly. Also, make sure the oil is hot enough before adding the chicken.
More Recipes
Final Words
These Raising Cane’s Chicken Fingers (Gluten Free Version) give you all the satisfaction of the drive-thru favorite without the gluten or the wait. The coating is crisp, the chicken stays juicy, and the seasoning hits all the right notes. Give this recipe a try — you’ll be surprised how close it gets to the original.
PrintRaising Cane’s Chicken Fingers (Gluten Free Version)
Crispy, juicy, and perfectly seasoned gluten-free chicken tenders that mimic the iconic Cane’s flavor. The buttermilk marinade ensures tender meat, while the gluten-free flour blend with cornstarch creates a crunchy, golden crust that stays crisp.
- Prep Time: 20
- Cook Time: 12
- Total Time: 32
- Yield: 4 1x
- Category: Main Course
- Method: Stovetop
- Cuisine: American
Ingredients
- 1 1/2 lb chicken breast tenders (about 8–10 tenders)
- 1 cup full-fat buttermilk
- 1 large egg
- 1 tsp kosher salt
- 1/2 tsp black pepper
- 1/2 tsp garlic powder
- 1/2 tsp onion powder
- 1/4 tsp paprika
- 1/4 tsp cayenne pepper (optional, for heat)
- 1 cup gluten-free all-purpose flour blend (with xanthan gum)
- 1/2 cup cornstarch
- 1 tsp baking powder
- 1 tsp kosher salt (for coating)
- 1/2 tsp black pepper (for coating)
- 1/2 tsp garlic powder (for coating)
- 1/2 tsp onion powder (for coating)
- 1/4 tsp paprika (for coating)
- 2 cups vegetable oil (for frying)
Instructions
- In a large bowl, whisk together the buttermilk, egg, 1 tsp kosher salt, 1/2 tsp black pepper, 1/2 tsp garlic powder, 1/2 tsp onion powder, 1/4 tsp paprika, and cayenne if using. Add the chicken tenders and toss to coat completely. Cover and refrigerate for at least 30 minutes or up to 4 hours to tenderize and infuse flavor.
- In a shallow dish or pie plate, combine the gluten-free flour, cornstarch, baking powder, 1 tsp kosher salt, 1/2 tsp black pepper, 1/2 tsp garlic powder, 1/2 tsp onion powder, and 1/4 tsp paprika. Whisk until well blended.
- Line a baking sheet with a wire rack for holding the coated tenders. Remove the chicken from the buttermilk mixture, letting any excess drip off. Working one at a time, dredge each tender in the flour mixture, pressing firmly to adhere. Shake off excess and place on the rack. Let the coated tenders rest for 10 minutes to allow the coating to set, ensuring better adhesion during frying.
- While the chicken rests, pour the vegetable oil into a large, heavy-bottomed skillet or Dutch oven to a depth of about 1/2 inch. Heat over medium-high heat until the oil shimmers and a small piece of bread sizzles immediately when dropped in (about 350°F / 175°C if using a thermometer).
- Carefully place 3-4 tenders into the hot oil in a single layer, ensuring not to overcrowd the pan. Fry for 3-4 minutes per side, turning once, until golden brown and crispy. The internal temperature should reach 165°F / 74°C. Use tongs to turn the chicken gently to avoid tearing the coating.
- Transfer the fried tenders to a clean wire rack set over a baking sheet to drain excess oil. Repeat with the remaining tenders, allowing the oil to return to temperature between batches.
- If you prefer an oven method, preheat oven to 400°F / 204°C. Place the coated tenders on a baking sheet lined with a wire rack and brush or spray lightly with oil. Bake for 20-25 minutes, flipping halfway, until internal temperature reaches 165°F / 74°C and coating is crisp. Increase broil for the last 2 minutes for extra crunch.
- Serve immediately with your favorite dipping sauce (classic Cane’s sauce is a mix of ketchup, mayonnaise, garlic powder, and Worcestershire sauce, but ensure the Worcestershire sauce is gluten-free).
Notes
Storage: Refrigerate leftover chicken fingers in an airtight container for up to 3 days. Freeze: Place cooled tenders in a single layer on a baking sheet and freeze until solid, then transfer to a freezer bag for up to 3 months. Reheat: For best crispiness, reheat in an air fryer at 375°F / 190°C for 4-6 minutes, or in a preheated oven at 400°F / 204°C for 8-10 minutes. Avoid microwave as it will make the coating soggy.
Nutrition
- Calories: 485
- Sugar: 2g
- Sodium: 840mg
- Unsaturated Fat: 4g
- Carbohydrates: 35g
- Fiber: 2g
- Protein: 34g
- Cholesterol: 115mg
Keywords: gluten free chicken fingers, Cane’s copycat, crispy chicken tenders, buttermilk fried chicken, gluten free fried chicken, chicken fingers recipe, kid friendly dinner, quick dinner, comfort food