 Kendric adan
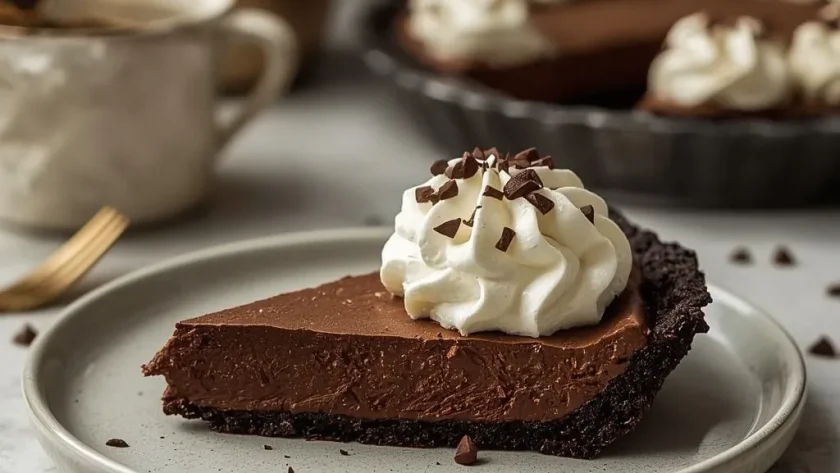
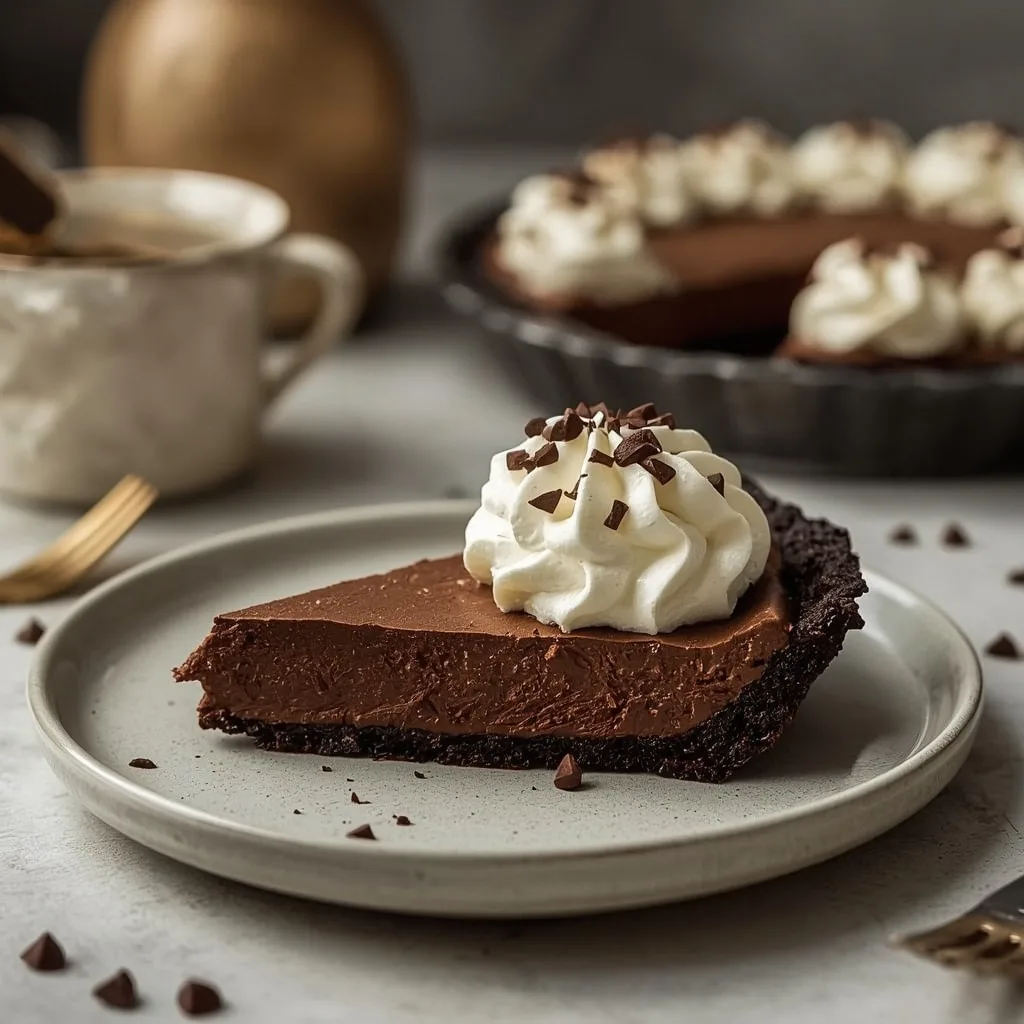
 This Easy Chocolate Pie is exactly what a dessert should be — rich, creamy, and deeply satisfying without any complicated techniques. It is a no-bake pudding pie with a crunchy chocolate cookie crust and a silky smooth filling that sets perfectly in the fridge.
This recipe takes about 15 minutes of active prep time, plus a few hours to chill. It is beginner-friendly and works beautifully for weeknight treats, dinner parties, or any occasion that calls for a simple chocolate fix. The only thing to watch closely is the stovetop pudding, which needs constant whisking to stay smooth.
Why You’ll Love This Recipe
- No oven required — This pie comes together entirely on the stovetop and in the fridge, making it ideal for hot days.
- Silky texture without extra work — The cornstarch-thickened pudding sets into a velvety filling that rivals anything from a bakery.
- Simple pantry ingredients — You likely have most of these on hand already, and the pie comes together in under 20 minutes of active effort.
What Makes This Recipe Special
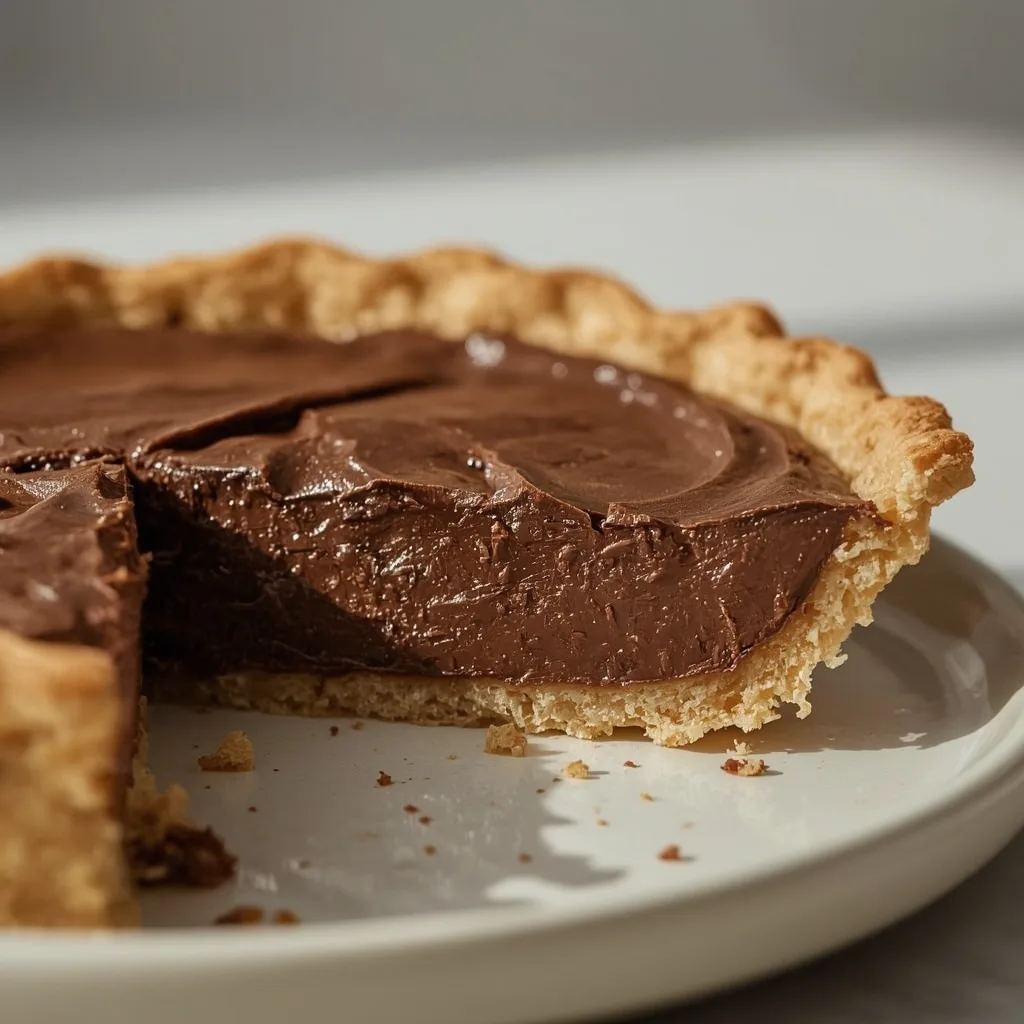
This pie skips the gelatin and artificial thickeners found in many no-bake desserts. Instead, cornstarch and egg yolks create a proper stovetop pudding that sets firm but stays luxuriously soft on the tongue. The chocolate cookie crust adds a toasty, slightly bitter contrast to the sweet cocoa filling, while the whipped cream topping provides a light, airy finish. It is an American-style cream pie that feels classic and comforting with every bite.
Ingredients You’ll Need
Here is everything you need for this pie, broken down by component. Exact measurements are listed above in the recipe card.
For the Crust
- Chocolate wafer cookies, finely crushed — These form the base of the crust. You need about 30 cookies, crushed into fine crumbs. No need to remove the creme filling if using sandwich cookies; it adds flavor and helps bind the crust.
- Unsalted butter, melted — This binds the crumbs together. Using unsalted butter lets you control the salt level in the crust.
For the Chocolate Filling
- Granulated sugar — Provides sweetness and helps thicken the pudding when cooked.
- Unsweetened cocoa powder, sifted — The main chocolate flavor. Sifting removes lumps so the pudding stays silky.
- Cornstarch — This is the thickening agent. It creates a firm, sliceable pie filling when fully cooked.
- Fine sea salt — A small amount enhances the chocolate flavor without making the pie salty.
- Whole milk — Full-fat milk gives the richest texture. Lower-fat milk will work but won’t be as creamy.
- Large egg yolks — These add richness and help set the pudding. Use only the yolks; save the whites for another recipe.
- Pure vanilla extract — Adds warmth and rounds out the chocolate flavor.
For the Whipped Topping
- Heavy cream, cold — Chilled cream whips up faster and holds its shape longer. Use at least 36% milk fat for best results.
- Powdered sugar — Dissolves instantly into the cream, giving it sweetness without grittiness.
Equipment Needed
- 9-inch pie plate — Standard size for this recipe. A glass or ceramic dish works equally well.
- Medium saucepan — For cooking the pudding. Use a heavy-bottomed pan to prevent scorching.
- Fine-mesh strainer — Straining the hot pudding catches any cooked egg bits or lumps, guaranteeing a smooth filling.
- Electric hand mixer or stand mixer — For whipping the cream by hand would take too long and the result would not be as fluffy.
- Plastic wrap — Pressed directly onto the hot pudding to prevent a skin from forming as it cools.
Instructions to Prepare Easy Chocolate Pie
Follow these steps in order for the best results. The crust sets in the fridge while you cook the filling, so there is no wasted time.
- Make the Crust — Combine crushed chocolate wafer cookies with melted butter until the mixture looks like wet sand. Press firmly into a 9-inch pie plate using the bottom of a measuring cup or a glass. Chill for at least 10 minutes while you prepare the filling.
- Mix the Dry Ingredients — In a medium saucepan, whisk together sugar, sifted cocoa powder, cornstarch, and salt until no lumps remain. This step distributes the cornstarch evenly to prevent clumps later.
- Add Milk and Egg Yolks — Gradually whisk in the milk, scraping the corners of the pan to incorporate all dry ingredients. Add the egg yolks and whisk until the mixture turns pale and slightly thickened.
- Cook the Pudding — Place the saucepan over medium heat. Whisk constantly, especially at the bottom and edges, until the mixture thickens and comes to a gentle boil (about 5-7 minutes). Once you see large, slow bubbles, continue whisking for 1 full minute. This cooks out the starch and prevents a grainy texture.
- Strain and Fill — Remove from heat and whisk in vanilla. Pour the hot pudding through a fine-mesh strainer into a clean bowl. Then pour the strained pudding into the chilled crust and spread evenly.
- Chill the Pie — Press plastic wrap directly onto the surface of the pudding to prevent skin from forming. Refrigerate for at least 3 hours, until fully set and cold.
- Make the Topping — In a chilled bowl, beat cold heavy cream and powdered sugar on medium-high speed until soft peaks form (about 2-3 minutes). Stop when the cream holds its shape but is still billowy.
- Finish and Serve — Spread or pipe the whipped cream over the chilled pie. Return to the fridge for 10-15 minutes to firm up the topping slightly before slicing. Use a hot, dry knife for clean slices.
Expert Tips for a Standout Easy Chocolate Pie
- Press the crust firmly — The crumbs need to be compacted to hold together when sliced. Use the flat bottom of a glass or measuring cup and push down with authority.
- Sift the cocoa powder — Cocoa tends to clump. Sifting it with the other dry ingredients ensures the pudding stays smooth and fully chocolatey.
- Whisk constantly on the stove — Cornstarch-thickened pudding can scorch easily if left unattended. Keep the whisk moving across the bottom and edges the entire time.
- Boil it for a full minute — Once it bubbles, let it cook for exactly 60 seconds while whisking. This step eliminates the raw starch taste and ensures the pie sets properly.
- Strain the pudding — Even if you whisk carefully, a tiny lump can form. Straining catches these and guarantees a perfectly smooth filling every time.
- Chill the pie completely — The full 3 hours is not negotiable. Cutting into a warm pie will result in a puddle instead of neat slices.
- Use cold cream for whipping — Warm cream will not whip into stiff peaks. Chill the bowl and beaters in the freezer for 5 minutes before starting for extra insurance.
Common Mistakes to Avoid
- Rushing the boil — Stopping the cooking before the pudding reaches a gentle boil means the cornstarch is not fully activated. The pie will be runny and will not hold its shape.
- Leaving the pudding unstirred — Even a few seconds of not whisking can cause scorching on the bottom of the pan. The burnt flavor will spread through the entire filling.
- Skipping the strainer — A single lump of cooked egg white or cornstarch can ruin the silky texture. Straining is a two-second step that guarantees quality.
- Cutting the pie too soon — The filling needs time to set completely. If you slice it after 2 hours instead of 3, the pudding will be too soft to hold a clean edge.
- Overwhipping the cream — Soft peaks are perfect for this pie. Whipping to stiff peaks risks turning the cream into butter, which will look grainy and feel greasy.
Variations & Ways to Customize Easy Chocolate Pie
- Mint Chocolate Pie — Add 1/4 teaspoon peppermint extract to the pudding along with the vanilla. Top with crushed peppermint candies for a holiday twist.
- Spiced Mexican Hot Chocolate Pie — Whisk 1/2 teaspoon ground cinnamon and a pinch of cayenne into the dry ingredients. The warmth complements the cocoa beautifully.
- White Chocolate Drizzle — Melt 1/4 cup white chocolate chips with 1 tablespoon heavy cream and drizzle over the finished pie before serving. It adds sweetness and visual appeal.
- Oreo Crust Version — Use 20 Oreo cookies (cream included) instead of chocolate wafer cookies. The filling stays the same, but the crust gets an extra creamy note.
- Gluten-Free Adaptation — Ensure the chocolate wafer cookies are certified gluten-free. Many brands offer gluten-free versions. The rest of the ingredients are naturally gluten-free.
What to Serve With Easy Chocolate Pie
This pie stands well on its own, but a few accompaniments can make it feel even more special.
- Fresh berries — Raspberries or strawberries add a tart contrast to the rich chocolate. A small handful on each slice brightens the whole dessert.
- Vanilla ice cream — A scoop alongside a warm slice (reheat gently) creates a classic hot-and-cold dessert combination.
- Espresso or strong coffee — The bitterness of coffee cuts through the sweetness and highlights the cocoa notes in the pie.
- Whipped cream rosettes — Pipe extra cream rosettes on top for a bakery-style finish. Dust with cocoa powder just before serving.
- Caramel sauce — A light drizzle of salted caramel over the whipped topping adds another layer of flavor that pairs beautifully with chocolate.
Make-Ahead Instructions
- Prepare the crust — The pressed crust can be made up to 2 days in advance. Keep it covered in the refrigerator until you are ready to add the filling.
- Cook the pudding — You can make the chocolate filling a day ahead. Pour it into the crust, cover with plastic wrap, and refrigerate overnight. Add the whipped cream the next day before serving.
- Whip the cream — Whipped cream holds its shape in the fridge for about 6 hours. If you are serving the pie later in the day, you can whip the cream in the morning and pipe it on just before guests arrive.
- Freeze the whole pie — Assemble the pie (without whipped cream), wrap tightly in plastic wrap and foil, and freeze for up to 2 months. Thaw overnight in the fridge, then add fresh whipped cream before serving.
Storage and Reheating
Storage
- Cover and refrigerate — Store leftover pie covered loosely with plastic wrap or in an airtight container in the fridge for up to 3 days.
- Keep the cream separate — If you plan to store leftovers for more than a day, keep the whipped cream in a separate container and add it fresh to each slice. This prevents the cream from deflating or weeping.
- Single slice storage — For individual portions, cut the pie and wrap each slice in plastic wrap. This makes it easy to grab a quick dessert without exposing the whole pie.
Reheating
- Microwave method — Place a single slice on a microwave-safe plate and heat on low power (30%) for 15-20 seconds. The pie should be slightly warm but not hot. This preserves the creamy texture.
- Oven method — For multiple slices, warm them in a 300°F (150°C) oven for about 5 minutes. Watch closely so the cream does not melt completely.
- Do not reheat the whipped cream — If reheating, remove the whipped cream first and add it fresh after warming. Melted cream ruins the texture and looks unappetizing.
- Serve cold preferred — Most people enjoy this pie straight from the fridge. Reheating is only recommended if you specifically want a warm pudding experience.
Nutritional Breakdown (Per Serving)
Based on 1 serving = 1 slice out of 4 total.
- Calories: 532
- Protein: 9g
- Fat: 31g
- Carbohydrates: about 57g
- Fiber: around 3g
- Sugar: roughly 37g
- Sodium: 261mg
Frequently Asked Questions
Can I freeze Easy Chocolate Pie?
Yes, you can freeze this pie without the whipped cream for up to 2 months. Wrap it tightly in plastic wrap and foil. Thaw overnight in the refrigerator before adding fresh whipped cream and serving.
How long does Easy Chocolate Pie last in the fridge?
Properly covered, it stays fresh for up to 3 days. The crust may soften slightly over time, but the flavor remains excellent. If you add the whipped topping, the pie is best eaten within 2 days.
Can I use milk chocolate instead of cocoa powder?
This recipe is designed for unsweetened cocoa powder to control sweetness and avoid clumps. If you want a milk chocolate flavor, substitute 1/4 cup of the cocoa powder with 1/4 cup melted milk chocolate added after cooking. Adjust the sugar down slightly.
Why is my pudding lumpy?
Lumps usually come from under-whisked dry ingredients or not cooking the pudding long enough. Sift the cocoa and cornstarch together before mixing. Also, whisk constantly on the stove and let the pudding boil for a full minute to fully dissolve any starch clumps.
Can I make this pie dairy-free?
You can substitute whole milk with full-fat oat milk or canned coconut milk. Use a vegan butter alternative for the crust. The texture will be slightly less rich, but the pie will still set and taste great. Note that the whipped cream will not work with non-dairy alternatives; use a store-bought whipped topping instead.
What kind of chocolate wafer cookies work best?
Any thin, crisp chocolate wafer cookie works. Nabisco Famous Chocolate Wafers are a classic choice. If you cannot find them, use Oreo cookies (creme included) for a slightly sweeter, softer crust. You will need about 20 Oreos to get 1 1/4 cups of fine crumbs.
Final Words
This Easy Chocolate Pie delivers everything you want in a chocolate dessert — rich flavor, a silky filling, and a buttery crunch — all without turning on the oven. The technique is simple enough for a first-time baker but the result is impressive enough for company. Give it a try this week; you will likely find yourself making it again very soon.
Similar Recipes
PrintEasy Chocolate Pie

A decadent yet simple chocolate pie with a silky, rich filling and a crisp, buttery crust. This no-bake dessert comes together in minutes, delivering deep cocoa flavor with a smooth, velvety texture that satisfies any chocolate craving.
- Prep Time: 15
- Cook Time: 195
- Total Time: 210
- Yield: 4 1x
- Category: Dessert
- Method: No-Cook
- Cuisine: American
Ingredients
- 1 1/4 cups (125g) chocolate wafer cookies, finely crushed (about 30 cookies)
- 1/4 cup (1/2 stick / 57g) unsalted butter, melted
- 1/3 cup (65g) granulated sugar
- 1/4 cup (20g) unsweetened cocoa powder, sifted
- 1/4 cup (30g) cornstarch
- 1/4 teaspoon fine sea salt
- 2 cups (480ml) whole milk
- 4 large egg yolks (reserve whites for another use)
- 1 teaspoon pure vanilla extract
- 1 cup (240ml) heavy cream, cold
- 2 tablespoons (15g) powdered sugar
Instructions
- In a medium bowl, combine the crushed chocolate wafer cookies with the melted unsalted butter. Stir with a fork until the mixture resembles wet sand and holds together when pressed. This ensures the crust will compact and hold its shape.
- Transfer the crumb mixture to a 9-inch (23cm) pie plate. Using the bottom of a measuring cup or a glass, press the crumbs firmly and evenly across the bottom and up the sides of the pie plate. Place the crust in the refrigerator to set while you prepare the filling, at least 10 minutes.
- In a medium saucepan off the heat, whisk together the granulated sugar, sifted cocoa powder, cornstarch, and fine sea salt until no lumps remain. This dry-mix step distributes the cornstarch evenly to prevent clumps in the pudding.
- Gradually whisk in the whole milk in a steady stream, making sure to scrape the corners of the pan to incorporate all the dry ingredients. Whisk until the mixture is smooth and homogenous.
- Add the egg yolks to the milk mixture and whisk thoroughly until fully combined. The mixture will look pale and slightly thickened. This emulsion is key to a silky texture.
- Place the saucepan over medium heat and cook, whisking constantly, especially at the bottom and edges, until the mixture thickens and comes to a gentle boil. This will take about 5–7 minutes. When it starts to bubble, continue whisking for 1 full minute to cook out the starch and ensure the pudding won’t turn grainy. You will see large, slow bubbles form.
- Remove the saucepan from heat and whisk in the vanilla extract. The pudding should be thick and smooth, coating the back of a spoon. Pour the hot pudding immediately through a fine-mesh strainer set over a clean bowl to catch any potential lumps if they formed.
- Pour the strained pudding into the chilled crust, spreading it evenly. Press a piece of plastic wrap directly onto the surface of the pudding to prevent a skin from forming. Refrigerate the pie for at least 3 hours, until fully set and cold.
- In a large chilled bowl, combine the cold heavy cream and powdered sugar. Using an electric hand mixer or a stand mixer with the whisk attachment, beat on medium-high speed until soft peaks form. This should take about 2–3 minutes. Stop when the cream holds its shape but is still billowy.
- Spread or pipe the whipped cream over the chilled pie. For a neat finish, use an off-set spatula. Return the pie to the refrigerator for 10–15 minutes before slicing to allow the cream to firm up slightly.
- To slice, run a sharp, thin-bladed knife under hot water, dry it off, and cut cleanly through the pie. Wipe the blade between cuts for neat, professional slices.
Notes
Store leftover chocolate pie covered in the refrigerator for up to 3 days. For longer storage, freeze the pie (without whipped cream) for up to 2 months; wrap tightly in plastic wrap and foil. To thaw, refrigerate overnight. The whipped cream is best added fresh before serving. To reheat individual slices as a warm dessert, microwave on low power (30%) for 15–20 seconds just until slightly warm, but not hot, to preserve the creamy texture.
Nutrition
- Calories: 532
- Sugar: 37g
- Sodium: 261mg
- Unsaturated Fat: 18g
- Carbohydrates: 57g
- Fiber: 3g
- Protein: 9g
- Cholesterol: 219mg
Keywords: easy chocolate pie, no bake chocolate pie, chocolate cream pie, simple chocolate dessert, quick chocolate pie, American dessert, chocolate pudding pie, homemade chocolate pie