 Kendric adan
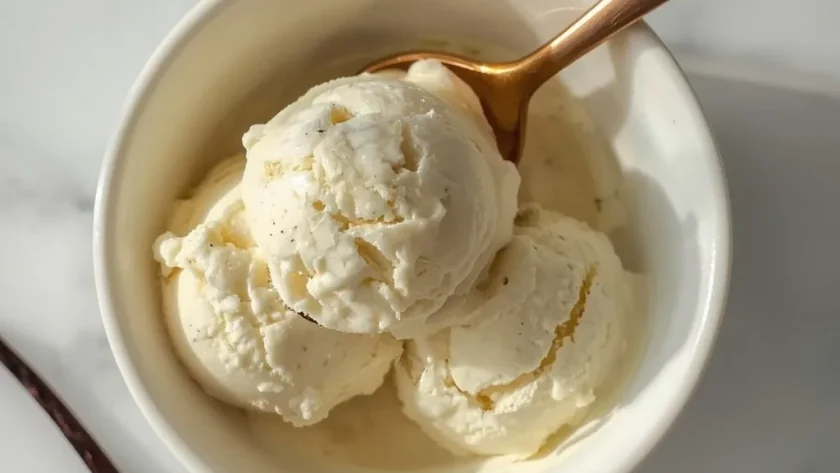
 This No Churn Vanilla Bean Ice Cream delivers a luxuriously creamy, scoopable texture without an ice cream maker. Real vanilla bean specks perfume every bite, balanced by the richness of heavy cream and sweetened condensed milk.
You can have this frozen dessert ready in about 15 minutes of active work, plus 6 hours in the freezer. It is a beginner-friendly recipe with one critical step: whipping the cream to stiff peaks without overdoing it.
Why You’ll Love This Recipe
- No machine required — You get professional-quality ice cream using just a whisk, a bowl, and your freezer.
- Real vanilla flavor — Whole vanilla bean seeds create deep, complex vanilla taste that extract cannot match.
- Scoopable from the freezer — The sweetened condensed milk keeps it soft enough to scoop directly, no thawing needed.
What Makes This Recipe Special
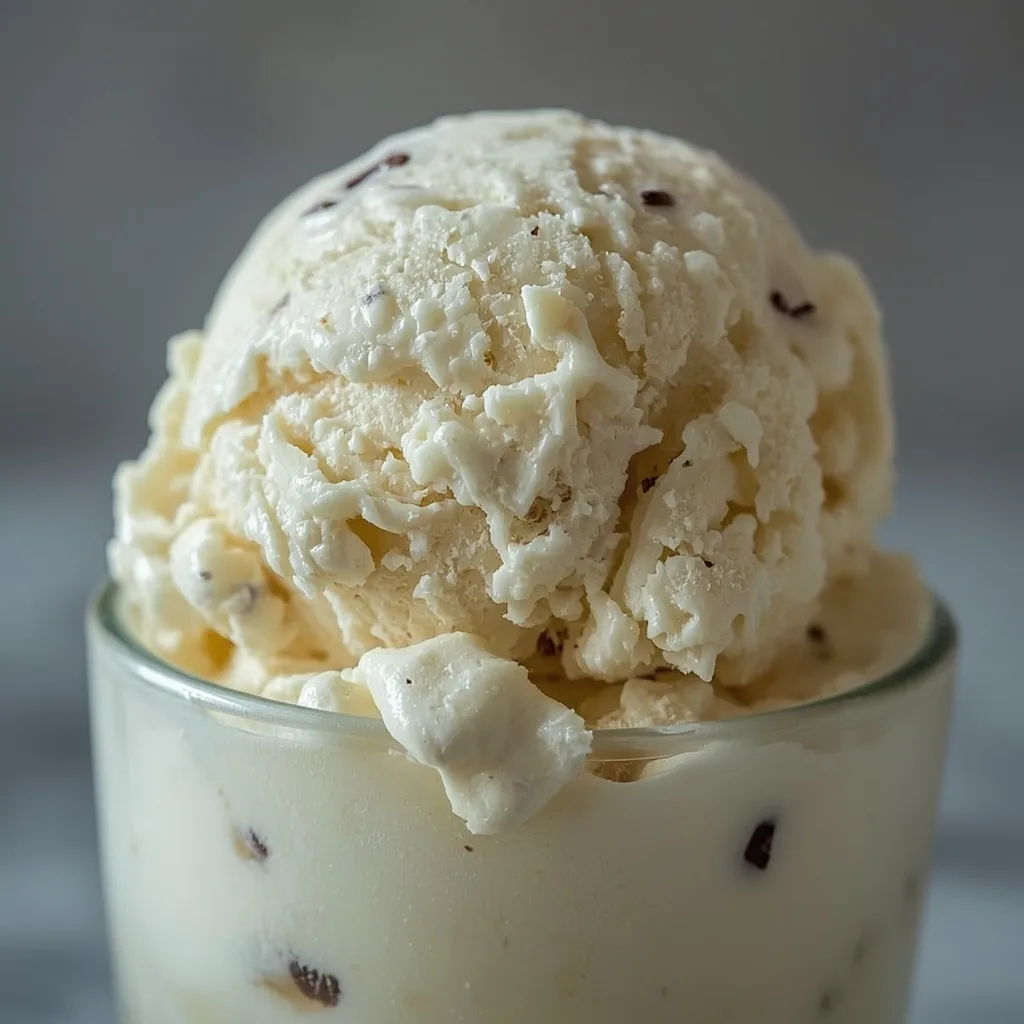
Three ingredients do the heavy lifting here: cold heavy cream, sweetened condensed milk, and a whole vanilla bean. The cream whips into stiff peaks that hold air, while the sweetened condensed milk adds sweetness and prevents icy crystals. This combination gives you a dense, velvety texture that rivals premium store-bought brands.
Ingredients You’ll Need
Gather these four simple items before you start. Quality matters here, especially with the vanilla.
Dairy Base
- Heavy cream — 2 cups (480 ml) cold. The chill helps it whip faster and hold stiffer peaks. Do not substitute half-and-half or milk here.
- Sweetened condensed milk — 1 can (14 oz / 397 g). This is not evaporated milk; the sugar content is essential for texture.
Flavorings
- Vanilla bean — 1 whole bean, split lengthwise with seeds scraped. The pod adds subtle flavor during freezing — remove it before serving.
- Fine sea salt — 1/4 teaspoon. Salt balances sweetness and sharpens the vanilla flavor. Table salt works fine here too.
Equipment Needed
- Stand mixer or hand mixer — Whipping heavy cream to stiff peaks by hand takes serious arm effort. A mixer saves time and gives consistent results.
- Large mixing bowls — You need two: one for whipping cream, one for combining the condensed milk mixture.
- Rubber spatula — Folding the whipped cream into the base gently preserves air. A wide spatula works best for this.
- 9×5-inch loaf pan — This size fits the batch perfectly. A 1-quart freezer-safe container works as a substitute.
- Parchment paper or plastic wrap — Pressing this onto the surface prevents ice crystals from forming during freezing.
Instructions to Prepare No Churn Vanilla Bean Ice Cream
The method is straightforward, but the order matters. Follow these steps exactly for the creamiest result.
- Whip the cream — Pour cold heavy cream into the mixer bowl. Whip on medium-high speed until stiff peaks form — when you lift the whisk, the cream should stand up firmly without drooping. This takes 3-5 minutes; stop immediately to avoid grainy overwhipped cream.
- Mix the base — In a separate large bowl, combine sweetened condensed milk, vanilla bean seeds (plus the empty pod for extra flavor), and fine sea salt. Whisk gently until seeds are evenly distributed with no streaks.
- Lighten the base — Add one-third of the whipped cream to the condensed milk mixture. Fold gently with a rubber spatula in broad strokes, scraping from the bottom up, until just combined. This step makes the final fold easier without deflating the cream.
- Combine everything — Pour the lightened mixture over the remaining whipped cream. Fold slowly and deliberately, turning the bowl as you go, until no white streaks remain. The batter should be uniform, airy, and thick.
- Freeze properly — Transfer to a loaf pan or freezer-safe container. Smooth the top, then press parchment or plastic wrap directly onto the surface. Freeze for at least 6 hours, ideally overnight.
- Serve — Remove the vanilla bean pod before scooping. The ice cream is scoopable straight from the freezer; if it has been frozen longer than 24 hours, let it sit at room temperature for 5 minutes before scooping.

Expert Tips for a Standout No Churn Vanilla Bean Ice Cream
- Chill your bowl and beaters — A cold bowl helps the cream whip faster and hold volume longer. Pop them in the freezer for 10 minutes before starting.
- Scrape every seed — Run the back of a knife down each half of the vanilla bean to extract every last seed. Those tiny specks carry the real flavor.
- Fold, do not stir — Stirring vigorously deflates the air you just whipped in. Use a gentle folding motion — cut through the center, scrape the bottom, fold over the top.
- Press wrap directly onto surface — Air trapped above the ice cream causes freezer burn and ice crystals. Pressing the plastic or parchment flat eliminates that gap.
- Freeze on a flat surface — Place your container on a level freezer shelf. An angled container causes the mixture to pool lopsided, which can affect texture.
- Let it sit before scooping — After 24+ hours in the freezer, the ice cream firms up more. Five minutes at room temperature softens it just enough for clean scoops.
- Store the pod for another use — The empty vanilla bean pod still carries flavor. Rinse it, dry it, and bury it in a jar of sugar to make vanilla sugar later.
Common Mistakes to Avoid
- Overwhipping the cream — The cream turns grainy and starts separating into butter. Stop the mixer the moment stiff peaks form and test by lifting the whisk.
- Skipping the salt — That 1/4 teaspoon seems small, but it brightens the vanilla and prevents a flat, overly sweet flavor. Do not leave it out.
- Using warm cream — Room-temperature cream refuses to whip into stiff peaks. Start with cream straight from the refrigerator for the best volume.
- Folding too aggressively — Rough mixing knocks air out of the whipped cream. The finished ice cream comes out dense and icy instead of light and creamy.
- Freezing without surface protection — Exposed ice cream develops a hard, icy crust within hours. Always press wrap or parchment onto the surface before freezing.
- Adding mix-ins too early — Chocolate chips, cookie pieces, or fruit sink to the bottom if folded into the batter before freezing. Stir them in after spreading half the base in the pan, then layer the rest on top.
Variations & Ways to Customize No Churn Vanilla Bean Ice Cream
- Chocolate swirl — Drizzle 1/3 cup melted dark chocolate into the batter during the final folding. Use a knife to swirl it gently — do not overmix.
- Berry ripple — Cook 1 cup fresh raspberries with 2 tablespoons sugar until jammy, then cool completely. Swirl it into the frozen base before the final freeze.
- Cookie crunch — Crush 8-10 vanilla wafer cookies or shortbread cookies into coarse crumbs. Fold them into the batter just before transferring to the pan.
- Espresso kick — Dissolve 1 tablespoon instant espresso powder into the sweetened condensed milk before adding vanilla. The coffee amplifies the vanilla without overpowering it.
- Nutty twist — Toast 1/2 cup chopped pecans or almonds, then fold them into the batter. The warm, toasted flavor contrasts beautifully with the cold, creamy base.
What to Serve With No Churn Vanilla Bean Ice Cream
A scoop of this ice cream stands beautifully on its own, but pairings turn it into a full dessert experience. Here are some natural partners.
- Warm fruit crisp — Spoon the ice cream over a bubbling apple or peach crisp. The hot fruit and cold cream create a perfect temperature contrast.
- Chocolate brownie — A fudgy, dense brownie soaks up the melting vanilla ice cream. Cut the brownie small — a little goes a long way.
- Shortbread cookies — Buttery, crumbly shortbread offers a crisp texture against the creamy scoop. Sandwich a scoop between two cookies for an impromptu ice cream sandwich.
- Caramel drizzle — Warm store-bought or homemade caramel sauce poured over the top adds richness. A pinch of flaky sea salt on top finishes the treat.
- Fresh berries — Toss strawberries, blueberries, or blackberries with a teaspoon of sugar and let them macerate for 10 minutes. The juicy fruit cuts through the cream.
Make-Ahead Instructions
- Freeze overnight — For best texture, freeze the ice cream for a full 8-12 hours instead of the minimum 6. The extra time allows the flavors to meld and the texture to stabilize.
- Mix the base a day early — Combine the sweetened condensed milk, vanilla bean seeds, and salt, then refrigerate in a sealed container. Whip the cream and fold everything together the next day.
- Portion into individual cups — For quick single servings, spoon the batter into 4-ounce ramekins or small freezer-safe jars. Freeze uncovered until firm, then cover and seal.
- Keep the surface wrap — If you plan to store the ice cream for more than a week, double-wrap it: first with plastic pressed onto the surface, then a tight lid or foil over the container.
Storage and Reheating
Storage
- Airtight container — Transfer leftovers to a container with a tight-fitting lid. Press plastic wrap directly onto the ice cream surface before sealing to block air pockets.
- Freezer shelf — Store at the back of the freezer, not the door, where temperature fluctuates less. Keep away from raw meat or strong-smelling foods to prevent odor absorption.
- Maximum duration — The ice cream stays fresh for up to 1 month. After that, texture begins to decline and ice crystals become noticeable.
- Do not refreeze — Once the ice cream melts to a liquid state, it cannot be refrozen without turning icy and grainy. Scoop only what you plan to eat.
Reheating
- Room temperature soften — Let the container sit on the counter for 5-10 minutes before scooping. This method preserves texture better than microwaving.
- Microwave (quick method) — Scoop the desired portion into a microwave-safe bowl. Heat on 30% power for 15-20 seconds — just enough to soften without melting.
- Warm water knife — Dip your ice cream scoop in warm water between scoops. The heat helps slice through hard ice cream cleanly.
- Refrigerator thaw — If the entire batch is too hard, move it to the refrigerator for 20-30 minutes. This gentle thaw prevents the edges from melting while the center softens.
Nutritional Breakdown (Per Serving)
Based on 1 serving = 1 scoop out of 4 total servings.
- Calories: 565
- Protein: 7g
- Fat: 38g
- Saturated Fat: about 22g
- Carbohydrates: 49g
- Fiber: 0g
- Sugar: 46g
- Sodium: around 200mg
- Cholesterol: roughly 115mg
Frequently Asked Questions
Can I use vanilla extract instead of a vanilla bean in No Churn Vanilla Bean Ice Cream?
Yes, substitute 2 teaspoons of pure vanilla extract for the bean. You will lose the visible specks and slightly less complex flavor, but the ice cream will still taste good.
How long does No Churn Vanilla Bean Ice Cream last in the freezer?
Stored properly with plastic pressed onto the surface, it stays fresh for up to 1 month. After that, ice crystals may form and the texture becomes less creamy.
Why did my ice cream turn out icy instead of creamy?
Two common causes: the cream was not whipped to stiff peaks, or the surface was not covered during freezing. Both allow ice crystals to form. Rewhip the cream fully and press wrap directly onto the batter next time.
Can I use light cream or half-and-half in this recipe?
No, the fat content in heavy cream is essential for the creamy texture and stable structure. Lighter creams will make the ice cream thin and icy.
Do I need to remove the vanilla bean pod before freezing?
You can leave the pod in during freezing to infuse more flavor. Just remove it before serving — the texture is unpleasant to bite into. Rinse and dry the pod for vanilla sugar later.
Can I double this recipe for a larger batch?
Yes, double all ingredients and use a larger container, such as a 2-quart freezer-safe dish. Whip the cream in batches if your mixer bowl is small, and freeze for at least 8-10 hours to ensure the center solidifies.
Final Words
This No Churn Vanilla Bean Ice Cream proves you do not need fancy equipment to make a truly superior frozen dessert at home. The real vanilla seeds, the silky texture, and the simple four-ingredient list make it a recipe worth keeping. Try it once, and it will likely become your go-to summer treat.
Similar Recipes
- Applebees Triple Chocolate Meltdown
- Baskin Robbins Peanut Butter Pie
- Snickerdoodle Cookies
- Sour Cream Cornbread Muffins
No Churn Vanilla Bean Ice Cream

This no-churn vanilla bean ice cream delivers a luxuriously creamy, scoopable texture without an ice cream maker. Real vanilla bean specks perfume every bite, balanced by the richness of heavy cream and sweetened condensed milk.
- Prep Time: 15
- Total Time: 375
- Yield: 4 1x
- Category: Dessert
- Method: No-Cook
- Cuisine: American
Ingredients
- 2 cups (480 ml) heavy cream, cold
- 1 (14 oz / 397 g) can sweetened condensed milk
- 1 whole vanilla bean, split lengthwise and seeds scraped
- 1/4 teaspoon fine sea salt
Instructions
- In the bowl of a stand mixer fitted with the whisk attachment (or in a large bowl using a hand mixer), pour the cold heavy cream. Whip on medium-high speed until stiff peaks form — when you lift the whisk, the cream should stand up firmly without drooping. This takes 3-5 minutes; do not overwhip or it will turn grainy.
- In a separate large bowl, combine the sweetened condensed milk, the scraped vanilla bean seeds (both the seeds and the empty pod can be added for extra flavor), and the fine sea salt. Whisk gently until the seeds are evenly distributed and no streaks of vanilla remain.
- Add one-third of the whipped cream to the condensed milk mixture. Fold gently with a rubber spatula in broad strokes, scraping from the bottom up, until just combined. This lightens the condensed milk mixture, making it easier to incorporate the rest of the cream without deflating it.
- Pour the lightened mixture over the remaining whipped cream. Fold slowly and deliberately, turning the bowl as you go, until no white streaks remain. The batter should be uniform, airy, and thick.
- Transfer the mixture to a 9×5-inch loaf pan or a 1-quart freezer-safe container. Smooth the top with the spatula. Press a piece of parchment paper or plastic wrap directly onto the surface to prevent ice crystals from forming.
- Freeze for at least 6 hours, ideally overnight, until firm enough to scoop. The ice cream will be scoopable directly from the freezer; if frozen longer than 24 hours, let it sit at room temperature for 5 minutes before scooping.
- Remove the vanilla bean pod before serving (if used). Scoop into bowls or cones and enjoy. The texture should be silky, creamy, and densely vanilla.
Notes
Store in an airtight container in the freezer for up to 1 month. For best texture, press a piece of plastic wrap directly onto the surface before sealing. To soften before serving, let stand at room temperature for 5-10 minutes. Do not refreeze after melting.
Nutrition
- Calories: 565
- Sugar: 46g
- Sodium: 200mg
- Saturated Fat: 23g
- Carbohydrates: 49g
- Fiber: 0g
- Protein: 7g
- Cholesterol: 130mg
Keywords: no churn vanilla bean ice cream, homemade vanilla ice cream, no ice cream maker, vanilla bean dessert, easy ice cream, summer dessert, creamy vanilla, sweet treat, no cook ice cream, four ingredient ice cream