 Kendric adan
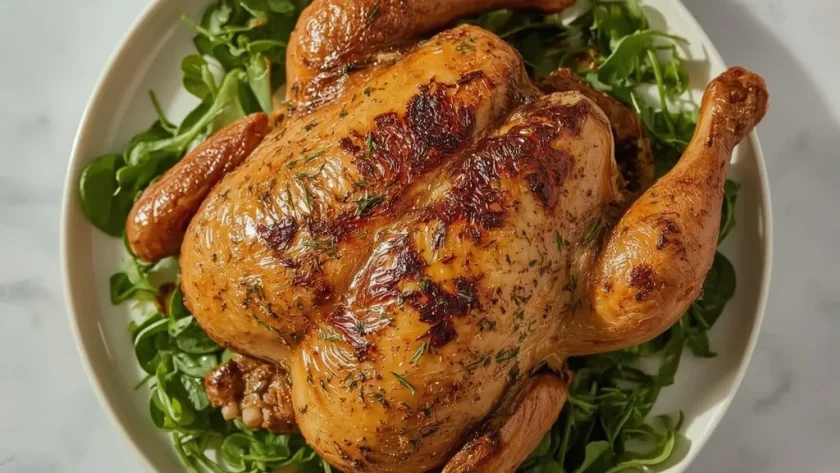
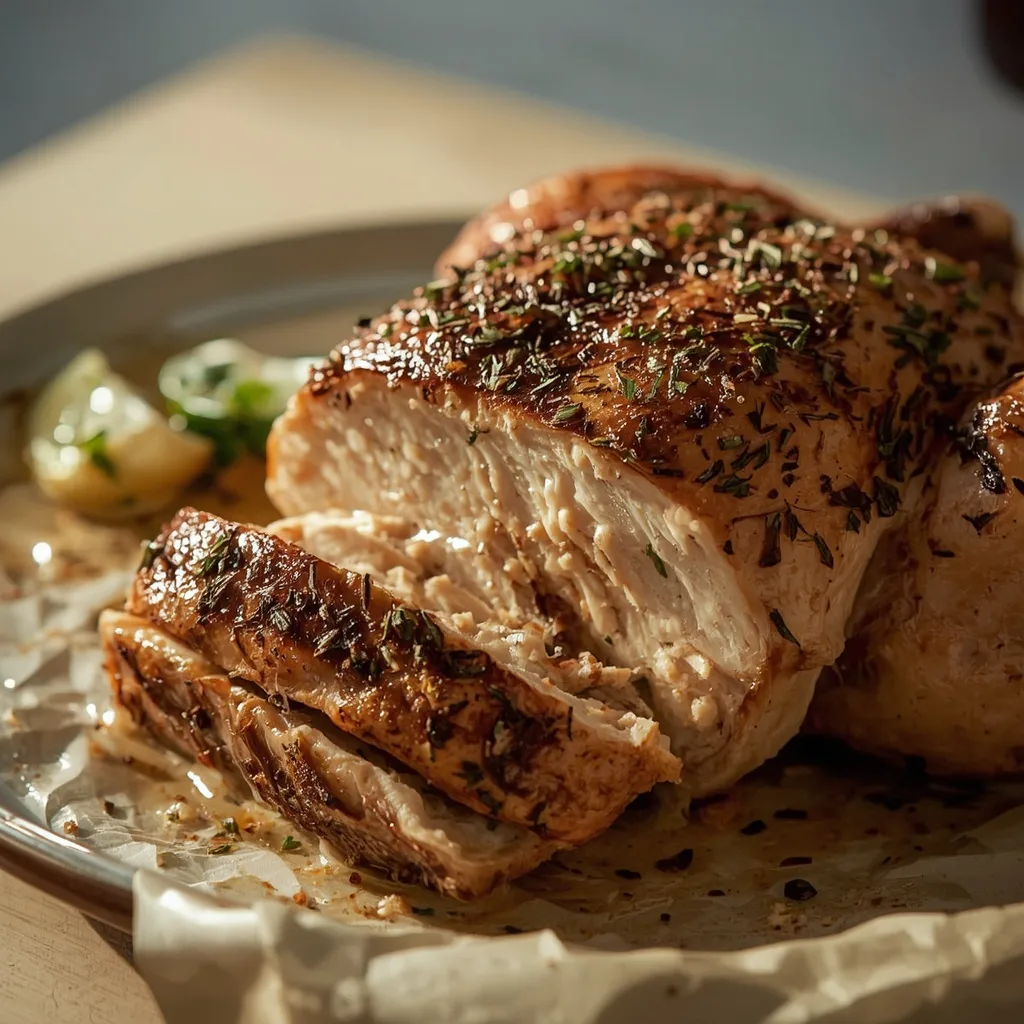
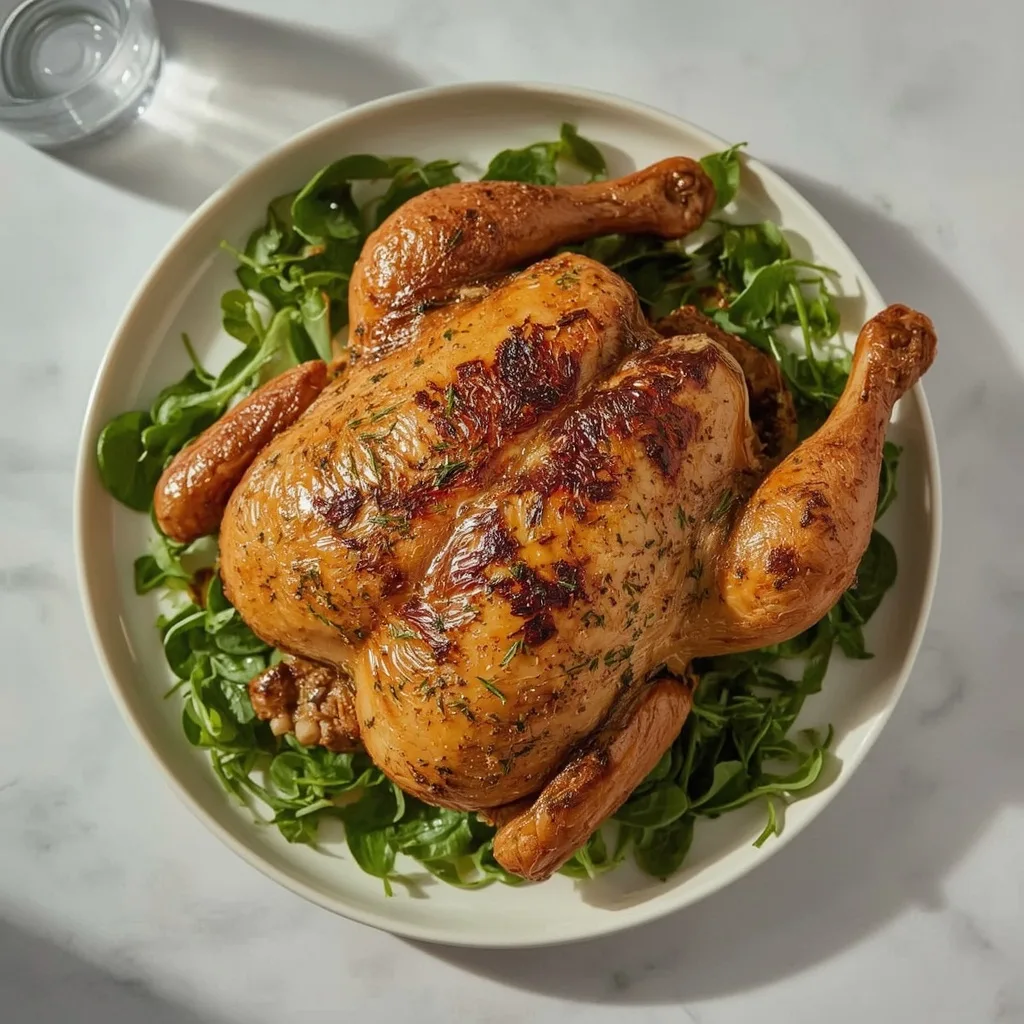
 Keto Boston Market Rotisserie Chicken brings that familiar, herb-crusted rotisserie flavor right into your own kitchen, minus the sugars and carbs you would rather avoid. The smoky, garlicky rub creates a deeply seasoned skin while the meat underneath stays remarkably tender and juicy.
You can have this on the table in about 90 minutes total, and I would call it beginner-friendly since the technique is mostly hands-off roasting. The only slightly tricky moment comes when flipping the hot bird halfway through, so grab sturdy tongs before you start.
Why You’ll Love This Recipe
- Simple Ingredients — Most of the spice rub comes from pantry staples you probably already own, with just a fresh lemon and rosemary to pick up.
- Genuinely Low Carb — At only 2g net carbs per serving, this fits comfortably into a keto lifestyle without feeling like a compromise.
- Crispy Skin Every Time — The combination of thorough drying, high heat, and a wire rack delivers that shatteringly crisp exterior you expect from rotisserie chicken.
What Makes This Recipe Special
The dry rub does most of the heavy lifting here, blending smoked paprika, garlic, onion, thyme, and oregano into something far more complex than a simple salt and pepper coating. Starting the chicken breast-side down protects the leaner meat from drying out while allowing the dark meat to render and crisp. The result tastes like a weekend roast that took hours of attention, when in reality the oven does nearly all the work. This makes a fantastic Sunday dinner or a meal-prep hero for busy weeks.
Ingredients You’ll Need
Everything on this list pulls together the classic rotisserie flavor profile without any hidden carbs or added sugars.
The Chicken and Oil
- 1 whole chicken (about 4 lb / 1.8 kg) — The centerpiece of the dish. Look for a bird with the giblets removed so it is ready to season immediately.
- 2 tbsp olive oil — This helps the spice rub adhere to the skin and encourages even browning during roasting.
The Spice Rub
- 1 tbsp kosher salt — Larger crystals distribute more evenly and season the meat deeply, so avoid fine table salt here.
- 2 tsp smoked paprika — This delivers the characteristic rotisserie smokiness that makes the dish taste like it came from a professional oven.
- 1 tsp garlic powder — Adds savory depth without the burning risk of fresh garlic at high temperatures.
- 1 tsp onion powder — Rounds out the savory notes with a subtle sweetness that balances the smoke.
- 1/2 tsp ground black pepper — Brings gentle heat and sharpness to the rub.
- 1/2 tsp dried thyme — Earthy and slightly floral, this herb pairs beautifully with poultry.
- 1/2 tsp dried oregano — Adds a Mediterranean touch that complements the other herbs without overwhelming them.
- 1/4 tsp cayenne pepper (optional, for heat) — Include this if you want a gentle kick; leave it out for a milder finish.
The Aromatics
- 1 lemon, halved — Placed inside the cavity, it steams and perfumes the meat from within, keeping everything moist.
- 4 sprigs fresh rosemary — These add an aromatic, pine-like fragrance that infuses the chicken as it roasts. Dried rosemary works in a pinch, though the flavor will be more subtle.
Equipment Needed
You do not need anything fancy, but a few specific tools make a noticeable difference in the final result.
- Wire rack and rimmed baking sheet — The rack lifts the chicken so hot air circulates underneath, preventing a soggy bottom and promoting even crisping.
- Kitchen twine — Tying the legs keeps the bird compact and ensures the thighs cook at the same rate as the breast.
- Meat thermometer — This removes all guesswork about doneness; 165°F (74°C) in the thickest part of the thigh means it is ready.
- Sturdy tongs and a spatula — You will need both to safely flip the hot chicken halfway through roasting without tearing the skin.
- Paper towels — Thorough drying before seasoning is non-negotiable for achieving crisp skin, so keep a generous stack on hand.
Instructions to Prepare Keto Boston Market Rotisserie Chicken
These steps follow the classic rotisserie method adapted for a standard home oven, with attention paid to the small details that make the biggest difference.
- Bring to Room Temperature — Pull the chicken from the fridge 30 minutes before cooking and pat it thoroughly dry with paper towels. This step matters more than you might think; cold meat cooks unevenly and the surface moisture steams instead of crisping.
- Preheat the Oven — Set it to 400°F (204°C) with the rack positioned in the lower third. That placement distributes heat more evenly and encourages proper browning rather than scorching the top.
- Mix the Dry Rub — Combine the kosher salt, smoked paprika, garlic powder, onion powder, black pepper, dried thyme, dried oregano, and cayenne if using in a small bowl. Stir everything together until the spices are evenly distributed.
- Apply the Oil — Rub the olive oil all over the exterior of the chicken with your hands, making sure to coat every section. This creates the sticky surface the spice rub needs to cling to.
- Season Generously — Sprinkle the spice rub evenly over the entire chicken, including the underside and the inside of the cavity. Massage the spices into the skin and any exposed meat so every bite carries flavor.
- Stuff the Cavity — Place the halved lemon and fresh rosemary sprigs inside. As the chicken roasts, these release steam and aroma that keep the meat moist from the inside out.
- Tie and Tuck — Secure the legs with kitchen twine and tuck the wing tips under the body. This prevents the thin wings from burning while the thicker parts finish cooking.
- Start Breast-Side Down — Set the chicken breast-side down on the wire rack over the baking sheet. Starting this way protects the lean breast meat and lets the dark meat start rendering first.
- Roast and Flip — Roast for 30 minutes, then carefully flip the bird breast-side up using tongs and a spatula. Continue roasting for another 45 to 55 minutes, until the thickest part of the thigh hits 165°F (74°C). If the skin browns too quickly, tent it loosely with foil.
- Rest Before Carving — When the juices run clear from the thigh and the skin is deep golden, transfer the chicken to a cutting board and let it rest for 15 minutes. This rest period lets the juices redistribute so the meat stays moist when carved.
- Carve and Serve — Remove the legs and thighs first, then slice the breast against the grain. Serve warm alongside roasted vegetables or a fresh green salad.
Expert Tips for a Standout Keto Boston Market Rotisserie Chicken
These are the details that separate a good roast chicken from a great one. I learned several of these the hard way.
- Pat the skin absolutely dry — Even a hint of surface moisture will steam before it browns, and that steam kills crispness. Take an extra minute to press paper towels into every crevice.
- Let the chicken sit out fully — The full 30 minutes at room temperature makes a real difference in even cooking. A fridge-cold bird will still be pink near the bone when the breast hits temperature.
- Season under the skin too — Gently loosen the skin over the breast and rub some spice directly onto the meat. This flavors the flesh itself, not just the exterior.
- Skip the basting — Opening the oven repeatedly drops the temperature and extends cooking time. The oil rub and cavity aromatics provide enough moisture on their own.
- Trust the thermometer over time — Ovens run hot or cold, and chicken sizes vary. The listed time range is a guide; the internal temperature is the definitive answer.
- Do not skip the rest — Carving immediately after roasting releases all those flavorful juices onto the cutting board instead of keeping them in the meat. Fifteen minutes feels long, but the payoff is worth it.
Common Mistakes to Avoid
These missteps pop up often in reader comments, and they are easy to prevent once you know what to watch for.
- Skipping the dry step — Wet skin steams instead of crisping, leaving you with rubbery, pale skin. The extra minute of patting pays off dramatically in texture.
- Overcrowding the pan — If the chicken touches the pan edges or another dish, those contact points will never crisp. Give it room on the rack.
- Opening the oven door constantly — Every peek costs heat and adds cooking time. Trust your thermometer and check only when you expect it to be close.
- Using too much cayenne — A quarter teaspoon adds pleasant warmth, but loading more can overwhelm the delicate herb flavors. Start with less if you are unsure.
- Resting on a flat board — Juice pools and the bottom skin turns soggy. Rest on the wire rack or a board with a channel to catch drips.
Variations & Ways to Customize Keto Boston Market Rotisserie Chicken
The base recipe stands beautifully on its own, but small tweaks can shift the flavor profile to suit whatever you are craving.
- Herb-Forward Version — Add an extra teaspoon of dried thyme and oregano, plus a handful of fresh herbs tucked under the skin. This brightens the profile for spring and summer meals.
- Spicy Southwest Twist — Double the smoked paprika and add an extra pinch of cayenne. A squeeze of lime over the carved meat brightens everything up.
- Garlic Lovers Upgrade — Slice two garlic cloves and slide them under the skin before roasting. The cloves mellow to a sweet, nutty flavor that permeates the breast.
- Butter Alternative — Swap the olive oil for melted butter to get a richer, more deeply browned exterior. The butter adds saturated fat, which fits nicely into a keto macro plan.
- Lemon-Pepper Variation — Increase the black pepper to a full teaspoon and add the zest of the lemon to the spice rub. This gives a brighter, more citrus-forward result.
What to Serve With Keto Boston Market Rotisserie Chicken
The beauty of this dish is how well it pairs with a wide range of keto-friendly sides, from simple vegetables to richer preparations.
- Roasted Asparagus — Toss asparagus spears with olive oil, salt, and pepper, then roast alongside the chicken during the last 15 minutes. The slight bitterness cuts through the rich meat perfectly.
- Cauliflower Mash — Creamy mashed cauliflower soaks up the chicken juices beautifully and offers that comforting potato-like texture without the carbs.
- Green Salad with Vinaigrette — A crisp salad with a tangy lemon vinaigrette balances the smoky, savory chicken and keeps the whole meal feeling light.
- Zucchini Noodles — Quick-sautéed zoodles with garlic provide a fresh, vegetable-forward base that pairs well with the herb notes in the rub.
- Roasted Brussels Sprouts — Halved sprouts roasted until caramelized develop a nutty sweetness that complements the smoky paprika beautifully.
- Bone Broth — Serve a warm mug of bone broth alongside for a deeply nourishing, warming addition to the meal.
Make-Ahead Instructions
This chicken works well for meal prep, and a little planning makes the whole process smoother.
- Prep the Dry Rub in Advance — Mix the spice blend up to a week ahead and store it in an airtight jar. That way, dinner comes together in minutes when you are ready.
- Season the Night Before — Rub the oil and spices on the chicken, cover it, and refrigerate overnight. The extra time lets the flavors penetrate deeper into the meat.
- Cook Early in the Day — Roast the chicken in the morning, let it cool, then slice and portion it into containers. Reheat portions as needed throughout the week.
- Freeze Portions for Later — Carved meat freezes well for up to 3 months without losing much quality. Skip the skin when freezing, as it tends to turn rubbery.
Storage and Reheating
Leftovers keep well, but the right storage and reheating methods make all the difference in preserving both flavor and texture.
Storage
- Refrigerator Method — Store leftover chicken in an airtight container in the fridge for up to 4 days. Keep the meat and skin together for the best texture.
- Freezer Option — Place carved meat in a freezer-safe bag, squeeze out excess air, and freeze for up to 3 months. Remove the skin first, as it loses its crispness when frozen.
- Moisture Protection — Add a small splash of broth to the storage container before sealing. This keeps the meat from drying out during refrigeration.
Reheating
- Oven Method — Place chicken in a 350°F (177°C) oven for 10-15 minutes until warmed through. This restores some crispness to the skin better than any other method.
- Microwave Approach — Heat on medium power for 2-3 minutes, watching carefully to avoid overcooking. The skin will lose crispness, so expect a softer texture.
- Quick Refresh — For small portions, a hot skillet with a splash of broth works well. Reheat over medium heat for 3-4 minutes per side.
Nutritional Breakdown (Per Serving)
Based on 1 serving out of 4 total, this fits neatly into a standard keto macro plan. The numbers assume you eat the skin, which is where most of the fat lives.
- Calories — 450
- Protein — 48g
- Fat — 26g
- Carbohydrates — about 2g
- Fiber — 0g
- Sugar — about 1g
- Sodium — around 890mg
Frequently Asked Questions
Can I freeze Keto Boston Market Rotisserie Chicken?
Yes, and it stores remarkably well. Remove the skin before freezing, place the meat in a freezer-safe bag, and it will keep for up to 3 months without losing much quality.
How long does Keto Boston Market Rotisserie Chicken last in the fridge?
Properly stored in an airtight container, leftovers stay fresh for up to 4 days. Add a splash of broth to the container before sealing to help keep the meat moist.
Can I use a different bird size with this recipe?
Absolutely. A slightly smaller or larger chicken works fine, but adjust the cooking time accordingly. The thermometer remains your most reliable guide regardless of size.
What if I do not have fresh rosemary?
Substitute 1 teaspoon of dried rosemary in the spice rub instead. The flavor will be a bit more subtle, but the chicken will still taste excellent.
Is the skin really necessary for the keto macros?
You could remove the skin to reduce calories and fat, but you would also lose the crisp texture that makes this dish so satisfying. The fat in the skin helps you feel full longer on a keto diet.
More Recipes
Final Words
Making Keto Boston Market Rotisserie Chicken at home gives you all the flavor of the restaurant version without the hidden sugars or the drive. The technique is forgiving, the ingredients are simple, and the payoff comes in that first bite of crispy, smoky skin followed by juicy, tender meat. Give this one a try on your next Sunday and see just how easy impressive low-carb cooking can be.
PrintKeto Boston Market Rotisserie Chicken
This keto-friendly version of Boston Market’s rotisserie chicken delivers the same juicy, herb-crusted exterior and tender, flavorful meat without the added sugars. The smoky, garlicky spice blend creates a crispy skin while the meat stays moist and succulent, making it an ideal centerpiece for a low-carb meal.
- Prep Time: 15
- Cook Time: 75
- Total Time: 90
- Yield: 4 1x
- Category: Main Course
- Method: Baking
- Cuisine: American
Ingredients
- 1 whole chicken (about 4 lb / 1.8 kg), giblets removed
- 2 tbsp olive oil
- 1 tbsp kosher salt
- 2 tsp smoked paprika
- 1 tsp garlic powder
- 1 tsp onion powder
- 1/2 tsp ground black pepper
- 1/2 tsp dried thyme
- 1/2 tsp dried oregano
- 1/4 tsp cayenne pepper (optional, for heat)
- 1 lemon, halved
- 4 sprigs fresh rosemary (or 1 tsp dried rosemary)
Instructions
- Remove the chicken from the refrigerator 30 minutes before cooking to allow it to come to room temperature. Pat the chicken thoroughly dry with paper towels—this is crucial for achieving crispy skin.
- Preheat your oven to 400°F (204°C). Position an oven rack in the lower third of the oven to ensure even heat distribution and proper browning.
- In a small bowl, combine the kosher salt, smoked paprika, garlic powder, onion powder, black pepper, dried thyme, dried oregano, and cayenne pepper if using. Mix well to create a dry rub.
- Rub the olive oil all over the exterior of the chicken, using your hands to coat evenly. This helps the spice rub adhere and promotes golden, crispy skin.
- Sprinkle the spice rub evenly over the entire chicken, including the underside and inside the cavity. Use your hands to massage the spices into the skin and any exposed meat.
- Place the halved lemon and fresh rosemary sprigs inside the chicken cavity. This adds aromatic moisture and flavor from within as the chicken roasts.
- Tie the chicken legs together with kitchen twine and tuck the wing tips under the body. This ensures even cooking and prevents the tips from burning.
- Place the chicken breast-side down on a wire rack set inside a rimmed baking sheet. This allows air to circulate underneath, promoting even browning and crisp skin.
- Roast the chicken for 30 minutes, then flip it breast-side up using tongs and a spatula. Be careful—the chicken will be hot. Continue roasting for another 45 to 55 minutes, or until the internal temperature in the thickest part of the thigh reaches 165°F (74°C). If the skin is browning too quickly, tent loosely with foil.
- When done, the juices should run clear when you pierce the thigh, and the skin should be deep golden and crisp. Rest the chicken on a cutting board for 15 minutes before carving. This allows the juices to redistribute, keeping the meat moist.
- Carve the chicken by removing the legs and thighs first, then slicing the breast against the grain. Serve warm, with your favorite keto sides like roasted vegetables or a fresh green salad.
Notes
Storage: Leftover chicken can be stored in an airtight container in the refrigerator for up to 4 days. Freeze (without skin, if possible) in a freezer-safe bag for up to 3 months. To reheat, place chicken in a 350°F (177°C) oven for 10-15 minutes until warmed through. You can also reheat in the microwave on medium power for 2-3 minutes, but the skin will lose crispness. For best results, add a small splash of broth before reheating to keep the meat moist.
Nutrition
- Calories: 450
- Sugar: 1g
- Sodium: 890mg
- Unsaturated Fat: 6g
- Carbohydrates: 2g
- Fiber: 0g
- Protein: 48g
- Cholesterol: 200mg
Keywords: keto rotisserie chicken, Boston Market chicken, low carb chicken recipe, roasted chicken, gluten free chicken, high protein dinner, keto main dish, rotisserie style chicken