 Kendric adan
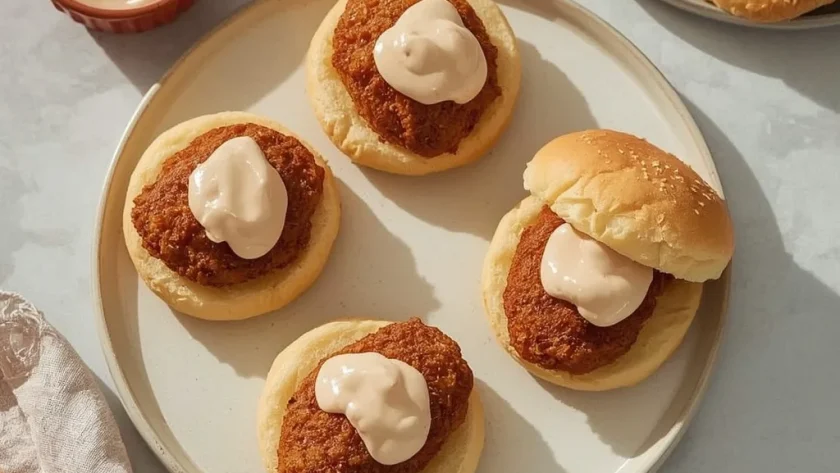
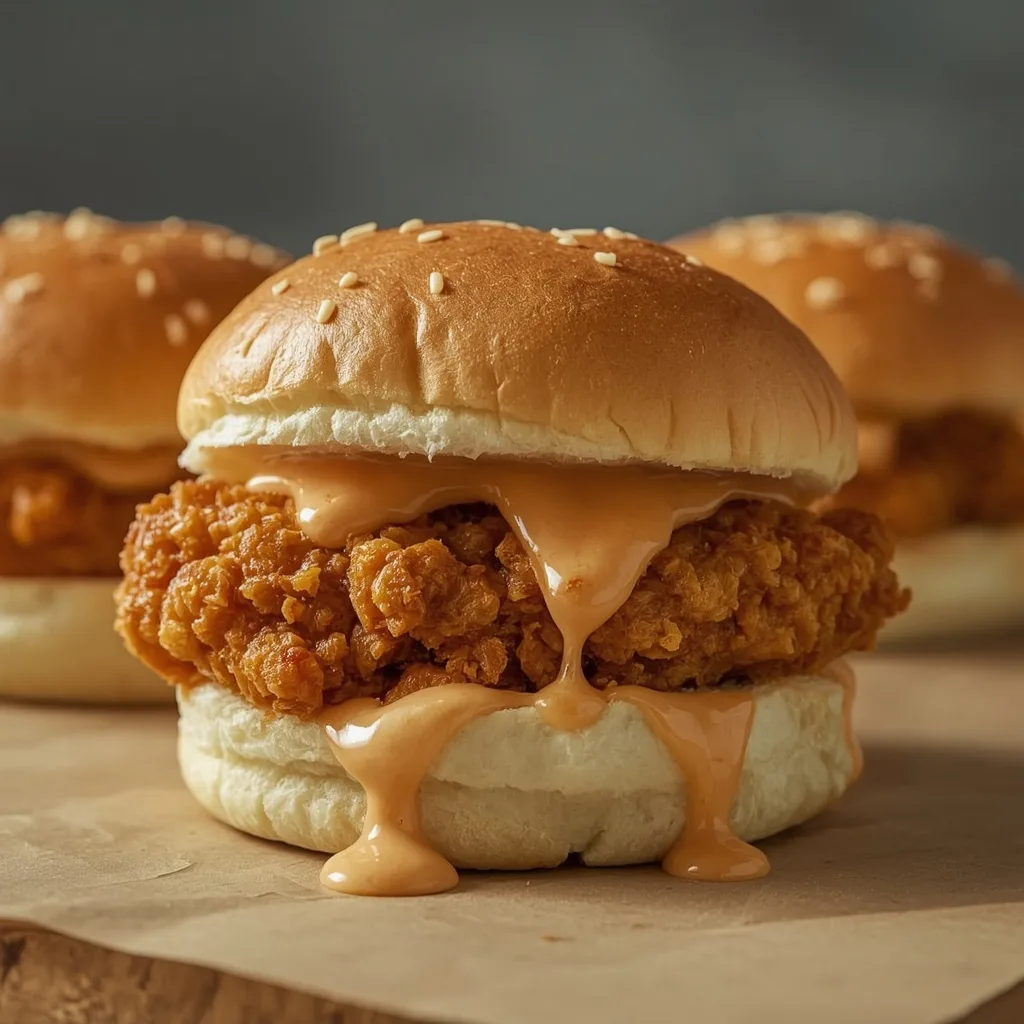
 KFC Chicken Littles (Retro Style) brings back that beloved fast-food sandwich from the 90s, minus the drive-thru. Tender, juicy chicken strips in a crispy seasoned coating, tucked into soft slider buns with a tangy pickle sauce — it’s a small sandwich with big nostalgia.
This recipe takes about 30 minutes from start to finish and is beginner-friendly. The only slightly tricky part is getting the oil temperature right for frying, but the visual cues I share will guide you through. Perfect for a casual weeknight dinner or game-day snacking.
Why You’ll Love This Recipe
- Fast — From cutting board to table in just 30 minutes, this beats waiting in a drive-thru line any day.
- Beginner-friendly — Simple steps and clear visual cues make this approachable even if you rarely fry food at home.
- Family favorite — Kids and adults both reach for these little sandwiches. They disappear fast.
What Makes This Recipe Special
The buttermilk marinade does double duty here — it tenderizes the chicken and gives the coating something to cling to, so every bite stays crunchy. That sauce is the real star though: mayonnaise, dill pickle relish, Dijon mustard, and white vinegar create that familiar tangy-creamy kick you remember. Between the crispy exterior and the soft bun, the texture contrast is exactly what makes these so satisfying.
Ingredients You’ll Need
Everything here is straightforward — most of it is probably already in your pantry. Here is what you need, broken down by category.
For the Chicken and Marinade
- 1 lb boneless, skinless chicken breast, cut into 1-inch strips — This is the base of the whole dish. Cut against the grain for extra tenderness.
- 1 cup buttermilk — The acidity tenderizes the chicken and helps the coating stick. No buttermilk on hand? Whole milk with a tablespoon of lemon juice works in pinch.
- 1 large egg — Helps bind the marinade together and gives the coating something to grip.
For the Coating
- 1/2 cup all-purpose flour — Provides the structure for that crispy crust.
- 1/4 cup cornstarch — The secret to extra crunch. Cornstarch creates a lighter, crispier texture than flour alone.
- 1 teaspoon paprika — Gives the coating that classic golden color.
- 1/2 teaspoon garlic powder — Savory depth without being overpowering.
- 1/2 teaspoon onion powder — Rounds out the savory profile.
- 1/2 teaspoon kosher salt — Essential for seasoning the crust itself, not just the chicken.
- 1/4 teaspoon black pepper — A little warmth in the background.
- 1/4 teaspoon cayenne pepper (optional, for heat) — Skip it if you want mild, or keep it for a subtle kick that builds.
For Frying and Assembly
- 1 cup neutral oil (like canola or vegetable) — Frying at around 350°F requires an oil with a high smoke point. Canola or vegetable work perfectly.
- 4 soft slider buns or small brioche buns — Small, soft buns that won’t overpower the chicken. Brioche adds a touch of sweetness.
- 1/4 cup mayonnaise — The creamy base of the signature sauce.
- 2 tablespoons dill pickle relish — This is where that tangy flavor comes from. Don’t skip it.
- 1 teaspoon Dijon mustard — Adds a sharp note that balances the creaminess.
- 1/2 teaspoon white vinegar — Brightens the sauce and ties everything together.
Equipment Needed
You probably own most of this already. Here is what makes the process smoother.
- Large heavy-bottomed skillet — Cast iron or stainless steel holds heat evenly, which matters for consistent frying.
- Wire rack over a baking sheet — This keeps the fried chicken crisp instead of soggy. Paper towels trap steam and ruin the coating.
- Tongs — For safely placing and flipping the chicken in hot oil.
- Shallow dish — Wide enough to dredge the chicken strips easily in the flour mixture.
- Instant-read thermometer — Optional but helpful. You want the oil around 350°F and the chicken at 165°F internally.
Instructions to Prepare KFC Chicken Littles (Retro Style)
The process moves quickly once you start frying, so read through the steps first. Everything comes together in about half an hour.
- Marinate the chicken — Whisk the buttermilk and egg until combined, then add the chicken strips, ensuring each piece is submerged. Let it sit for at least 15 minutes at room temperature, or up to 2 hours in the fridge for extra tenderness.
- Prepare the coating — In a shallow dish, whisk together the flour, cornstarch, paprika, garlic powder, onion powder, salt, black pepper, and cayenne if using. This mixture delivers that signature crispy crunch.
- Coat the strips — Set a wire rack over a baking sheet. One by one, remove each strip from the marinade, letting excess drip off. Dredge thoroughly in the flour mixture, pressing gently to adhere. Rest the coated strips on the rack for 5 minutes — this step prevents the coating from falling off during frying.
- Make the sauce — Stir together the mayonnaise, dill pickle relish, Dijon mustard, and white vinegar until smooth. Taste and add a pinch of salt if needed. Refrigerate until ready to serve.
- Heat the oil — Pour oil into the skillet to a depth of about 1/2 inch. Heat over medium-high heat until the oil shimmers and a small piece of flour sizzles immediately when dropped in. Do not let it smoke.
- Fry in batches — Place half the coated strips in the hot oil without crowding. Fry 3 to 4 minutes per side until golden brown and cooked through — internal temperature should reach 165°F (74°C).
- Drain properly — Transfer cooked strips to the wire rack and sprinkle with flaky sea salt if desired. Skip the paper towels; they make the coating soggy.
- Repeat with remaining chicken — Let the oil return to temperature between batches. Keep cooked chicken warm in a 200°F oven if needed.
- Toast the buns — Split the slider buns and toast cut side down on a clean, dry skillet over medium heat for about 1 minute until golden. This prevents sogginess.
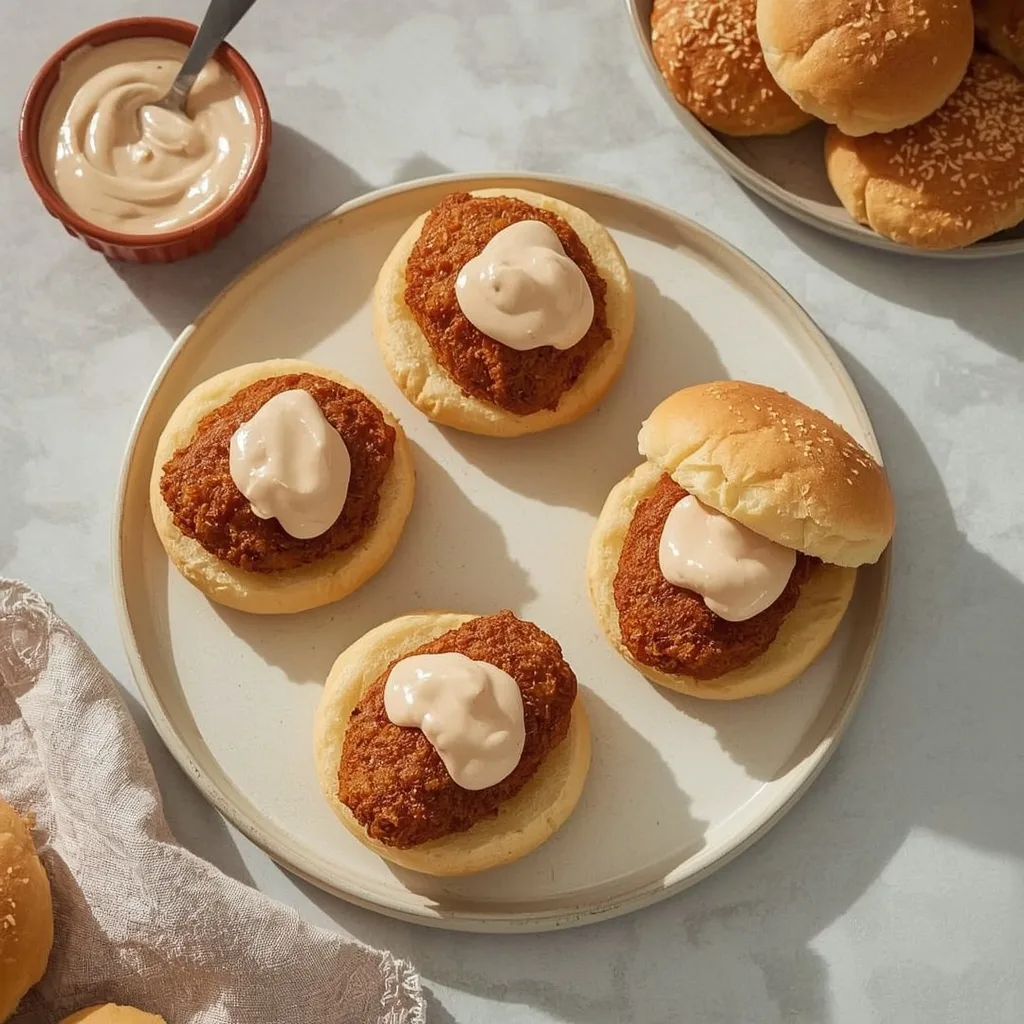
- Assemble and serve — Spread a generous amount of sauce on the bottom half of each bun. Add a couple of crispy chicken strips, then top with the other half. Serve immediately while hot and crunchy.
Expert Tips for a Standout KFC Chicken Littles (Retro Style)
These are the small details that separate good fried chicken from great fried chicken. Pay attention to these and you will nail it on the first try.
- Resting time matters — Let the coated strips rest for the full 5 minutes before frying. This lets the flour mixture hydrate and adhere, so the coating stays on the chicken instead of floating in the oil.
- Oil temperature is everything — If the oil is too cool, the coating absorbs oil and turns greasy. Too hot, and the outside burns before the inside cooks. That shimmer-and-sizzle test is your best friend.
- Work in small batches — Crowding the pan drops the oil temperature fast, which ruins the crispiness. Two batches for this amount of chicken is right.
- Pat the chicken dry — Before marinating, pat the chicken strips dry with paper towels. Excess moisture thins out the marinade and makes the coating harder to stick.
- Season the sauce carefully — The relish already brings salt and tang, so taste before adding any extra salt. You can always add more, but you cannot take it out.
- Toast the buns always — It takes one extra minute and makes a real difference. A warm, lightly toasted bun holds up better and adds a pleasant crunch.
- Use a thermometer if you have one — Checking the internal temperature at 165°F (74°C) guarantees the chicken is cooked through without guessing.
Common Mistakes to Avoid
After frying these more times than I can count, here are the pitfalls that trip people up most.
- Skipping the rest period — Frying immediately after dredging means the coating can slide right off. Those 5 minutes on the wire rack are non-negotiable.
- Overcrowding the pan — Too many strips at once lowers the oil temperature and steams the chicken. You get pale, soggy results instead of golden crunch.
- Draining on paper towels — Steam gets trapped between the paper and the coating, softening it within minutes. The wire rack keeps air circulating and the crust crisp.
- Using cold oil — Starting with cold oil means the coating absorbs it slowly and becomes heavy and greasy. Always heat until shimmering before adding chicken.
- Marinating too long — More than 2 hours in the buttermilk can make the chicken mushy. The acid starts breaking down the protein too much.
- Forgetting to toast the buns — The sauce will soak into untoasted buns and turn them soggy before you finish your first sandwich. Toasting creates a barrier.
Variations & Ways to Customize KFC Chicken Littles (Retro Style)
This base recipe is great as-is, but it also handles tweaks well. Try these variations when you want to mix things up.
- Spicy version — Double the cayenne to 1/2 teaspoon or add a splash of hot sauce to the marinade. Serve with extra sauce on the side for dipping.
- Honey mustard twist — Swap the Dijon in the sauce for 2 teaspoons of honey and 1 teaspoon of yellow mustard. Sweeter and milder for those who prefer a gentler tang.
- Crunchier coating — Replace 2 tablespoons of the flour with crushed cornflakes or panko breadcrumbs. This adds an extra layer of crunch.
- Chicken thigh option — Use boneless, skinless chicken thighs instead of breasts. They stay juicier and are harder to overcook.
- Slaw-topped version — Pile a little creamy coleslaw on top of the chicken before closing the bun. Cool and crunchy against the hot, crispy chicken.
- Baked alternative — Skip the frying and bake the coated strips on a rack at 425°F for 15-18 minutes, flipping halfway. Spray with oil for a crisper result.
What to Serve With KFC Chicken Littles (Retro Style)
These little sandwiches are filling on their own, but they pair beautifully with the right sides. Here is what works well alongside them.
- Classic fries — Crispy, salty fries are the natural companion here. Season them with a little extra paprika to match the theme.
- Coleslaw — The cool, creamy crunch of coleslaw balances the warm, crispy chicken pieces beautifully.
- Baked beans — Sweet, smoky baked beans round out the meal and add a comforting element.
- Pickle spears — More of that briny tang echoes the sauce in the sandwich. A crisp dill spear on the side is perfect.
- Watermelon or fruit salad — Something fresh and juicy cuts through the richness nicely on a hot day.
- Sweet iced tea — A tall glass of sweet tea completes the Southern-inspired vibe of this meal.
Make-Ahead Instructions
While these are best fresh, you can prep parts of this recipe ahead of time to make mealtime easier.
- Marinate in advance — Cut and marinate the chicken the night before. Keep it sealed in the refrigerator for up to 2 hours for the best texture.
- Prepare the sauce early — Mix the sauce up to 3 days ahead and refrigerate it in a small airtight container. Stir before using.
- Coat ahead of time — Dredge the strips and place them on the wire rack, then refrigerate uncovered for up to 4 hours. Fry when ready.
- Toast buns just before serving — Toasted buns go stale fast, so do this step right before assembly. Everything else can be waiting.
Storage and Reheating
Leftovers are rare with these, but if you have some, here is how to handle them properly.
Storage
- Separate components — Store the fried chicken strips and buns in separate airtight containers. The sauce goes in its own small container.
- Refrigerate promptly — Leftover strips keep in the fridge for up to 2 days. Do not leave them out at room temperature for more than 2 hours.
- Skip the freezer — Fried chicken loses its crunch when frozen and reheated. These are best eaten fresh or within a day or two.
Reheating
- Oven method — Place strips on a baking sheet and warm at 375°F (190°C) for 5-7 minutes until heated through and crispy again.
- Air fryer method — Heat at 350°F (177°C) for 2-3 minutes. This is the fastest way to restore crispiness.
- Skillet method — Reheat in a dry skillet over medium heat for 2-3 minutes per side. Watch closely so the coating does not burn.
- Microwave (last resort) — It will soften the coating, but it works in a pinch. Heat for 30-second intervals on a plate lined with a paper towel.
Nutritional Breakdown (Per Serving)
Based on 1 serving = 1 sandwich out of 4 total.
- Calories — 530 per serving
- Protein — 35g
- Fat — 25g
- Carbohydrates — 38g
- Fiber — about 2g
- Sugar — around 6g
- Sodium — roughly 720mg
Frequently Asked Questions
Can I make KFC Chicken Littles (Retro Style) gluten-free?
Yes. Swap the all-purpose flour for a 1:1 gluten-free flour blend and use gluten-free buns. The cornstarch stays the same. The coating will be slightly less crispy but still delicious.
How long does KFC Chicken Littles (Retro Style) last in the refrigerator?
Stored properly in separate airtight containers, the fried chicken strips and buns stay good for up to 2 days. Reassemble with fresh sauce and freshly toasted buns for the best experience.
What if I do not have buttermilk?
Mix 1 cup of whole milk with 1 tablespoon of lemon juice or white vinegar and let it sit for 5 minutes. It will thicken slightly and work the same way in the marinade.
Can I use chicken tenders instead of cutting a breast?
Absolutely. Pre-cut tenders save you a step, but pat them dry before marinating since they often come packed in extra moisture. Adjust frying time slightly if they are thinner than your strips.
Why did my coating fall off during frying?
This usually happens when you skip the 5-minute rest after dredging, or if the chicken was too wet going into the flour. Press the coating on firmly and respect that resting time.
Can I double this recipe?
Yes, but fry in small batches regardless of quantity. A crowded pan ruins the texture. Just add a few more minutes to the total fry time and keep batches warm in the oven.
More Recipes
Final Words
There is something deeply satisfying about making a fast-food favorite at home, especially when it tastes this close to the original. The crispy coating, the tangy sauce, the soft bun — it all comes together in about half an hour with simple ingredients. Give these KFC Chicken Littles (Retro Style) a try and bring back those nostalgic flavors without leaving your kitchen.
PrintKFC Chicken Littles (Retro Style)
Crispy, juicy chicken tenders tucked into soft mini buns with a tangy, creamy sauce. This retro favorite recreates the classic KFC Chicken Little with a homemade buttermilk marinade and a perfectly seasoned crunchy coating.
- Prep Time: 20
- Cook Time: 10
- Total Time: 30
- Yield: 4 1x
- Category: Main Course
- Method: Stovetop
- Cuisine: American
Ingredients
- 1 lb boneless, skinless chicken breast, cut into 1-inch strips
- 1 cup buttermilk
- 1 large egg
- 1/2 cup all-purpose flour
- 1/4 cup cornstarch
- 1 teaspoon paprika
- 1/2 teaspoon garlic powder
- 1/2 teaspoon onion powder
- 1/2 teaspoon kosher salt
- 1/4 teaspoon black pepper
- 1/4 teaspoon cayenne pepper (optional, for heat)
- 1 cup neutral oil (like canola or vegetable), for frying
- 4 soft slider buns or small brioche buns
- 1/4 cup mayonnaise
- 2 tablespoons dill pickle relish
- 1 teaspoon Dijon mustard
- 1/2 teaspoon white vinegar
Instructions
- In a medium bowl, whisk together the buttermilk and egg until fully combined. Add the chicken strips, ensuring each piece is submerged. Let it marinate for at least 15 minutes at room temperature, or up to 2 hours in the refrigerator for extra tenderness and flavor.
- In a shallow dish, whisk together the all-purpose flour, cornstarch, paprika, garlic powder, onion powder, kosher salt, black pepper, and cayenne if using. This coating mixture provides the signature crispy crunch and spicy-savory flavor.
- Set a wire rack over a baking sheet. One by one, remove each chicken strip from the buttermilk mixture, letting any excess drip off. Dredge each strip thoroughly in the flour mixture, pressing gently to adhere. Place the coated strips on the wire rack and let them rest for 5 minutes. This allows the coating to set and adhere better during frying.
- While the chicken rests, make the sauce. In a small bowl, stir together the mayonnaise, dill pickle relish, Dijon mustard, and white vinegar until smooth. Taste and adjust with a pinch of salt if needed. Cover and set aside in the refrigerator until ready to serve. The sauce is tangy and creamy, a perfect balance to the crispy chicken.
- Pour the neutral oil into a large, heavy-bottomed skillet to a depth of about 1/2 inch. Heat over medium-high heat until the oil shimmers and a small piece of flour sizzles immediately when dropped in (around 350°F / 177°C if using a thermometer). Do not overheat to the point of smoking.
- Carefully place half of the coated chicken strips in the hot oil, making sure not to crowd the pan. Fry for 3 to 4 minutes per side, until golden brown and cooked through. The internal temperature should reach 165°F (74°C).
- Using tongs, transfer the fried chicken strips to a clean wire rack set over a baking sheet. Immediately sprinkle with a pinch of flaky sea salt, if desired. Do not drain on paper towels, as this can make the coating soggy; the wire rack keeps them crisp.
- Repeat with the remaining chicken strips, allowing the oil to return to temperature between batches. Keep the cooked chicken warm in a 200°F (93°C) oven while frying the rest, if needed.
- To assemble, split the slider buns and lightly toast them on a clean, dry skillet over medium heat for about 1 minute, cut side down, until golden and warm. This adds a pleasant texture and prevents the bun from getting soggy.
- Spread a generous amount of the prepared sauce on the bottom half of each bun. Place a couple of crispy chicken strips on top, then cover with the top half of the bun. Serve immediately while hot and crunchy, for the classic retro KFC Chicken Little experience.
Notes
Storage: The cooked chicken littles are best enjoyed immediately. If you have leftovers, store the fried chicken strips and buns separately in airtight containers in the refrigerator for up to 2 days. To reheat, place the chicken strips on a baking sheet and warm in a 375°F (190°C) oven for 5-7 minutes, or until heated through and crispy. Alternatively, reheat in an air fryer at 350°F (177°C) for 2-3 minutes. Reassemble with fresh sauce and toasted buns. The sauce can be made ahead and refrigerated for up to 3 days.
Nutrition
- Calories: 530
- Sugar: 6g
- Sodium: 720mg
- Saturated Fat: 4g
- Carbohydrates: 38g
- Fiber: 2g
- Protein: 35g
- Cholesterol: 120mg
Keywords: chicken littles, KFC copycat, retro chicken sliders, crispy chicken sandwiches, buttermilk fried chicken, snack recipe, party food, game day appetizer, fried chicken slider, homemade chicken littles