 Kendric adan
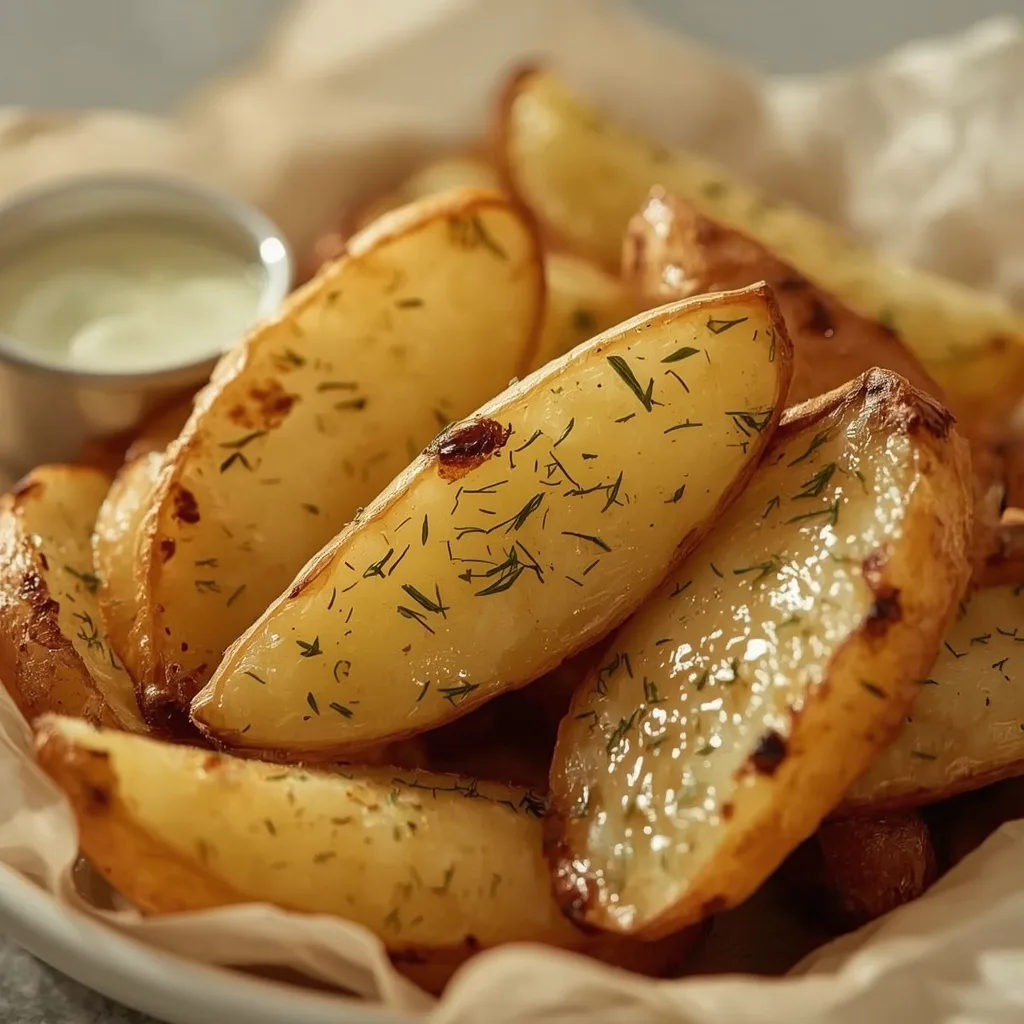
 Boston Market Dill Potato Wedges are a tried-and-true side dish that delivers crispy edges, fluffy centers, and a punch of herby flavor. They nail that restaurant-style texture without needing a deep fryer, making them an easy win for weeknight dinners.
This recipe takes about 50 minutes total and is beginner-friendly. The only step that needs your attention is flipping the wedges halfway through, but that small effort pays off with even browning on every side.
Why You’ll Love This Recipe
- Simple Ingredients — You only need basic pantry staples like dried dill, garlic powder, and russet potatoes to get bold flavor.
- Oven-Baked, Not Fried — These wedges turn crispy without the mess or extra oil of deep frying.
- Versatile Side Dish — They pair with anything from grilled chicken to sandwiches, making them a reliable go-to.
What Makes This Recipe Special
The combination of dried dill weed, onion powder, and paprika creates a savory, slightly floral seasoning that sets these wedges apart from plain roasted potatoes. Baking at a high temperature with the cut sides down first builds a deep golden crust while the interior steams to a light, fluffy texture. This method gives you that crave-worthy contrast in every wedge, exactly like the restaurant version.
Ingredients You’ll Need
Here is everything you need for this recipe, broken down by category.
Potatoes
- 2 lb (about 4 medium) russet potatoes — Russets have high starch content, which helps them crisp up beautifully in the oven. Scrub them well and cut each potato lengthwise into 8 wedges.
Oil and Seasoning
- 3 tbsp olive oil — This coats the wedges evenly to help the seasonings stick and promotes browning. You can substitute avocado oil if needed.
- 1 1/2 tsp dried dill weed — This is the star herb that gives the wedges their signature flavor. Do not swap with fresh dill here; dried dill has a more concentrated taste that holds up during baking.
- 1 tsp garlic powder — Adds a gentle savory depth without burning like fresh garlic would.
- 1 tsp onion powder — Complements the garlic and dill with a subtle sweetness.
- 1/2 tsp paprika — Provides a mild smoky note and a hint of color. Sweet or smoked paprika both work.
- 1 tsp kosher salt — Kosher salt dissolves evenly and seasons the potatoes without making them overly salty.
- 1/2 tsp black pepper, freshly ground — Freshly ground pepper gives a brighter kick than pre-ground.
Equipment Needed
- Large, Rimmed Baking Sheet — A rimmed sheet catches any oil drips and keeps the wedges contained. A half-sheet pan (18×13 inches) works perfectly.
- Parchment Paper — Lining the pan makes cleanup effortless and prevents sticking without extra oil.
- Large Mixing Bowl — You need enough room to toss the wedges with oil and seasonings without crushing them.
- Thin Metal Spatula — A thin, flexible spatula helps flip the wedges cleanly without breaking the crust.
Instructions to Prepare Boston Market Dill Potato Wedges
Follow these steps in order for the best results. Each detail matters for texture and flavor.
- Preheat and Prep — Position an oven rack in the center and preheat the oven to 425°F (218°C). Line a large, rimmed baking sheet with parchment paper for easy cleanup.
- Coat the Wedges — Place the potato wedges in a large bowl. Drizzle with olive oil and toss with your hands until each wedge is evenly coated. The oil helps the seasonings adhere and promotes browning.
- Mix the Seasoning — In a small bowl, combine the dried dill weed, garlic powder, onion powder, paprika, kosher salt, and black pepper. Stir with a fork to ensure uniform distribution.
- Season Generously — Sprinkle the seasoning mixture over the oiled potato wedges. Toss vigorously with your hands or a spatula until every wedge is evenly dusted with the herb blend.
- Arrange for Baking — Arrange the seasoned wedges in a single layer on the prepared baking sheet, cut sides down. Leave a small gap between each wedge to allow hot air to circulate, which ensures crispness instead of steaming.
- First Bake — Bake for 20 minutes. The wedges will be lightly browned on the bottom edges.
- Flip Carefully — Remove the baking sheet from the oven. Using a thin metal spatula, carefully flip each wedge over so the opposite cut side is now facing down. This promotes even browning on all exposed surfaces.
- Finish Baking — Return the sheet to the oven and continue baking for an additional 15 minutes, or until the wedges are deep golden brown and crispy on the outside, and a knife inserted into the thickest part meets no resistance.
- Rest Briefly — Remove from the oven and let the wedges rest on the baking sheet for 2 minutes. This allows them to firm up slightly before serving.
- Serve Hot — Transfer to a serving platter, sprinkle with a pinch of additional kosher salt if desired, and serve hot. The wedges are best enjoyed immediately while the exterior remains crisp.

Expert Tips for a Standout Boston Market Dill Potato Wedges
- Cut Uniform Wedges — Slicing each potato into 8 evenly sized wedges ensures they all cook at the same rate. Uneven pieces lead to some burnt edges and some undercooked centers.
- Don’t Skip the Parchment — Parchment paper prevents sticking and makes flipping much easier. Foil can work, but the wedges may stick more.
- Space Them Out — Crowding the baking sheet traps steam and softens the wedges. Leave at least a finger’s width between each wedge.
- Flip Once, Not Multiple Times — Flipping only once at the halfway mark gives each side enough time to develop a sturdy crust. Flipping more often breaks the browning process.
- Let Them Rest Before Serving — That 2-minute rest on the hot baking sheet allows the exterior to set further. Serving straight out of the oven can result in a softer crust.
Common Mistakes to Avoid
- Skipping the Oil Coating — Without enough oil, the seasoning falls off and the wedges won’t brown properly. Toss until every wedge looks glossy.
- Using Wet Potatoes — Mopping up residual moisture from washed potatoes dilutes the oil and seasoning. Pat them dry with a clean towel before cutting.
- Overcrowding the Pan — Stacking wedges on top of each other traps steam and makes them soggy. A single layer with space is non-negotiable.
- Not Flipping at All — Leaving them cut-side down the whole time results in uneven browning and a pale top. The flip is essential for that all-around golden look.
- Opening the Oven Frequently — Peeking every few minutes lets heat escape and extends the bake time. Trust the timer and check only at the flip point.
- Storing Them Uncovered — Leftover wedges left out on the counter dry out fast. Always cool completely before sealing in an airtight container.
Variations & Ways to Customize Boston Market Dill Potato Wedges
- Spicy Kick — Add 1/2 teaspoon of cayenne pepper or red pepper flakes to the seasoning mix. The heat balances the dill nicely.
- Cheesy Finish — Sprinkle 1/4 cup of grated Parmesan cheese over the wedges during the last 5 minutes of baking. The cheese melts into a crispy, savory crust.
- Lemon-Herb Twist — Swap the dried dill for 1 teaspoon dried thyme and add the zest of one lemon to the seasoning. Brightens the flavor considerably.
- Garlic Lover’s Version — Increase garlic powder to 2 teaspoons and add 2 finely minced garlic cloves tossed in with the oil. Watch closely so the fresh garlic doesn’t burn.
- Smoky Paprika Upgrade — Replace the sweet paprika with smoked paprika for a deeper, wood-fired taste. Pair with grilled meats for a perfect match.
- Low-Sodium Option — Reduce the kosher salt to 1/2 teaspoon and add 1/4 teaspoon of garlic salt or onion salt for flavor without as much sodium.
What to Serve With Boston Market Dill Potato Wedges
These wedges work beautifully alongside a variety of main dishes and dips.
- Grilled Chicken Breast — The mild, herbaceous wedges complement simple grilled or roasted chicken without competing.
- Classic Burger — Swap fries for these wedges on a burger night. They hold up better and add more flavor.
- Steamed Vegetables — A side of steamed broccoli or green beans adds color and a fresh contrast to the crispy potatoes.
- Dipping Sauces — Serve with ranch dressing, sour cream, or a spicy sriracha mayo for extra indulgence.
- Green Salad — A tangy vinaigrette-dressed salad cuts through the richness of the wedges. Arugula or spinach works well.
- Eggs for Breakfast — Pair leftover wedges with scrambled eggs for a hearty morning meal. They reheat nicely in the oven.
Make-Ahead Instructions
- Cut Potatoes in Advance — You can slice the russet potatoes into wedges up to 8 hours ahead. Submerge them in a bowl of cold water and refrigerate to prevent browning. Drain and pat dry before proceeding.
- Mix Seasoning Blend — Combine the dried dill, garlic powder, onion powder, paprika, salt, and pepper in a small jar. Store at room temperature for up to 2 weeks. This saves time on busy nights.
- Par-Bake and Finish Later — Bake the wedges for the first 20 minutes, let them cool completely, then refrigerate on the baking sheet. When ready to serve, flip and bake for an extra 15-18 minutes until hot and crispy.
Storage and Reheating
Storage
- Airtight Container — Transfer cooled leftover wedges to an airtight container. Press out as much air as possible before sealing to prevent sogginess.
- Refrigerate Up to 3 Days — Store in the refrigerator for up to 3 days. Beyond that, the texture degrades noticeably.
- Do Not Freeze — Freezing changes the potato’s cell structure, turning the wedges mushy upon thawing. Best to enjoy them fresh or within the fridge window.
Reheating
- Oven Method (Best) — Place wedges on a baking sheet in a preheated 400°F (204°C) oven for 8-10 minutes. This restores crispness better than any other method.
- Air Fryer Option — Reheat in a single layer in the air fryer at 375°F (190°C) for 5-6 minutes, shaking halfway. They come out nearly as crispy as fresh.
- Avoid the Microwave — Microwaving makes the exterior rubbery and the interior watery. Reserve it only if you absolutely need speed and accept soft wedges.
- Stovetop Skillet — Add a teaspoon of oil to a nonstick skillet over medium-high heat. Cook the wedges for 3-4 minutes per side until hot and crisp. Works well for small portions.
Nutritional Breakdown (Per Serving)
Based on 1 serving = 1/4 of the total batch (about 8 wedges).
- Calories: 250
- Protein: 4g
- Fat: 10g
- Saturated Fat: 1.5g
- Carbohydrates: 37g
- Fiber: 4g
- Sugar: 1g
- Sodium: about 540mg
- Cholesterol: around 0mg
Frequently Asked Questions
Can I use sweet potatoes instead of russet for Boston Market Dill Potato Wedges?
Yes, sweet potatoes work, but they cook faster and won’t get as crispy. Reduce the total bake time by about 5-7 minutes and check for doneness early.
How long do Boston Market Dill Potato Wedges last in the fridge?
They stay good for up to 3 days when stored in an airtight container. Beyond that, the texture turns mealy and the flavor fades.
Can I double this recipe?
Absolutely. Use two baking sheets, each with wedges in a single layer. Rotate the pans between top and bottom racks halfway through baking for even cooking.
Why are my wedges not crispy?
Most likely causes are overcrowding the pan, not drying the potatoes after washing, or skipping the parchment paper. Also check that your oven is fully preheated to 425°F.
Can I use fresh dill instead of dried?
Fresh dill has a milder flavor and will burn at 425°F. Stick with dried dill for this recipe. If you must use fresh, add it after baking as a garnish.
Is it necessary to flip the wedges?
Yes, flipping ensures both cut sides get direct contact with the hot pan surface for even browning. Skipping this step leaves the top side pale and soft.
Final Words
These Boston Market Dill Potato Wedges bring that restaurant-quality crunch and herby flavor straight to your kitchen. With a handful of pantry staples and a few smart tricks, you get a side dish that disappears fast. Give them a try with your next meal and see how simple great flavor can be.
Similar Recipes
PrintBoston Market Dill Potato Wedges

Crispy on the outside, fluffy on the inside, these oven-baked potato wedges are generously seasoned with dried dill, garlic, and onion for a savory, herbaceous flavor. They are a healthier, crave-worthy copycat of the restaurant favorite, perfect as a side dish or snack.
- Prep Time: 15
- Cook Time: 35
- Total Time: 50
- Yield: 4 1x
- Category: Snack
- Method: Baking
- Cuisine: American
Ingredients
- 2 lb (about 4 medium) russet potatoes, scrubbed and cut lengthwise into 8 wedges each
- 3 tbsp olive oil
- 1 1/2 tsp dried dill weed
- 1 tsp garlic powder
- 1 tsp onion powder
- 1/2 tsp paprika
- 1 tsp kosher salt
- 1/2 tsp black pepper, freshly ground
Instructions
- Position an oven rack in the center and preheat the oven to 425°F (218°C). Line a large, rimmed baking sheet with parchment paper for easy cleanup.
- Place the potato wedges in a large bowl. Drizzle with olive oil and toss with your hands until each wedge is evenly coated. The oil helps the seasonings adhere and promotes browning.
- In a small bowl, combine the dried dill weed, garlic powder, onion powder, paprika, kosher salt, and black pepper. Stir with a fork to ensure uniform distribution.
- Sprinkle the seasoning mixture over the oiled potato wedges. Toss vigorously with your hands or a spatula until every wedge is evenly dusted with the herb blend.
- Arrange the seasoned wedges in a single layer on the prepared baking sheet, cut sides down. Leave a small gap between each wedge to allow hot air to circulate, which ensures crispness instead of steaming.
- Bake for 20 minutes. The wedges will be lightly browned on the bottom edges.
- Remove the baking sheet from the oven. Using a thin metal spatula, carefully flip each wedge over so the opposite cut side is now facing down. This promotes even browning on all exposed surfaces.
- Return the sheet to the oven and continue baking for an additional 15 minutes, or until the wedges are deep golden brown and crispy on the outside, and a knife inserted into the thickest part meets no resistance.
- Remove from the oven and let the wedges rest on the baking sheet for 2 minutes. This allows them to firm up slightly before serving.
- Transfer to a serving platter, sprinkle with a pinch of additional kosher salt if desired, and serve hot. The wedges are best enjoyed immediately while the exterior remains crisp.
Notes
Store leftover wedges in an airtight container in the refrigerator for up to 3 days. To reheat and restore crispness, place them on a baking sheet in a 400°F (204°C) oven for 8-10 minutes. Avoid microwaving, as it will make the wedges soggy. For best results, consume within 3 days. Freezing is not recommended as the texture degrades significantly upon thawing.
Nutrition
- Calories: 250
- Sugar: 1g
- Sodium: 540mg
- Saturated Fat: 1.5g
- Carbohydrates: 37g
- Fiber: 4g
- Protein: 4g
- Cholesterol: 0mg
Keywords: Boston Market potato wedges, dill potato wedges, oven baked potato wedges, crispy potato wedges, roasted potato wedges, American side dish, easy potato recipe, snack, garlic dill potatoes, homemade potato wedges