 Kendric adan
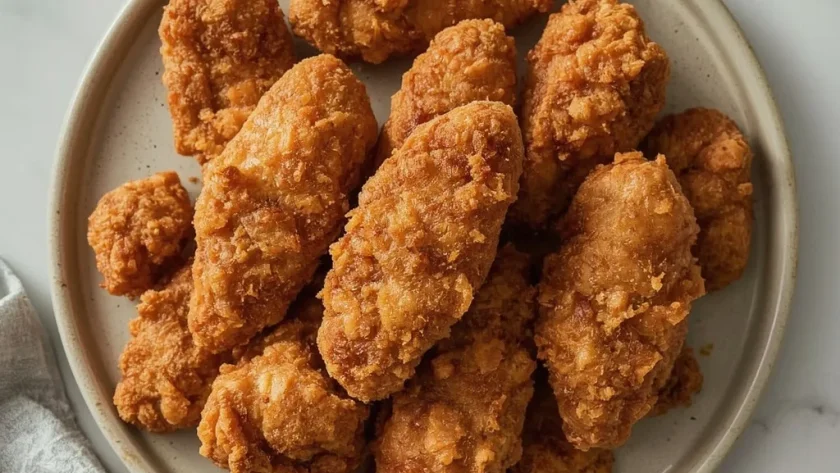
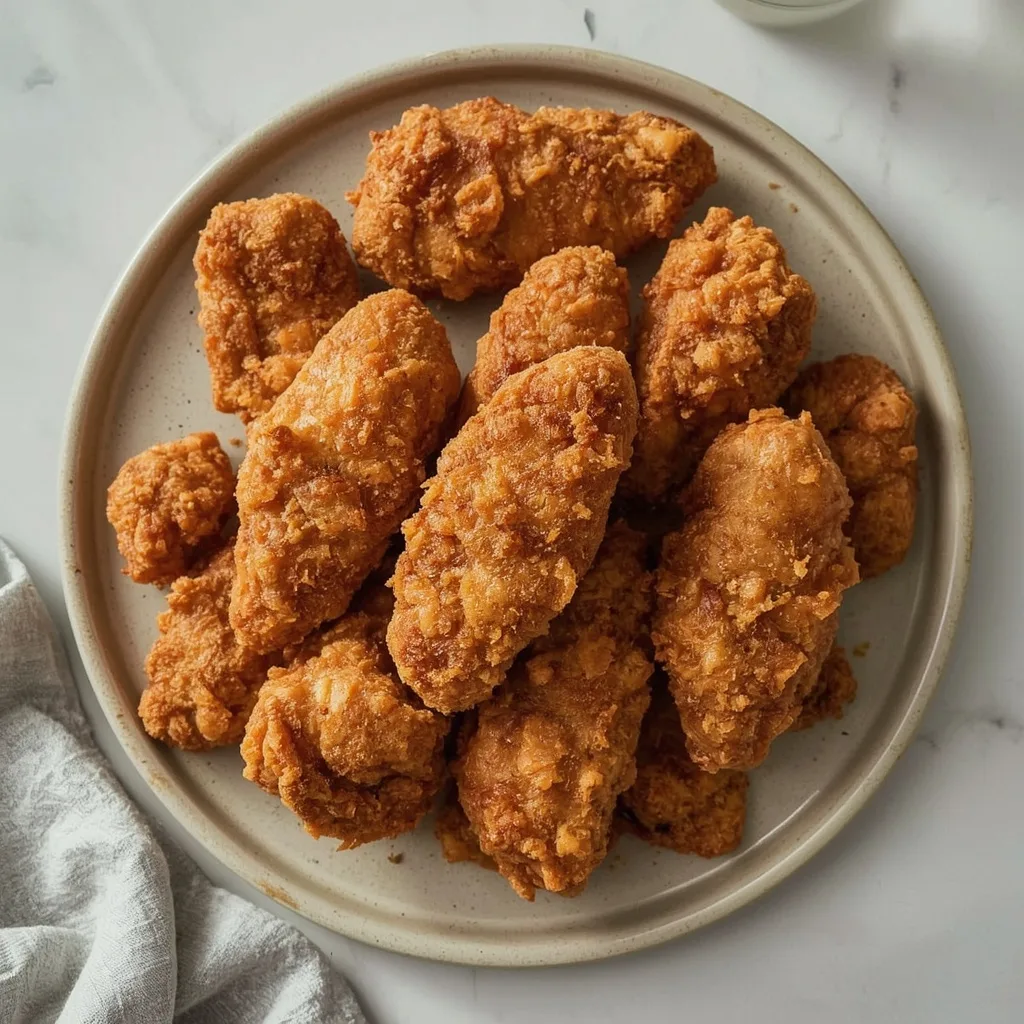
This Cracker Barrel Fried Chicken Tenders recipe nails that signature crunchy coating and juicy interior right in your own kitchen. These tenders come out deeply golden with a seasoned crust that has just the right amount of kick, making them dangerously close to the restaurant original.
You can have these on the table in 35 minutes flat, and the whole process is beginner-friendly. The only step that needs a little attention is keeping the oil temperature steady while frying — get that right and the rest is smooth sailing for weeknight dinners or game-day snacking.
Why You’ll Love This Recipe
- Restaurant flavor at home — The buttermilk brine and seasoned flour blend recreate that familiar Cracker Barrel taste without leaving the house.
- Beginner-friendly method — Straightforward steps with simple visual cues mean anyone can fry these successfully on the first try.
- Genuinely crispy crunch — A short resting period after breading helps the coating grip the chicken, so every bite stays crunchy instead of falling off.
What Makes This Recipe Special
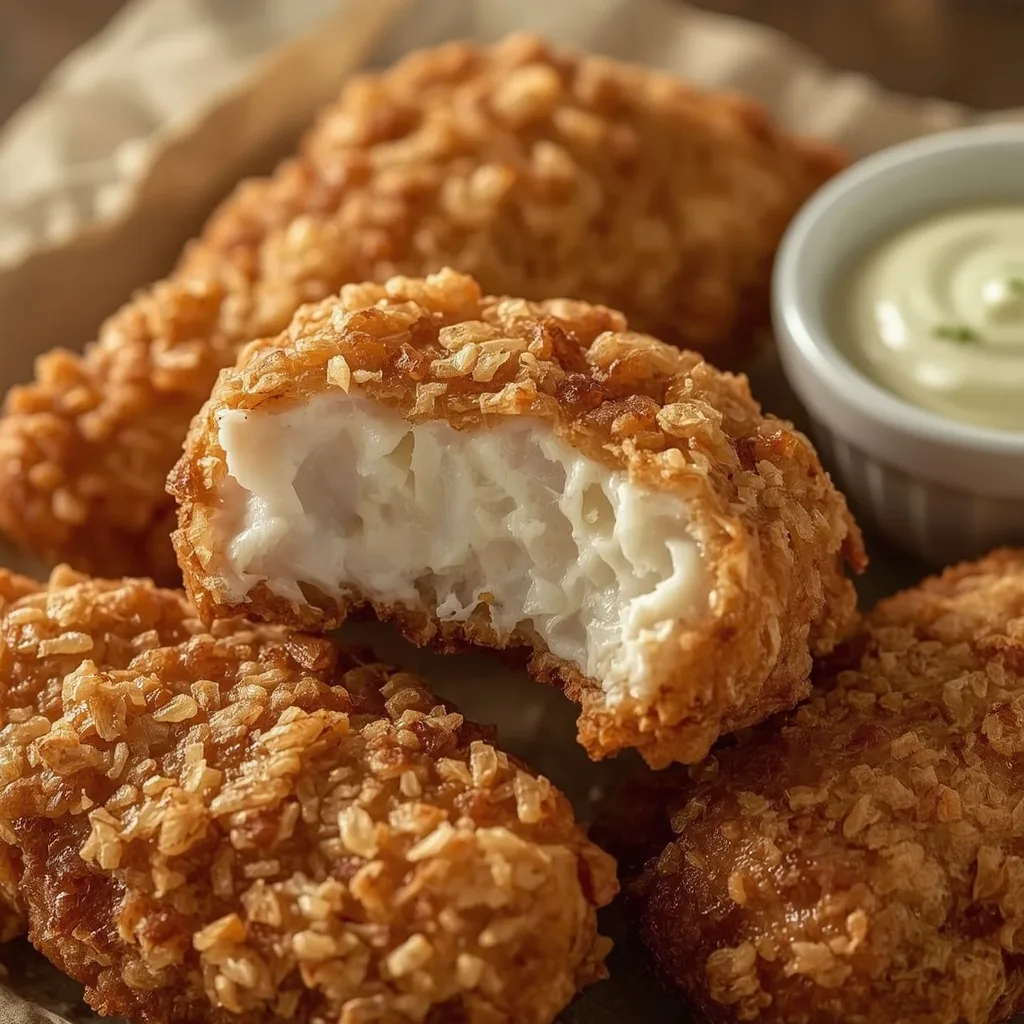
The buttermilk soak does double duty here, tenderizing the chicken while adding a subtle tang that carries through the crust. That seasoned flour brings garlic, onion, and paprika together in a blend that tastes familiar but not generic. The result is a craggy, shatter-crisp exterior giving way to moist, flavorful meat — the kind of texture contrast that makes fried chicken so satisfying. It is the perfect weekend project when you want something comforting without a complicated ingredient list.
Ingredients You’ll Need
Everything on this list is easy to find at any grocery store, and most items are probably already in your pantry. Here is what does the heavy lifting in this recipe.
For the Chicken and Brine
- 1 lb chicken breast tenderloins — These are the star of the show. You can also slice boneless, skinless chicken breasts into strips if tenderloins are not available.
- 1½ cups buttermilk — This tenderizes the meat and adds that subtle tangy flavor. Make sure to shake the carton well before measuring since it separates naturally.
- ½ teaspoon kosher salt — Added to the brine to season the chicken from the inside out.
For the Seasoned Coating
- 2 cups all-purpose flour — The base of the crunchy crust. It clings to the buttermilk-soaked chicken beautifully.
- 1 tablespoon garlic powder — Gives the coating that savory, aromatic note you expect from restaurant-style tenders.
- 1 tablespoon onion powder — Adds sweetness and depth that balances the garlic and paprika.
- 2 teaspoons paprika — Provides color and a mild, smoky warmth that makes the crust look appetizing.
- 1 teaspoon cayenne pepper — Optional. If you want heat, keep it in. For a milder version, simply leave it out or reduce it to ½ teaspoon.
- 1 teaspoon black pepper — Adds a gentle bite that complements the other seasonings.
- 1½ teaspoons kosher salt — Seasoning for the flour mixture, essential for a flavorful crust.
For Frying and Finishing
- 2 cups vegetable oil — You will want about 1 inch of oil in your skillet. Vegetable oil has a high smoke point, which makes it ideal for frying.
- Kosher salt, for finishing — A pinch right after frying gives the hot tenders that final salty pop.
Equipment Needed
You probably have most of these already. Here is what makes the process easier.
- A large, heavy-bottomed skillet — Cast iron or stainless steel works best for holding steady oil temperature. Cast iron holds heat particularly well.
- Shallow dish for dredging — A pie plate or wide bowl gives you room to coat the chicken without making a mess.
- Wire rack — Setting the breaded tenders on a rack lets air circulate around them, which helps the coating dry slightly and stick better.
- Tongs — Needed to gently lower the chicken into hot oil and flip it without splashing. Metal tongs with a good grip are ideal.
- Paper-towel-lined plate — Essential for draining the fried tenders after they come out of the oil.
Instructions to Prepare Cracker Barrel Fried Chicken Tenders
Follow these steps in order and you will have golden, crispy tenders ready in about 35 minutes. The buttermilk brine needs at least half an hour, so plan accordingly.
- Brine the chicken — Combine the chicken tenders with 1½ cups of buttermilk and ½ teaspoon of kosher salt in a large bowl. Stir to coat, cover, and refrigerate for at least 30 minutes, or up to 2 hours for deeper flavor.
- Mix the seasoned flour — In a shallow dish, whisk together the all-purpose flour, garlic powder, onion powder, paprika, cayenne, black pepper, and remaining 1½ teaspoons of kosher salt. Make sure everything is evenly distributed.
- Bread the tenders — Remove each tender from the buttermilk, letting the excess drip off. Dredge in the flour mixture, pressing lightly so the coating adheres, then shake off the excess. Place on a wire rack and let them rest for 5 minutes — this step is crucial for keeping the crust intact during frying.
- Heat the oil — Pour the vegetable oil into a large, heavy-bottomed skillet to a depth of about 1 inch. Heat over medium-high until the oil shimmers and a pinch of flour sizzles immediately when dropped in (about 350°F / 175°C if you use a thermometer).
- Fry in batches — Carefully place the breaded tenders in the hot oil in a single layer without crowding. Fry 4-5 minutes per side until deep golden brown and the internal temperature reaches 165°F (74°C). Adjust the heat as needed to prevent over-browning.
- Drain and season — Remove the fried tenders with tongs and drain on a paper-towel-lined plate. Immediately sprinkle with a pinch of kosher salt if desired. Let the oil return to temperature between batches.
- Rest before serving — Let the tenders rest 5 minutes to allow the juices to redistribute. Serve hot with honey mustard, barbecue sauce, or your favorite dipping sauce.
Expert Tips for a Standout Cracker Barrel Fried Chicken Tenders
A few small adjustments make a noticeable difference in the final result. Here is what I have learned from frying my fair share of chicken.
- Do not skip the rest after breading — Those 5 minutes let the flour hydrate and cling to the chicken. Frying immediately makes the coating slide off in the oil.
- Keep the oil temperature steady — If the oil gets too hot, the outside burns before the chicken cooks through. Too cool and the coating soaks up oil, turning greasy. Medium-high heat with occasional adjustment is the sweet spot.
- Shake the buttermilk well — It separates naturally in the carton, and the thinner liquid at the top does not coat as evenly. A good shake ensures consistent coverage.
- Let excess buttermilk drip off — Too much liquid on the chicken creates clumpy, uneven breading. A quick drip over the bowl solves this before you hit the flour.
- Work in small batches — Crowding the skillet drops the oil temperature fast. Fry fewer tenders at a time and let the oil come back up between rounds.
- Use a thermometer if you have one — Checking the internal temperature hits 165°F (74°C) guarantees juicy chicken without guessing. If you do not own one, cut into the thickest piece to make sure there is no pink.
Common Mistakes to Avoid
Most fried chicken problems come down to a few repeatable errors. Avoiding these will keep you on track.
- Frying too many at once — Overcrowding drops the oil temperature, which means greasy, soggy coating. Fry in a single layer and give each piece room.
- Skipping the buttermilk soak — The brine is what keeps the chicken moist and adds flavor. Even the 30-minute minimum makes a difference, so do not rush past it.
- Using a thermometer-less approach — Guessing the oil temperature often leads to burnt exteriors or raw centers. The pinch-of-flour test works, but a thermometer is foolproof.
- Neglecting to adjust heat between batches — The oil gets hotter with each round. Turn the heat down slightly after the first batch to avoid over-browning.
- Tasting too soon — Those 5 minutes of rest are not just for juices. Cutting into the tenders right away lets the steam escape and softens the crust.
Variations & Ways to Customize Cracker Barrel Fried Chicken Tenders
This base recipe is fantastic as is, but it also takes well to a few tweaks. Pick what sounds good to you.
- Spicier version — Increase the cayenne to 2 teaspoons or add a dash of hot sauce to the buttermilk brine for extra heat.
- Gluten-free option — Swap the all-purpose flour for a 1:1 gluten-free baking blend. The texture stays crunchy, though slightly lighter.
- Herb-infused coating — Add 1 teaspoon of dried thyme or oregano to the flour mixture for a more aromatic crust.
- Extra-crunchy texture — Mix in ½ cup of cornstarch with the flour. It creates a lighter, crispier coating that shatters when you bite into it.
- Buttermilk substitution — No buttermilk on hand? Add 1 tablespoon of lemon juice or white vinegar to 1½ cups of regular milk and let it sit 5 minutes.
What to Serve With Cracker Barrel Fried Chicken Tenders
These tenders pair well with a wide range of sides, from classic comfort food to something fresher. Here are some combinations worth trying.
- Mashed potatoes with gravy — The creamy texture and rich gravy contrast beautifully with the crunchy coating.
- Buttermilk biscuits — A nod to the restaurant experience, perfect for soaking up any extra dipping sauce.
- Coleslaw — The cool, tangy crunch cuts through the richness of the fried chicken nicely.
- Mac and cheese — Creamy, cheesy, and indulgent — a family favorite that disappears fast.
- Collard greens — The slight bitterness and savory depth balance the salty, crunchy tenders.
- Sweet tea or lemonade — A cold, sweet drink is the classic pairing for Southern fried food.
Make-Ahead Instructions
Want to get ahead of the dinner rush? These tenders can be prepped in stages without losing quality.
- Brine the night before — Combine the chicken with buttermilk and salt, then refrigerate up to 24 hours. This actually deepens the flavor and tenderness.
- Bread and refrigerate — Coat the tenders and place them on a wire rack. Cover loosely and refrigerate for up to 4 hours before frying — the coating will cling even better.
- Freeze breaded tenders — Arrange breaded, uncooked tenders on a baking sheet and freeze until solid. Store in a sealable bag for up to 2 months. Fry frozen, adding 2-3 minutes to the cooking time.
- Prep the dipping sauce — Whisk together honey mustard or your sauce of choice a day ahead. It saves time at the table.
Storage and Reheating
Leftovers are a real possibility — these tenders keep well and reheat surprisingly nicely with the right method.
Storage
- Refrigerator — Place cooled tenders in an airtight container. They will keep for up to 3 days without losing much quality.
- Freezer — Arrange cooked tenders on a baking sheet in a single layer, freeze until solid, then transfer to a sealable bag. They stay good for up to 2 months.
- Separate the layers — If stacking tenders in a container, place parchment paper between layers to prevent the coating from sticking together.
Reheating
- Oven — Heat at 375°F (190°C) for 8-10 minutes until hot and crispy. Place tenders on a wire rack over a baking sheet so air circulates.
- Air fryer — Set to 375°F (190°C) and heat 8-10 minutes, flipping halfway. This brings back the crunch beautifully.
- Microwave — Avoid this method. It will make the coating soggy and chewy.
- Stovetop skillet — A quick re-fry in a shallow layer of oil over medium heat for 2-3 minutes per side works well in a pinch.
Nutritional Breakdown (Per Serving)
Based on 1 serving of 4 total servings, each portion contains roughly:
- Calories — about 605
- Protein — 32g
- Fat — 36g
- Carbohydrates — 45g
- Fiber — 2g
- Sugar — 4g
- Sodium — about 1250mg
Frequently Asked Questions
Can I freeze Cracker Barrel Fried Chicken Tenders?
Yes, you can freeze both cooked and breaded raw tenders. Cooked tenders freeze well for up to 2 months, while breaded raw ones can be frozen for the same period and fried straight from frozen with a slightly longer cook time.
How long does Cracker Barrel Fried Chicken Tenders last in the fridge?
These tenders keep for up to 3 days in an airtight container in the refrigerator. Reheat them in the oven or air fryer to restore the crunch, not the microwave.
Can I use chicken breasts instead of tenderloins?
Absolutely. Slice boneless, skinless chicken breasts into strips about 1 inch wide. The cooking time stays roughly the same, though thicker strips may need an extra minute or two.
Why did my breading fall off during frying?
Most likely you skipped the rest after breading or the oil was not hot enough. Letting the coated tenders sit 5 minutes allows the flour to hydrate and grip the chicken properly.
How do I know when the oil is hot enough without a thermometer?
Drop a pinch of flour into the oil. If it sizzles immediately and floats, the oil is ready. The oil should shimmer across the surface before you add the chicken.
What dipping sauces go best with these tenders?
Honey mustard and barbecue sauce are classic choices. Ranch, honey, and even a simple ketchup-and-mayo blend work great too.
More Recipes
Final Words
Making Cracker Barrel Fried Chicken Tenders at home is one of those recipes that feels like a treat every time. The process is simple enough for a casual weeknight, but the result is good enough for special occasions. I hope you give it a try and enjoy every crunchy bite.
PrintCracker Barrel Fried Chicken Tenders
Extra-crispy chicken tenders with a seasoned, crunchy coating and juicy, tender interior. This copycat recipe captures the classic flavor and texture of the restaurant favorite, perfect for a family dinner or game-day snack.
- Prep Time: 20
- Cook Time: 15
- Total Time: 35
- Yield: 4 1x
- Category: Main Course
- Method: Stovetop
- Cuisine: American
Ingredients
- 1 lb chicken breast tenderloins (or boneless skinless chicken breasts, sliced into strips)
- 2 cups buttermilk (well-shaken)
- 2 cups all-purpose flour
- 1 tablespoon garlic powder
- 1 tablespoon onion powder
- 2 teaspoons paprika
- 1 teaspoon cayenne pepper (optional, for heat)
- 1 teaspoon black pepper
- 2 teaspoons kosher salt (divided: 1½ tsp for flour, ½ tsp for brine)
- 2 cups vegetable oil (for frying, about 1-inch deep in skillet)
- Kosher salt, for finishing (optional)
Instructions
- In a large bowl, combine the chicken tenders with 1½ cups of buttermilk and ½ teaspoon of kosher salt. Stir to coat, cover, and refrigerate for at least 30 minutes (or up to 2 hours) to tenderize and add flavor.
- In a shallow dish, whisk together the all-purpose flour, garlic powder, onion powder, paprika, cayenne, black pepper, and remaining 1½ teaspoons of kosher salt until evenly combined.
- Remove the chicken from the buttermilk, letting any excess drip off. Dredge each tender in the flour mixture, pressing lightly to adhere. Shake off the excess and set aside on a wire rack. Let the coated tenders rest for 5 minutes, which helps the coating stick during frying.
- While the chicken rests, pour the vegetable oil into a large, heavy-bottomed skillet (cast iron or stainless steel) to a depth of about 1 inch. Heat over medium-high heat until the oil shimmers and a pinch of flour sizzles immediately when dropped in (about 350°F / 175°C if using a thermometer).
- Working in batches, carefully place the breaded tenders into the hot oil in a single layer without crowding. Fry for 4-5 minutes per side, until deep golden brown and the internal temperature reaches 165°F (74°C). Adjust the heat as needed to prevent over-browning.
- Remove the fried tenders with tongs and drain on a paper-towel-lined plate. Immediately sprinkle with a pinch of kosher salt, if desired. Repeat with the remaining tenders, allowing the oil to return to temperature between batches.
- Let the tenders rest for 5 minutes before serving to allow juices to redistribute. Serve hot with honey mustard, barbecue sauce, or your favorite dipping sauce.
Notes
Storage: Leftover fried chicken tenders can be stored in an airtight container in the refrigerator for up to 3 days. Freezing: Cooked tenders can be frozen for up to 2 months. Place them on a baking sheet in a single layer, freeze until solid, then transfer to a sealable bag or container. Reheating: For best crunch, reheat in a 375°F (190°C) oven or air fryer for 8-10 minutes until hot and crispy. Avoid microwaving, which will make them soggy.
Nutrition
- Calories: 605
- Sugar: 4g
- Sodium: 1250mg
- Unsaturated Fat: 6g
- Carbohydrates: 45g
- Fiber: 2g
- Protein: 32g
- Cholesterol: 110mg
Keywords: Cracker Barrel fried chicken tenders, buttermilk chicken tenders, crunchy chicken strips, copycat recipe, southern fried chicken, deep fried chicken, chicken tenders recipe, easy chicken dinner, kid-friendly dinner, restaurant style chicken