 Kendric adan
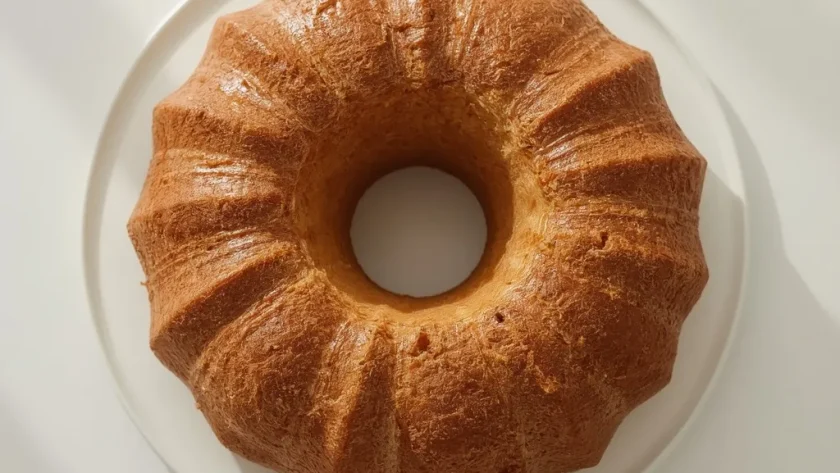
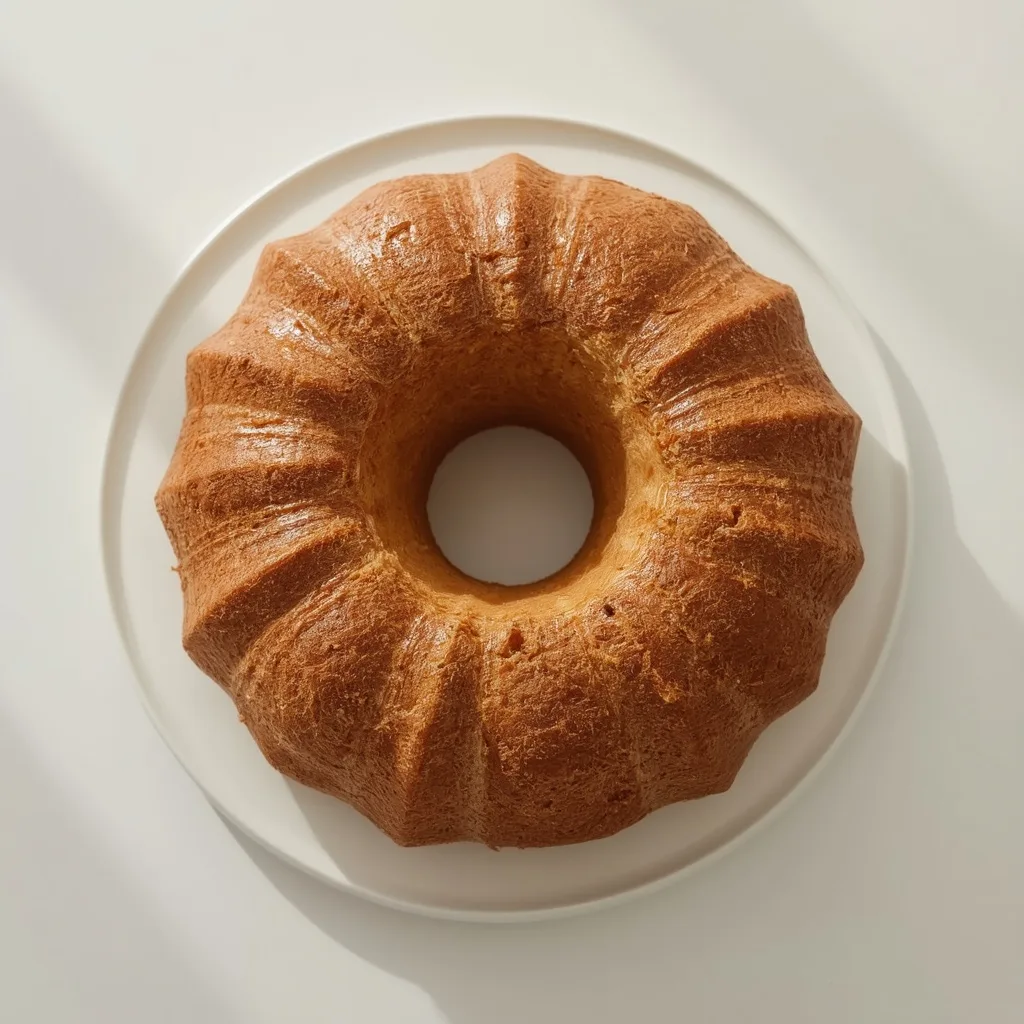
 Sara Lee Pound Cake is the kind of dense, buttery dessert that feels like a trip back to Sunday dinners and simple coffee breaks. It has a golden, crackly top, a tight crumb, and just the right amount of vanilla sweetness.
You can have it on the table in about 90 minutes total, and while the method is straightforward enough for a beginner, the overnight rest is the one step you shouldn’t skip. This is a great candidate for brunch, holiday platters, or just a quiet afternoon with a hot cup of tea.
Why You’ll Love This Recipe
- Simple Ingredients — Seven pantry staples you already own, no special equipment needed.
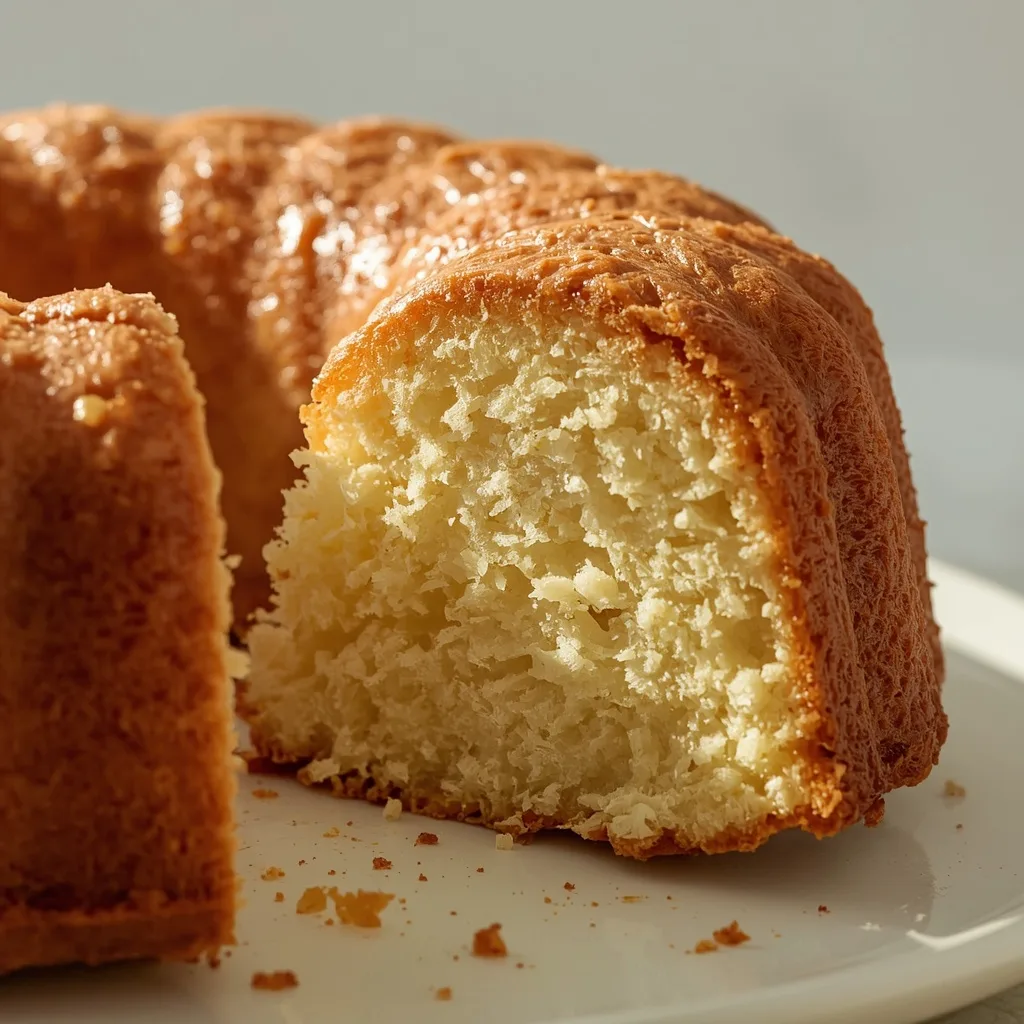
- That Classic Texture — Dense but tender, with a velvety crumb that holds up to slicing without crumbling.
- Better the Next Day — Resting it overnight deepens the vanilla flavor and makes the texture even softer.
- Versatile Base — Works beautifully on its own, toasted, or dressed up with berries and whipped cream.
What Makes This Recipe Special
The magic here comes down to the creaming method and a few specific ratios. Creaming the butter and sugar for a full 3 to 4 minutes traps air that gives the cake its rise, while alternating flour and milk keeps the batter smooth without overworking the gluten.
The result is a slice that’s rich with butter and vanilla, with a slightly crisp exterior and a moist, almost velvety inside. It’s the kind of cake that doesn’t need frosting to feel like a treat, making it a reliable dessert for any day of the week.
Ingredients You’ll Need
Everything on this list is a standard baking staple, so you likely have most of it already. Room temperature matters more than you think here, so pull the butter, eggs, and milk out ahead of time.
Core Ingredients
- 1 cup (2 sticks) unsalted butter, softened — This is the backbone of the flavor and texture. Softened butter creams properly, so don’t microwave it to speed things up. You’ll also need a little extra for greasing the pan.
- 1 cup granulated sugar — Adds sweetness and helps create that crackly top during baking. There’s no substitute here that will give the same result.
- 3 large eggs, at room temperature — Room temperature eggs emulsify into the batter smoothly, preventing a curdled look. Cold eggs can cause the mixture to separate.
- 1 teaspoon vanilla extract — Pure vanilla gives a cleaner, warmer flavor than imitation. Use a good quality one since it’s a prominent note in this cake.
- 1 1/2 cups all-purpose flour — Provides the structure. Measure it correctly by spooning it into your measuring cup and leveling off, or better yet, weigh it.
- 1/2 teaspoon fine sea salt — Balances the sweetness and enhances the butter flavor. Fine sea salt dissolves more evenly than coarse kosher salt.
- 1/4 cup whole milk, at room temperature — Adds moisture and helps create that tender crumb. Whole milk is ideal here for the richness it brings.
Equipment Needed
- A 9×5-inch loaf pan — This is the exact size you need. A different size will change the baking time and the final shape of the cake.
- A hand mixer or stand mixer — Creaming butter properly by hand is tough and takes longer. A mixer makes it easier to get that light, fluffy texture in a reasonable time.
- A rubber spatula — You’ll use this for folding the batter and scraping down the bowl, ensuring everything is mixed evenly without overworking it.
- A medium mixing bowl — For whisking the flour and salt together. A separate bowl keeps this step quick and simple.
- A wire cooling rack — Cooling the cake here allows air to circulate, preventing a soggy bottom while the cake finishes setting.
Instructions to Prepare Sara Lee Pound Cake
Follow these steps in order, and you’ll have a perfectly baked loaf. The key is to not rush the creaming or the baking — both are essential to getting that classic texture.
- Prep the Oven and Pan — Preheat your oven to 325°F (163°C). Grease a 9×5-inch loaf pan with butter, then dust with flour and tap out the excess. This ensures the cake releases cleanly after baking.
- Cream Butter and Sugar — In a large bowl, beat the softened butter and sugar on medium speed for 3 to 4 minutes, until light and fluffy. Scrape the sides and bottom of the bowl once during mixing to ensure even creaming.
- Add Eggs One at a Time — Beat each egg in for about 30 seconds after adding. The mixture should look smooth and slightly glossy. If it looks curdled, the eggs were likely too cold — let it sit for a minute and beat again.
- Beat in Vanilla — Add the vanilla extract and mix for about 15 seconds until fully incorporated.
- Whisk Dry Ingredients — In a separate bowl, whisk the flour and salt together. This aerates the flour and evenly distributes the salt.
- Alternate Flour and Milk — With the mixer on low, add the flour mixture in three additions, alternating with the milk. Start and end with flour. Mix each addition just until no streaks remain — overmixing makes the cake tough.
- Fold the Batter — Stop the mixer and gently fold the batter with a rubber spatula, scraping from the bottom to the top to ensure even incorporation. The batter will be thick and smooth.
- Fill the Pan — Pour the batter into the prepared pan and spread it evenly. Tap the pan on the counter a few times to release any large air bubbles.
- Bake — Place the pan in the center of the oven and bake for 60 to 70 minutes, or until a toothpick inserted into the center comes out clean with only a few moist crumbs attached. The top should be deep golden brown and cracked in the center. If it browns too quickly at around 40 minutes, tent loosely with aluminum foil.
- Cool in the Pan — Remove the cake from the oven and place the pan on a wire rack. Let it cool for 15 minutes so it sets and doesn’t crumble when inverted.
- Remove and Cool Completely — Run a thin knife around the edges to loosen, then invert onto the wire rack. Turn it right side up and cool completely, about 1 to 2 hours. Slicing too early will tear the cake.
- Rest Overnight — Wrap the cooled cake in plastic wrap and let it rest overnight at room temperature. This redistributes moisture, making the crumb even more tender and the flavor more developed.
Expert Tips for a Standout Sara Lee Pound Cake
Here is what I have learned from baking this recipe more times than I can count. These little tweaks make the difference between a good loaf and a great one.
- Patience with Creaming — Give the butter and sugar the full 3 to 4 minutes. It looks done before it actually is, and under-creamed butter means a denser, flatter cake.
- Room Temperature Ingredients — Set the eggs, butter, and milk out together about an hour before you start. There is no way around this step if you want a smooth, well-emulsified batter.
- Don’t Overmix the Flour — Mix only until the streaks disappear. Gluten develops quickly, and overmixing will give you a tough, rubbery crumb instead of a tender one.
- Check Early for Browning — Every oven runs differently. Around the 40-minute mark, peek inside and if the top looks deeply browned, lay a piece of foil loosely over the pan.
- Use a Toothpick Correctly — Insert it into the center of the crack. A few moist crumbs clinging to it are perfect; wet batter means it needs more time.
- Cool Before Slicing — The cake is still setting up as it cools. Slicing while warm will cause it to tear and crumble, so let it cool fully before you even think about cutting.
- Trust the Overnight Rest — Not convinced yet? Bake it a day ahead. The texture noticeably improves after 12 hours wrapped at room temperature.
Common Mistakes to Avoid
- Using Cold Ingredients — Cold eggs or milk will curdle the batter and make the cake dense and uneven. Bring everything to room temperature first.
- Skipping the Pan Prep — Butter alone isn’t enough. The dusting of flour is what guarantees the cake releases cleanly from the pan without sticking.
- Opening the Oven Too Early — During the first 40 minutes, the cake is still rising. The sudden temperature change can cause it to sink in the middle.
- Forgetting to Tap the Pan — Large air bubbles create tunnels in the crumb. A few firm taps on the counter fixes this in seconds.
- Overmixing the Batter — It is tempting to keep mixing until perfectly smooth, but each extra turn develops gluten. Stop as soon as the flour disappears.
- Slicing Too Soon — The cake needs time to set. Cutting after just a few minutes of cooling will leave you with a crumbly mess.
Variations & Ways to Customize Sara Lee Pound Cake
Once you have the basic loaf down, the possibilities are pretty fun to play with. These tweaks keep the same method but change up the flavor profile.
- Citrus Glazed — Whisk together 1 cup powdered sugar and 2 tablespoons lemon juice for a simple drizzle. The brightness pairs well with the buttery richness.
- Marble Swirl — Melt 2 ounces of dark chocolate and swirl it into half the batter before baking. Pour the plain batter in first, then add chocolate spoonfuls and gently swirl with a knife.
- Almond Extract Swap — Replace the vanilla with 1/2 teaspoon almond extract for a nuttier, more fragrant cake. Be careful — almond extract is much stronger than vanilla.
- Berry Topping — Serve with fresh strawberries and lightly sweetened whipped cream. Simple, seasonal, and always a crowd pleaser.
What to Serve With Sara Lee Pound Cake
This loaf is honestly delicious all on its own, but the right pairing can make it feel like an occasion. Here are some combinations I have tried and loved.
- Fresh Berries — A handful of raspberries or sliced strawberries cuts through the richness with bright acidity.
- Vanilla Bean Ice Cream — A warm slice with a scoop of melting ice cream is a classic for a reason.
- A Strong Cup of Coffee — The bitterness of black coffee balances the sweet, buttery cake perfectly.
- Lemon Curd — A spoonful of tart lemon curd adds a bright, tangy layer that complements the vanilla flavor.
- Salted Caramel Sauce — The salt and sweet combination takes this simple cake to a whole new level.
- Iced Tea — A tall glass of unsweetened iced tea is a low-fuss pairing for a summer afternoon.
Make-Ahead Instructions
- Bake a Day Ahead — This is actually the best way to make it. Wrap the cooled cake in plastic wrap and let it sit overnight at room temperature. It tastes better on day two.
- Freeze for Later — Wrap the cooled cake tightly in plastic wrap, then in foil, and freeze for up to 3 months. Thaw overnight in the fridge or for 2 hours at room temperature.
- Prep the Pan in Advance — You can grease and flour the loaf pan a day ahead and keep it covered on the counter. Saves a few minutes on baking day.
- Slice Before Freezing — Slice the cake first, then freeze individual pieces. You can pull out just what you need without thawing the whole loaf.
Storage and Reheating
Storage
- At Room Temperature — Store the unfrosted cake in an airtight container for up to 4 days. Keep it away from direct sunlight or heat.
- In the Fridge — The fridge will dry this cake out, so stick to room temperature unless you’re in a hot climate. If you do refrigerate, wrap it tightly.
- In the Freezer — Wrap the cooled cake in plastic wrap, then in foil, and freeze for up to 3 months. Defrost at room temperature for about 2 hours before serving.
Reheating
- Oven Method — Place individual slices on a baking sheet in a 300°F (150°C) oven for 5-7 minutes. This warms evenly without drying the cake out.
- Microwave Method — Heat on high for 15-20 seconds until just warm. Check at 15 seconds first to avoid overheating and making it tough.
- Softer Texture — If you want extra tenderness after reheating, brush the slice lightly with melted butter before warming. It adds back moisture.
- Toasted Option — For a crispy edge, pop a slice in a toaster or under the broiler for 1-2 minutes. Great with a smear of butter.
Nutritional Breakdown (Per Serving)
Based on 1 serving = 1 slice out of 4 total slices. This is a rich dessert, so the numbers lean on the higher side.
- Calories — 553
- Protein — about 7g
- Fat — 29g
- Carbohydrates — 65g
- Fiber — around 1g
- Sugar — 40g
- Sodium — roughly 299mg
Frequently Asked Questions
Can I freeze Sara Lee Pound Cake?
Yes, this cake freezes very well. Wrap the cooled cake tightly in plastic wrap, then in foil, and freeze for up to 3 months. Thaw at room temperature for about 2 hours before serving.
How long does Sara Lee Pound Cake last in the fridge?
The fridge will actually dry this cake out, so I recommend keeping it at room temperature in an airtight container for up to 4 days. If you must refrigerate it, wrap it tightly in plastic wrap to minimize moisture loss.
Why did my cake crack on top?
A crack down the center is totally normal and even desirable for a pound cake — it is a signature look. It happens because the outside sets quickly while the center still rises, creating that natural split.
Can I use salted butter instead of unsalted?
You can, but you should reduce the added salt to just a pinch or skip it entirely. Salted butter typically contains about 1/4 teaspoon of salt per stick, which can throw off the balance.
What if I don’t have whole milk?
You can substitute 2% or even half-and-half if that’s what you have. Avoid skim milk since it won’t add as much richness, and the texture will be slightly less tender.
How do I know when the cake is fully baked?
Insert a toothpick into the center of the cake and pull it out. It should come out clean with only a few moist crumbs attached. If you see wet batter, it needs more time in the oven.
More Recipes
Final Words
This recipe captures everything a classic Sara Lee Pound Cake should be — dense, buttery, and so tender it nearly melts on your tongue. The simple ingredients and straight-forward steps make it a reliable choice for both beginners and experienced bakers.
Give it a try and let the loaf do the talking. With that crackly top and moist crumb, it just might become your new go-to dessert.
PrintSara Lee Pound Cake
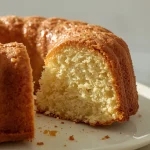
A dense, buttery pound cake with a fine, tender crumb and a golden, crackly top. This classic dessert is rich with vanilla flavor and a moist, velvety texture that melts in your mouth.
- Prep Time: 20
- Cook Time: 70
- Total Time: 90
- Yield: 4 1x
- Category: Dessert
- Method: Baking
- Cuisine: American
Ingredients
- 1 cup (2 sticks) unsalted butter, softened to room temperature, plus more for greasing the pan
- 1 cup granulated sugar
- 3 large eggs, at room temperature
- 1 teaspoon vanilla extract
- 1 1/2 cups all-purpose flour
- 1/2 teaspoon fine sea salt
- 1/4 cup whole milk, at room temperature
Instructions
- Preheat your oven to 325°F (163°C). Grease a 9×5-inch loaf pan with butter, then dust with flour, tapping out the excess. This ensures the cake releases cleanly after baking.
- In a large mixing bowl, using a hand mixer or stand mixer with the paddle attachment, cream the softened butter and sugar together on medium speed for 3 to 4 minutes, until light and fluffy. Stop to scrape down the sides and bottom of the bowl once during mixing to ensure even creaming.
- Add the eggs one at a time, beating well after each addition, about 30 seconds per egg. The mixture should look smooth and slightly glossy. If it looks curdled, it’s likely the eggs were too cold—let it sit for a minute and beat again.
- Beat in the vanilla extract until fully incorporated, about 15 seconds.
- In a separate bowl, whisk together the flour and salt until combined. This aerates the flour and evenly distributes the salt.
- With the mixer on low speed, add the flour mixture to the butter-egg mixture in three additions, alternating with the milk. Start and end with flour. Begin with half the flour, mix until just combined, then add the milk and mix, then the remaining flour. Mix each addition just until no streaks of flour remain—overmixing develops gluten and makes the cake tough.
- After the last addition, stop the mixer and fold the batter gently with a rubber spatula, scraping from the bottom to the top, to ensure everything is evenly incorporated. The batter will be thick and smooth.
- Pour the batter into the prepared loaf pan and spread it evenly with the spatula. Tap the pan on the counter a few times to release any large air bubbles.
- Place the pan in the center of the oven and bake for 60 to 70 minutes, or until a toothpick inserted into the center comes out clean, with only a few moist crumbs attached. The top should be deep golden brown and cracked in the center. If the top is browning too quickly (around 40 minutes), loosely tent with aluminum foil.
- Remove the cake from the oven and place the pan on a wire rack. Let it cool in the pan for 15 minutes. This allows the cake to set so it doesn’t crumble when inverted.
- After 15 minutes, carefully run a thin knife around the edges of the pan to loosen the cake, then invert it onto the wire rack. Turn it right side up and let it cool completely, about 1 to 2 hours, before slicing. Slicing too early will cause the cake to tear.
- For best flavor, wrap the cooled cake in plastic wrap and let it rest overnight at room temperature. The moisture redistributes, making the crumb even more tender and the flavor more developed.
Notes
Store unfrosted pound cake in an airtight container at room temperature for up to 4 days. To freeze, wrap the cooled cake tightly in plastic wrap, then in foil, and freeze for up to 3 months. Thaw at room temperature for about 2 hours before serving. To reheat individual slices, place on a baking sheet in a 300°F (150°C) ovenfor 5-7 minutes, or microwave on high for 15-20 seconds until just warm.
Nutrition
- Calories: 553
- Sugar: 40g
- Sodium: 299mg
- Unsaturated Fat: 17g
- Carbohydrates: 65g
- Fiber: 1g
- Protein: 7g
- Cholesterol: 173mg
Keywords: Sara Lee pound cake, pound cake recipe, classic pound cake, buttery cake, vanilla cake, homemade pound cake, American dessert, baked goods, dessert recipe, bundt cake