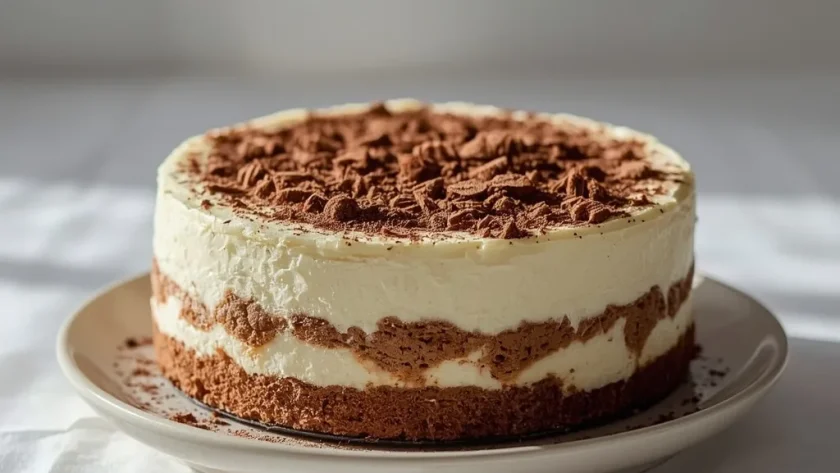
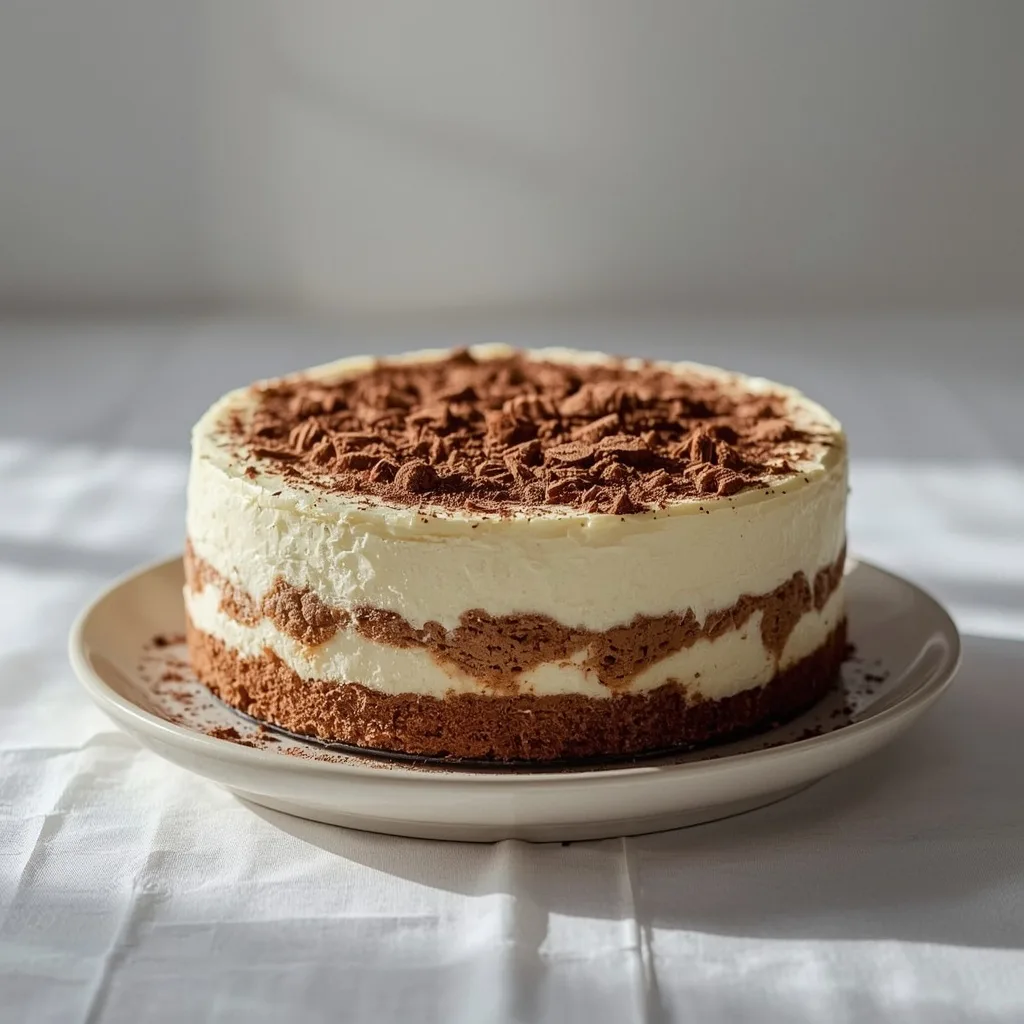
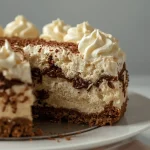
Tiramisu Su Cheesecake layers coffee-soaked ladyfingers with a silky mascarpone-cream cheese filling for a dessert that hits both cravings at once. It is rich without being heavy, sweet but balanced by bold espresso, and the texture lands somewhere between a classic cheesecake and a chilled custard.
You will need about 5 hours total — 30 minutes of hands-on work, 50 minutes of baking, and the rest for cooling and chilling. The water bath is the only tricky part, but wrapping the pan in foil handles that. This is an intermediate-level recipe best saved for a dinner party or a weekend project when you have time to let it rest.
Why You’ll Love Tiramisu Cheesecake Recipe
- Two desserts in one — You get the coffee kick of tiramisu and the creamy density of cheesecake in every single bite.
- Make-ahead friendly — The cake actually tastes better after a full night in the fridge, so you can bake it the day before.
- No weird ingredients — Cream cheese, mascarpone, ladyfingers, espresso, cocoa — everything is easy to find at any grocery store.

What Makes Tiramisu Cheesecake Special
The filling uses both cream cheese and mascarpone, which gives it the tang of a New York cheesecake and the velvety richness of real tiramisu. Ladyfingers form the crust and a second layer inside, so every forkful has a soft, coffee-soaked crumb against the smooth custard. It bakes in a water bath at a low temperature, which keeps the center creamy and the top crack-free.
Ingredients You’ll Need
Everything on this list is standard. Check your pantry for the instant espresso powder — it is the one item people sometimes miss.
For the Crust
- 4 ladyfingers (about 1.5 oz / 42g) — Crush these into fine crumbs for the base. Savoiardi-style ladyfingers work best; soft sponge-cake ladyfingers are too tender to form a stable crust.
- 2 tablespoons (28g) unsalted butter, melted — Binds the crumbs together. Use salted butter and skip the optional sugar if you prefer a savory-sweet contrast.
- 1 tablespoon granulated sugar (optional) — Adds a touch of sweetness to the crust. Leave it out if your ladyfingers are already sugary.
For the Soaking
- 1/2 cup (120ml) strong brewed coffee or espresso, cooled — The backbone flavor. Brew it double-strength so it does not get diluted by the ladyfingers.
- 1 tablespoon coffee liqueur (such as Kahlua), optional — Adds depth and a subtle boozy note. Skip it for a kid-friendly or alcohol-free version.
- 6 ladyfingers (about 2 oz / 56g) — These form the soaked layer on top of the crust. Dip them briefly — two seconds per side is enough.
For the Filling
- 8 oz (226g) full-fat cream cheese, softened — Provides structure and tang. Low-fat cream cheese changes the texture; stick with full-fat.
- 1/4 cup (57g) mascarpone cheese, softened — The Italian velvet. It makes the filling luscious without being greasy.
- 1/4 cup (50g) granulated sugar — Just enough to sweeten. The coffee and cocoa add their own complexity, so you do not need much.
- 2 large eggs, at room temperature — Cold eggs can seize the batter and create lumps. Let them sit on the counter for 30 minutes first.
- 1 teaspoon vanilla extract — Rounds out the coffee flavor. Pure vanilla is better here than imitation.
- 1 teaspoon instant espresso powder, dissolved in 1 teaspoon water — A concentrated paste that reinforces the coffee taste inside the cheesecake itself.
For the Topping
- 1 tablespoon unsweetened cocoa powder — Dusted right before serving. Dutch-process cocoa gives a darker, milder flavor; natural cocoa works fine too.
Equipment Needed
- 6-inch springform pan — The exact size matters. A larger pan makes the cake too thin and changes the bake time.
- Heavy-duty aluminum foil — A double layer wrapped around the pan keeps water out of the cheesecake during the water bath.
- Food processor or zip-top bag with rolling pin — For turning ladyfingers into crumbs. A processor is faster; the bag method works fine and is easier to clean.
- Roasting pan — Large enough to hold the springform pan with room for hot water to circulate. A 9×13 baking dish works if the springform fits inside.
- Instant-read thermometer — Optional but helpful. The internal temperature of 150°F (66°C) tells you exactly when the custard is set without guesswork.
Instructions to Prepare Tiramisu Su Cheesecake
Read through all the steps once before you start. The water bath and the gradual cooling are the parts most people rush, and those are the parts that prevent cracks.
- Preheat and prep the pan — Set the oven to 325°F (163°C). Grease the inside of a 6-inch springform pan lightly, then wrap the outside with two layers of heavy-duty foil, pressing the foil tight against the bottom and up the sides.
- Make the crust — Pulse 4 ladyfingers in a food processor until they become fine crumbs, or seal them in a zip-top bag and crush them with a rolling pin. Transfer the crumbs to a bowl, add 2 tablespoons melted butter and 1 tablespoon sugar (if using), and stir until the mixture looks like wet sand.
- Bake the crust — Press the crumb mixture firmly into the bottom of the prepared pan. Use the bottom of a flat glass or measuring cup to compact it evenly. Bake for 8-10 minutes, until the crust is lightly golden and smells toasted. Let it cool completely on a wire rack. Leave the oven on.
- Prepare the coffee soak — In a shallow bowl, combine 1/2 cup cooled strong coffee or espresso with 1 tablespoon coffee liqueur (if using). Set it aside.
- Make the espresso paste — Dissolve 1 teaspoon instant espresso powder in 1 teaspoon water in a small bowl. Stir until it forms a smooth, dark paste. This gets mixed into the filling later.
- Make the filling — In a large bowl, beat 8 oz softened cream cheese and 1/4 cup softened mascarpone on medium speed until smooth and fluffy, about 2 minutes. Scrape the bowl down halfway through. Add 1/4 cup granulated sugar and beat until combined.
- Add the eggs — Crack in the eggs one at a time, beating on low speed after each just until the yolk disappears. Overbeating at this stage adds too much air, which can cause the cheesecake to puff up and crack. Stir in 1 teaspoon vanilla and the espresso paste until just incorporated.
- Assemble the layers — Dip each of the 6 ladyfingers into the coffee mixture for 1-2 seconds per side. They should be moistened but still hold their shape. Trim the ends if they are too long to fit the pan. Arrange them in a single layer over the cooled crust, covering the entire surface.
- Pour the filling — Gently pour the cheesecake batter over the soaked ladyfingers and spread it evenly. Tap the pan on the counter a few times to release any air bubbles trapped inside.
- Set up the water bath — Place the springform pan inside a larger roasting pan. Pour hot water into the roasting pan until it reaches halfway up the sides of the springform pan. The foil seal keeps the water out while the steam creates a gentle, even baking environment.
- Bake — Bake at 325°F (163°C) for 45-50 minutes. The edges should look set and the center should jiggle slightly when you shake the pan gently. If you use an instant-read thermometer, it should read about 150°F (66°C) in the center.
- Cool gradually in the oven — Turn the oven off and crack the door open. Let the cheesecake rest in the water bath for 1 hour. This slow cooldown is your best defense against surface cracks.
- Chill — Remove the pan from the water bath, peel off the foil, and let the cheesecake cool completely on a wire rack. Cover with plastic wrap and refrigerate for at least 4 hours, preferably overnight. The texture firms up and the coffee flavor deepens as it sits.
- Serve — Just before serving, dust the top generously with unsweetened cocoa powder through a fine-mesh sieve. Slice with a sharp knife, wiping the blade clean between each cut.
Expert Tips for a Standout Tiramisu Su Cheesecake
- Soften both cheeses fully — Cold cream cheese and mascarpone create lumps that do not smooth out. Let them sit at room temperature for at least 30 minutes before beating.
- Dip ladyfingers quickly — A 1-2 second dunk on each side is enough. Soggy ladyfingers release too much liquid and make the cake watery.
- Use hot water for the bath — Cold water lowers the oven temperature too fast and extends the bake time unevenly. Boil the water first, then pour it in.
- Let the cake cool in the oven — Cracking happens from sudden temperature changes. Leaving the cheesecake in the turned-off oven with the door cracked gives it a gentle transition.
- Chill overnight for best texture — 4 hours works in a pinch, but 12 hours makes the cake firmer, cleaner to slice, and more flavorful.
- Re-dust cocoa before serving — Cocoa absorbs moisture from the fridge and can look blotchy. A fresh dusting right before serving makes it look professional.
Common Mistakes to Avoid
- Overmixing the filling — Beating too much air into the batter causes the cheesecake to puff up during baking and then collapse, which creates cracks. Mix on low speed after adding the eggs and stop as soon as they are incorporated.
- Skipping the foil wrap — A single layer or loose foil can leak. Water seeps into the pan and turns the crust into a soggy mess. Use two layers of heavy-duty foil and press them tight against the pan.
- Baking until the center is firm — A cheesecake that looks fully set in the center is already overbaked. The center should wobble like jello when you shake the pan. It will finish setting as it cools.
- Using cold eggs — Cold eggs stiffen the fat in the cream cheese batter and create a lumpy texture. Room-temperature eggs blend in smoothly and emulsify properly.
- Cutting the cake while warm — Warm cheesecake is too soft to slice cleanly. The filling will smoosh out and the layers will slide. Wait until after the full chilling time.
Variations & Ways to Customize Tiramisu Su Cheesecake
- Chocolate tiramisu twist — Melt 2 ounces of dark chocolate and fold it into the filling before pouring. Reduce the sugar by 1 tablespoon to balance the sweetness.
- Boozy soak — Replace the coffee liqueur with dark rum, brandy, or amaretto for a different flavor profile. Use the same amount — 1 tablespoon.
- Gluten-free version — Use gluten-free ladyfingers or substitute the crust with crushed gluten-free graham crackers. The rest of the ingredients are naturally gluten-free.
- Decaf option — Brew decaf espresso or use chicory coffee for the soaking liquid. The flavor stays rich but the caffeine content drops.
- Berry tiramisu cheesecake — Layer fresh raspberries or sliced strawberries on top of the soaked ladyfingers before adding the filling. The tart fruit cuts through the richness.
What to Serve With Tiramisu Su Cheesecake
The cake is rich enough to stand alone, but a few simple sides turn it into a proper dessert spread.
- Whipped cream — A dollop of lightly sweetened cream adds a cooling, airy contrast to the dense cheesecake.
- Fresh berries — Raspberries or blackberries cut the sweetness and add a pop of color on the plate.
- Espresso or cappuccino — A hot coffee drink reinforces the tiramisu flavors and cleanses the palate between bites.
- Dessert wine — A small glass of Vin Santo or Moscato d’Asti pairs well with the creamy, coffee-forward profile.
- Dark chocolate shavings — Curl them over the top for extra texture and a more intense cocoa hit.
Make-Ahead Instructions
- Bake one day early — Prepare the cheesecake completely through step 13, then refrigerate covered for up to 24 hours. The texture improves and the flavors meld overnight.
- Freeze the whole cake — Cool and chill the cheesecake first, then wrap it tightly in plastic wrap and a layer of foil. Freeze for up to 2 months. Thaw overnight in the refrigerator before serving.
- Pre-measure dry ingredients — Combine the sugar and instant espresso powder in a small container and store at room temperature. This saves time on baking day.
- Soak and freeze ladyfingers — Assemble the soaked ladyfinger layer directly in the pan, then freeze it for up to 1 week. Add the filling and bake straight from frozen — just add 5-7 minutes to the bake time.
Storage and Reheating
Storage
- Refrigerator — Keep the cheesecake covered with plastic wrap or in an airtight container for up to 5 days. Place a paper towel inside the container to absorb excess moisture and change it daily.
- Freezer (whole cake) — After the cake is fully chilled, wrap it in a layer of plastic wrap, then a layer of aluminum foil. Freeze for up to 2 months. Thaw overnight in the fridge with the wraps still on to prevent condensation.
- Freezer (individual slices) — Slice the chilled cheesecake, wrap each slice in plastic wrap, and place them in a freezer-safe bag. Thaw single portions in the refrigerator for about 2 hours.
Reheating
- Oven — Not recommended. This cheesecake is served cold; reheating changes the delicate custard texture and turns it grainy.
- Microwave — If you prefer a slightly softened slice, microwave it on 50% power for 10-15 seconds. Watch closely — longer than that and the mascarpone can separate.
- Air fryer — Do not use the air fryer for this dessert. The hot circulating air dries out the surface and ruins the creamy texture.
Nutritional Breakdown (Per Serving)
Based on 1 serving = 1 slice out of 4 total.
- Calories — 508
- Protein — 10g
- Fat — 37g
- Carbohydrates — 36g
- Fiber — about 1g
- Sugar — about 21g
- Sodium — around 262mg
Frequently Asked Questions
Can I make Tiramisu Su Cheesecake without a springform pan?
You can use a 6-inch regular cake pan lined with parchment paper, but removing the cake cleanly is harder. A springform pan gives you the easiest release and the neatest slices.
How long does Tiramisu Su Cheesecake last in the fridge?
Covered tightly, it stays fresh for up to 5 days. The cocoa topping may fade after day one, so dust a fresh layer right before serving leftovers.
Can I freeze Tiramisu Su Cheesecake for later?
Yes. Chill it fully, wrap it in plastic wrap and foil, and freeze for up to 2 months. Thaw overnight in the refrigerator with the wraps on to keep condensation off the surface.
Why did my cheesecake crack on top?
Three common causes: overmixing the batter, skipping the water bath, or cooling it too fast. Letting the cake rest in the turned-off oven with the door cracked open prevents most cracks.
Do I have to use mascarpone cheese?
Mascarpone gives the filling its creamy, luxurious texture. You can substitute an equal amount of extra cream cheese, but the result will be tangier and less silky.
Can I skip the coffee liqueur?
Absolutely. Just use straight brewed coffee or espresso for the soak. The cake will still have plenty of coffee flavor from the espresso paste in the filling.
Final Words
Tiramisu Su Cheesecake brings together two beloved desserts in a way that feels intentional, not gimmicky. The coffee-cocoa-mascarpone trio works just as well in a chilled, sliceable cake as it does in the traditional layered version. Give yourself enough time for the chilling step — it makes the difference between a good cheesecake and a great one.
More Recipes
PrintTiramisu Cheesecake
A decadent fusion of classic Italian tiramisu and creamy New York-style cheesecake. Layers of espresso-soaked ladyfingers and a velvety mascarpone-cream cheese filling are baked until set, then chilled and dusted with cocoa for a rich, coffee-infused dessert.
- Prep Time: 30
- Cook Time: 50
- Total Time: 320
- Yield: 4 1x
- Category: Dessert
- Method: Baking
- Cuisine: Italian-American
Ingredients
- For the Crust: 4 ladyfingers (about 1.5 oz / 42g), crushed into fine crumbs
- 2 tablespoons (28g) unsalted butter, melted
- 1 tablespoon granulated sugar (optional)
- For the Soaking: 1/2 cup (120ml) strong brewed coffee or espresso, cooled
- 1 tablespoon coffee liqueur (such as Kahlua), optional
- 6 ladyfingers (about 2 oz / 56g)
- For the Filling: 8 oz (226g) full-fat cream cheese, softened
- 1/4 cup (57g) mascarpone cheese, softened
- 1/4 cup (50g) granulated sugar
- 2 large eggs, at room temperature
- 1 teaspoon vanilla extract
- 1 teaspoon instant espresso powder, dissolved in 1 teaspoon water
- For the Topping: 1 tablespoon unsweetened cocoa powder
Instructions
- Preheat oven to 325°F (163°C). Lightly grease a 6-inch springform pan and wrap the outside with a double layer of heavy-duty aluminum foil to prevent water seepage during the water bath.
- For the crust: Pulse the 4 ladyfingers in a food processor until fine crumbs form, or crush them in a zip-top bag with a rolling pin. Transfer to a bowl, add melted butter and sugar (if using), and stir until mixture resembles wet sand.
- Press the crumb mixture evenly into the bottom of the prepared pan. Use the bottom of a glass to compact firmly. Bake for 8-10 minutes until lightly golden and fragrant. Cool completely on a wire rack. Leave oven on.
- For the coffee soak: In a shallow dish, combine the cooled strong coffee and coffee liqueur (if using). Set aside.
- In a small bowl, dissolve the instant espresso powder in 1 teaspoon water. Set aside. This concentrated paste will be added to the filling for a deeper coffee flavor.
- For the filling: In a large bowl, beat the softened cream cheese and mascarpone on medium speed until smooth and fluffy, about 2 minutes, scraping down the bowl as needed. Add the sugar and beat until combined.
- Add the eggs one at a time, beating on low speed after each just until the yolk disappears. Do not overbeat, as excess air can cause cracks. Stir in the vanilla and the dissolved espresso paste until just incorporated.
- To assemble: Dip each of the 6 ladyfingers into the coffee mixture for 1-2 seconds per side — they should be moistened but not soggy; trim ends to fit if necessary. Arrange the soaked ladyfingers in a single layer over the cooled crust, covering the entire surface.
- Pour the cheesecake filling over the ladyfingers, spreading evenly. Tap the pan gently on the counter a few times to release any trapped air bubbles.
- Place the springform pan inside a larger roasting pan. Pour hot water into the roasting pan until it reaches halfway up the sides of the springform pan. This water bath ensures gentle, even cooking and helps prevent cracking.
- Bake at 325°F (163°C) for 45-50 minutes, until the edges are set and the center jiggles slightly when the pan is gently shaken. The internal temperature should register about 150°F (66°C) on an instant-read thermometer for a creamy, fully-cooked custard.
- Turn off the oven, crack the door open, and let the cheesecake cool in the water bath for 1 hour. This gradual cooling minimizes the risk of cracking. Remove the pan from the water bath, discard the foil, and cool completely on a wire rack.
- Cover the cooled cheesecake with plastic wrap and refrigerate for at least 4 hours, preferably overnight. Chilling fully sets the texture and allows the coffee and mascarpone flavors to meld.
- Just before serving, dust the top generously with unsweetened cocoa powder through a fine-mesh sieve. Slice with a clean, sharp knife, wiping the blade between cuts for neat slices. Serve chilled.
Notes
Store leftover tiramisu cheesecake in the refrigerator, covered, for up to 5 days. To freeze, wrap tightly in plastic wrap and then aluminum foil; freeze for up to 2 months. Thaw overnight in the refrigerator before serving. If the cocoa topping fades after chilling, re-dust with fresh cocoa just before serving.
Nutrition
- Calories: 508
- Sugar: 21g
- Sodium: 262mg
- Saturated Fat: 20g
- Carbohydrates: 36g
- Fiber: 1g
- Protein: 10g
- Cholesterol: 213mg
Keywords: tiramisu cheesecake, mascarpone cheesecake, coffee dessert, Italian dessert, baked cheesecake, ladyfinger crust, espresso, creamy, Easter dessert, holiday dessert, fusion dessert