 Kendric adan
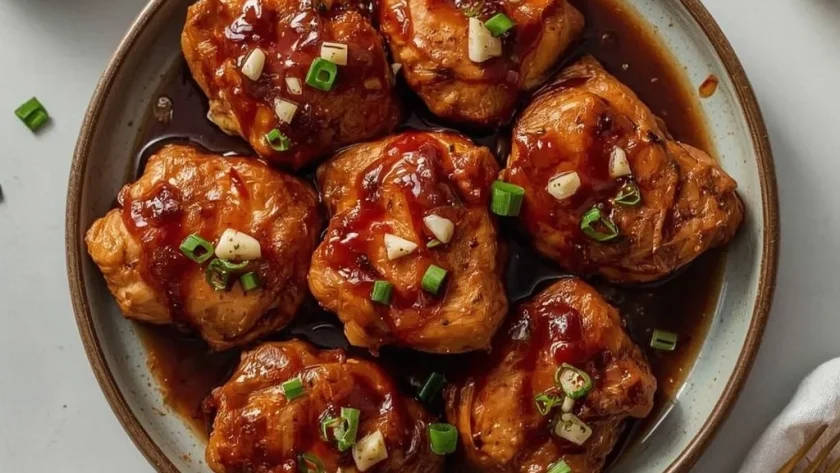
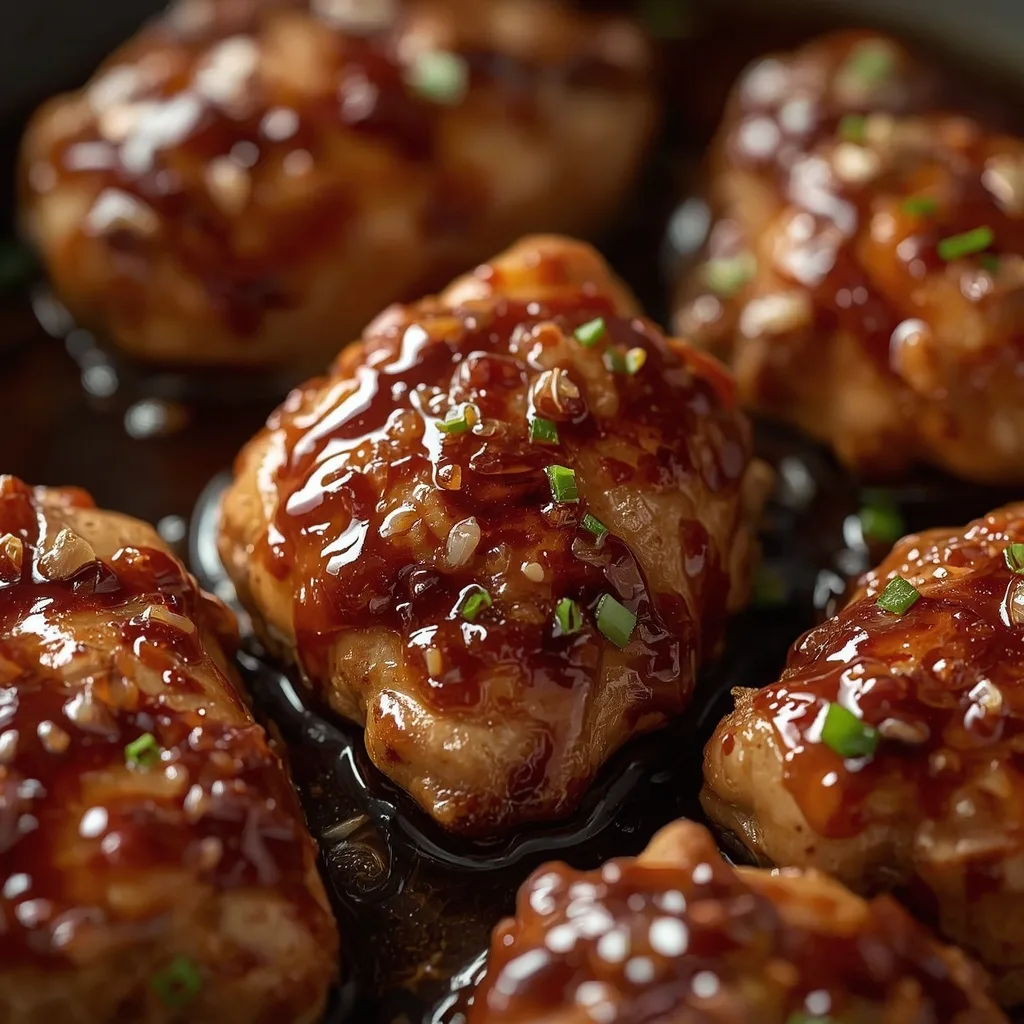
 Easy Hawaiian Shoyu Chicken delivers all the savory-sweet, garlicky goodness of a classic Hawaiian plate lunch right in your own kitchen. Tender chicken thighs simmer in a glossy soy-based sauce until they are practically fall-apart tender.
This stovetop recipe takes about 45 minutes total and is beginner-friendly enough for a weeknight dinner. The only slightly tricky part is getting a good sear on the chicken before simmering — but I will walk you through it step by step.
Why You’ll Love This Recipe
- Fast enough for a weeknight — 15 minutes of prep and 30 minutes of simmering means dinner is on the table in under an hour.
- Bold flavor without fuss — Just a handful of pantry staples creates a deeply savory-sweet sauce that coats every bite.
- Customizable to your taste — Adjust the sweetness, salt, or thickness in minutes with simple tweaks.
What Makes This Recipe Special
This dish skips the long marinade and complicated steps found in many Hawaiian recipes. The magic comes from browning the chicken thighs first, which builds a rich crust that infuses the entire braising liquid. What you get is a silky, glossy sauce that tastes like it simmered all day, with tender meat that pulls apart with a fork. It is pure comfort food that fits a busy schedule.
Ingredients You’ll Need
Here is what goes into this recipe. Most of these are probably in your kitchen already.
For the Chicken
- 2 lbs boneless skinless chicken thighs (about 6 thighs) — Thighs stay juicy during simmering and soak up the sauce beautifully. Trim excess fat but leave a thin layer for moisture.
For the Braising Liquid
- 1/2 cup low-sodium soy sauce (or regular, if preferred) — Provides the salty umami base. Low-sodium gives you better control over saltiness.
- 1/2 cup water — Thins the sauce enough to create a gentle simmer without diluting flavor.
- 1/3 cup packed light brown sugar — Adds sweetness and helps the sauce caramelize into a glossy glaze.
- 2 tbsp rice vinegar — A splash of acidity balances the richness and brightens the overall taste.
- 1 tbsp grated fresh ginger (from a 2-inch piece) — Fresh ginger brings warmth and a slight peppery kick. Do not substitute dried ginger here.
- 4 cloves garlic, minced — Essential for building the savory depth that defines shoyu chicken.
- 1/2 cup thinly sliced yellow onion (about half a medium onion) — Adds sweetness and texture as it cooks down into the sauce.
For Thickening (Optional)
- 1 tbsp cornstarch — Creates a thicker, glossier glaze if you prefer a more clinging sauce.
- 2 tbsp cold water — Mixed with cornstarch to make a slurry before adding to the hot sauce.
For Garnish
- 2 green onions, thinly sliced — A fresh, mild onion finish that brightens the final dish.
Equipment Needed
- Large, deep skillet or Dutch oven (12-inch/30cm or larger) — Gives enough surface area to sear the chicken without crowding and room for the braising liquid to bubble gently.
- Tongs — Essential for flipping the chicken without tearing the skin or losing the sear.
- Wooden spoon or spatula — Great for scraping up browned bits from the pan after searing.
- Medium mixing bowl — For whisking together the braising liquid ingredients.
- Small bowl (if using cornstarch) — For making the slurry if you want a thicker sauce.
Instructions to Prepare Easy Hawaiian Shoyu Chicken
These steps are straightforward, but the order matters for getting that deep flavor. Follow them in sequence and you will nail it.
- Prep the Chicken — Pat the thighs dry with paper towels and trim excess fat, leaving a thin layer. Season both sides lightly with kosher salt and black pepper — go easy, as the soy sauce adds plenty of saltiness.
- Make the Braising Liquid — In a medium bowl, whisk together soy sauce, water, brown sugar, rice vinegar, grated ginger, and minced garlic. Stir until the sugar is mostly dissolved. This is your shoyu braising liquid; the ginger and garlic will infuse the chicken as it cooks.
- Sear the Chicken — Set a large, deep skillet or Dutch oven over medium-high heat. Add 1 tablespoon of neutral oil and swirl to coat the bottom. When the oil shimmers, place the chicken thighs in a single layer — do not crowd; work in two batches if needed. Sear for 3-4 minutes per side, until deep golden brown. Use tongs to flip, listening for a steady sizzle throughout. Transfer the seared thighs to a plate. This browning step builds the savory crust that amplifies flavor.
- Cook the Onion — Reduce the heat to medium. Add the sliced onion to the pan with a splash of water or sake if the pan looks dry. Cook, stirring frequently with a wooden spoon, until the onion softens and turns translucent, about 2 minutes. Scrape up any browned bits from the bottom of the pan — those are concentrated flavor.
- Build the Sauce — Pour the prepared soy sauce mixture into the pan with the onions. Bring to a boil over medium-high heat, then lower the heat to medium-low to maintain a gentle simmer. The liquid should be bubbling slowly, not boiling vigorously.
- Simmer the Chicken — Return the seared chicken thighs to the pan, nestling them into the liquid. Spoon some of the sauce over the tops. Cover the pan with a lid slightly ajar to allow steam to escape, and simmer on medium-low for 20 minutes, flipping the chicken halfway through.
- Thicken the Sauce (Optional) — After 20 minutes, remove the lid. The chicken should be fork-tender and the sauce slightly reduced. If you prefer a thicker glaze, prepare a cornstarch slurry: in a small bowl, stir the cornstarch with 2 tablespoons cold water until smooth. Drizzle the slurry into the simmering sauce while stirring gently, and cook for 1-2 minutes until the sauce is glossy and thickened.
- Adjust Seasoning — Remove the pan from the heat. Taste the sauce and adjust if needed: add a pinch more brown sugar for sweetness, or a splash more vinegar for tang. Remember that the sauce will concentrate further as it cools.
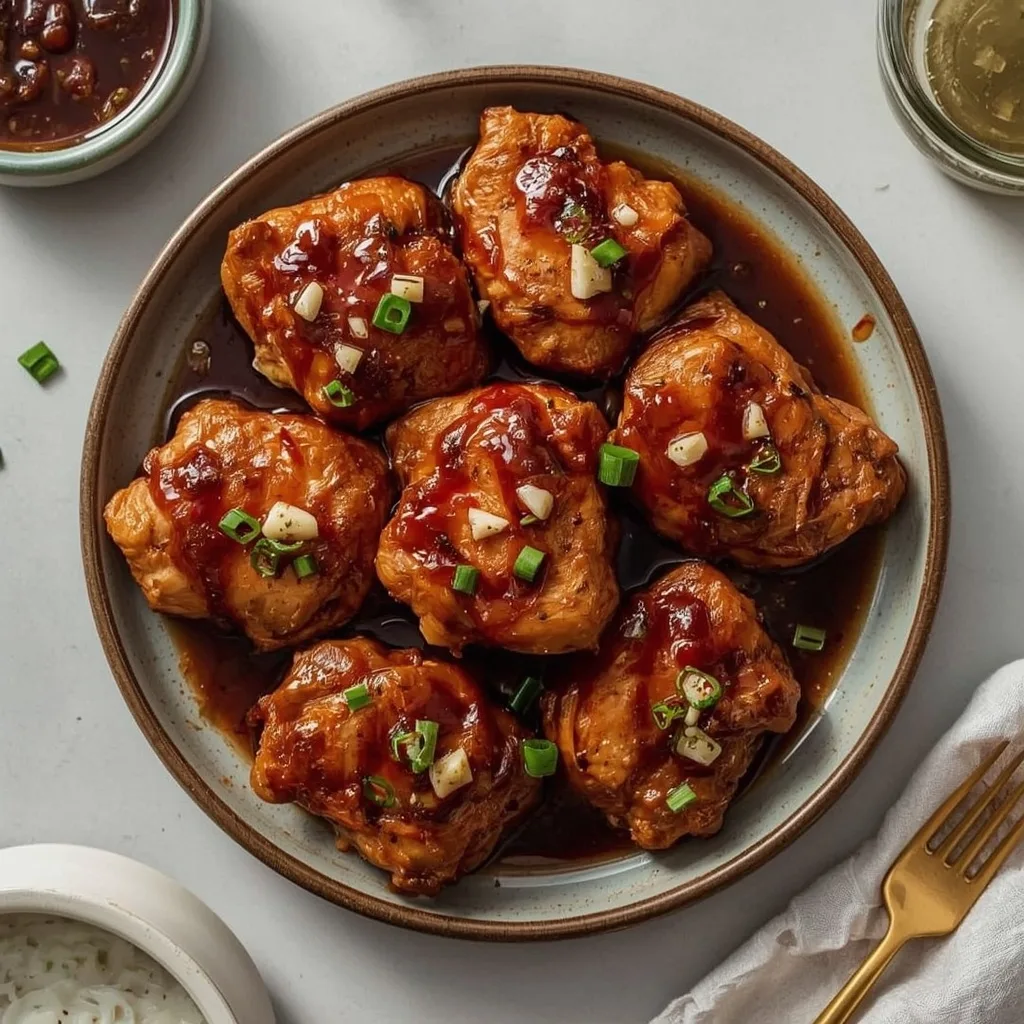
- Serve — Transfer the chicken to a serving platter and spoon the sauce over the top. Garnish with sliced green onions. Serve immediately over steamed white rice or with a side of macaroni salad for the full plate lunch experience.
Expert Tips for a Standout Easy Hawaiian Shoyu Chicken
- Pat dry the chicken thoroughly — Moisture on the surface prevents browning. Dry thighs develop a deeper, richer crust during searing.
- Sear in batches if needed — Crowding the pan drops the temperature and steams the meat instead of browning it. Two batches take only a few extra minutes.
- Scrape the browned bits — Those stuck-on pieces from searing are pure flavor. Deglaze them with the onion and a splash of liquid so they dissolve into the sauce.
- Simmer gently, not vigorously — A fast boil toughens the chicken and evaporates the sauce too quickly. A gentle bubble keeps the meat tender.
- Taste before adding the slurry — The sauce is naturally thin when hot. Try it first; you might prefer the lighter texture. The slurry is purely optional.
- Let it rest briefly before serving — A couple of minutes off the heat lets the sauce settle and cling better to the chicken.
Common Mistakes to Avoid
- Skipping the sear — Without browning, the sauce flavor is flat and the chicken lacks that savory depth. Always take the time to get golden-brown crust.
- Underseasoning the chicken — A light sprinkle of salt and pepper before searing is essential. The soy sauce is salty, but the meat itself needs the initial seasoning to taste seasoned all the way through.
- Boiling the sauce too hard — Vigorous boiling reduces the sauce too quickly and can make the chicken dry. Keep it at a gentle simmer.
- Adding the slurry to a boiling-hot sauce — Drizzling cornstarch slurry into a wild boil creates lumps. Stir it in while the sauce is at a gentle simmer, not at a roiling boil.
- Overcooking the chicken — Twenty minutes is usually enough for boneless thighs. Check for fork-tenderness at the 18-minute mark if your thighs are on the smaller side.
Variations & Ways to Customize Easy Hawaiian Shoyu Chicken
- Spicy shoyu chicken — Add 1-2 teaspoons of sriracha or a pinch of red pepper flakes to the braising liquid for gentle heat.
- Garlic-heavy version — Double the minced garlic (8 cloves) and add half during the onion cooking step, half near the end of simmering for a brighter garlic punch.
- Bone-in chicken thighs — Use bone-in, skin-on thighs for extra flavor and richness. Increase simmer time to 30-35 minutes, and skim excess fat before serving.
- Low-sugar version — Replace brown sugar with 2 tablespoons of honey or maple syrup for a less processed sweetener. Reduce liquid slightly to compensate.
- Gluten-free adaptation — Substitute tamari or coconut aminos for soy sauce. Both work well and maintain the umami character.
- Slow cooker method — After searing, transfer chicken and sauce to a slow cooker. Cook on low for 4-6 hours or high for 2-3 hours. Thicken with slurry at the end if desired.
What to Serve With Easy Hawaiian Shoyu Chicken
This dish pairs beautifully with classic sides that soak up the extra sauce. Here are my go-to choices.
- Steamed white rice — The essential foundation for any plate lunch. The fluffy grains catch every drop of glossy sauce.
- Macaroni salad — A creamy, tangy side that contrasts the savory-sweet chicken perfectly. Hawaiian-style mac salad is the classic partner.
- Steamed broccoli or bok choy — A simple green vegetable adds freshness and balances the richness of the dish.
- Pickled vegetables — Quick-pickled cucumbers or carrots cut through the sweetness with acidity and crunch.
- Grilled pineapple rings — A sweet, caramelized fruit side that echoes the tropical notes of the sauce.
Make-Ahead Instructions
- Prep the braising liquid — Whisk together soy sauce, water, brown sugar, vinegar, ginger, and garlic up to 2 days in advance. Store in an airtight container in the fridge.
- Slice and store the onion — Slice the onion and store in a sealed bag in the refrigerator for up to 3 days. Pat dry before adding to the pan.
- Cook the full dish — Prepare the chicken and sauce completely, then cool and refrigerate in an airtight container for up to 3 days. Reheat gently on the stovetop.
- Freeze for longer storage — Cool the cooked chicken and sauce completely, then freeze in a freezer-safe container for up to 2 months. Thaw overnight in the fridge before reheating.
Storage and Reheating
Storage
- Refrigerator — Store in an airtight container for up to 3 days. The sauce will thicken as it cools, which is normal.
- Freezer — Place cooled chicken and sauce in a freezer-safe container for up to 2 months. Thaw overnight in the fridge before reheating.
- Separate sauce from chicken (optional) — If reheating in batches, store the sauce separately from the chicken to avoid the meat getting too soft.
Reheating
- Stovetop — Place chicken and sauce in a skillet over medium-low heat with a splash of water. Cover and warm for 5-7 minutes, flipping once, until heated through. This method best preserves texture.
- Microwave — Cover and heat at 70% power for 2-3 minutes, stirring halfway. The texture will be slightly softer, but it is quick and convenient.
- Oven — Place chicken and sauce in an oven-safe dish, cover with foil, and reheat at 350°F for 10-12 minutes. Add a tablespoon of water if the sauce looks too thick.
Nutritional Breakdown (Per Serving)
Based on 1 serving = 1/4 of the recipe (about 1.5 thighs with sauce).
- Calories — 420
- Protein — 43g
- Fat — 16g
- Saturated Fat — about 4g
- Carbohydrates — 24g
- Fiber — 1g
- Sugar — about 21g
- Sodium — around 1380mg
- Cholesterol — about 185mg
Frequently Asked Questions
Can I use chicken breasts instead of thighs for Easy Hawaiian Shoyu Chicken?
Boneless skinless chicken breasts will work, but they dry out faster. Reduce simmer time to 12-15 minutes and check for doneness with a thermometer (165°F internal). The sauce still tastes great, but thighs stay juicier.
How do I make the sauce thicker without cornstarch?
Simmer the sauce uncovered for an extra 5-10 minutes after removing the chicken. The natural reduction will concentrate and thicken it. Alternatively, mash a few of the cooked onions into the sauce for body.
Can I freeze Easy Hawaiian Shoyu Chicken?
Yes, absolutely. Cool the cooked chicken and sauce completely, then transfer to a freezer-safe container. It keeps well for up to 2 months. Thaw overnight in the fridge and reheat gently on the stovetop with a splash of water to loosen the sauce.
Why is my shoyu chicken too salty?
Low-sodium soy sauce prevents this issue. If you used regular soy sauce, balance the salt by adding a squeeze of lime juice, a teaspoon more brown sugar, or a splash of unseasoned rice vinegar. These small adjustments brighten the flavor without adding liquid.
What is the best rice to serve with this dish?
Short-grain white rice is traditional for Hawaiian plate lunches. It has a sticky texture that holds the sauce well. Jasmine rice also works and adds a fragrant note.
Can I make this recipe in a slow cooker?
Yes. Sear the chicken and cook the onion on the stovetop as directed, then transfer everything (including the braising liquid) to a slow cooker. Cook on low for 4-6 hours or high for 2-3 hours. Thicken the sauce with a cornstarch slurry at the end if you want a thicker glaze.
More Recipes
Final Words
This Easy Hawaiian Shoyu Chicken delivers big flavor with minimal effort. The savory-sweet sauce and tender chicken make it a weeknight win every time. Give it a try — I think you will be surprised how quickly it becomes a regular in your dinner rotation.
PrintEasy Hawaiian Shoyu Chicken
Tender chicken thighs simmered in a savory-sweet soy-based sauce with ginger and garlic, capturing the iconic flavors of Hawaiian plate lunch. The sauce reduces to a glossy glaze that coats each piece, delivering a perfect balance of salty, sweet, and umami.
- Prep Time: 15
- Cook Time: 30
- Total Time: 45
- Yield: 4 1x
- Category: Main Course
- Method: Stovetop
- Cuisine: Hawaiian
Ingredients
- 2 lbs boneless skinless chicken thighs (about 6 thighs)
- 1/2 cup low-sodium soy sauce (or regular, if preferred)
- 1/2 cup water
- 1/3 cup packed light brown sugar
- 2 tbsp rice vinegar
- 1 tbsp grated fresh ginger (from a 2-inch piece)
- 4 cloves garlic, minced
- 1/2 cup thinly sliced yellow onion (about half a medium onion)
- 1 tbsp cornstarch (optional, for thicker sauce)
- 2 tbsp cold water (if using cornstarch)
- 2 green onions, thinly sliced for garnish
Instructions
- Place the chicken thighs on a cutting board and pat dry with paper towels. Trim any excess fat or skin, but leave a thin layer for moisture. Season both sides lightly with kosher salt and black pepper — go easy, as the soy sauce adds plenty of saltiness.
- In a medium bowl, whisk together the soy sauce, water, brown sugar, rice vinegar, grated ginger, and minced garlic. Stir until the sugar is mostly dissolved. This is your shoyu braising liquid; the ginger and garlic will infuse the chicken as it cooks.
- Set a large, deep skillet or Dutch oven (12-inch/30cm or larger) over medium-high heat. Add 1 tablespoon of neutral oil (like avocado or canola) and swirl to coat the bottom. When the oil shimmers, carefully place the chicken thighs in a single layer — do not crowd; work in two batches if needed. Sear for 3-4 minutes per side, until deep golden brown. Use tongs to flip, listening for a steady sizzle throughout. Transfer the seared thighs to a plate. This browning step builds the savory crust that amplifies flavor.
- Reduce the heat to medium. Add the sliced onion to the pan with a splash of water or sake if the pan looks dry. Cook, stirring frequently with a wooden spoon, until the onion softens and turns translucent, about 2 minutes. Scrape up any browned bits from the bottom of the pan — those are concentrated flavor.
- Pour the prepared soy sauce mixture into the pan with the onions. Bring to a boil over medium-high heat, then lower the heat to medium-low to maintain a gentle simmer. The liquid should be bubbling slowly, not boiling vigorously.
- Return the seared chicken thighs to the pan, nestling them into the liquid. Spoon some of the sauce over the tops. Cover the pan with a lid slightly ajar to allow steam to escape, and simmer on medium-low for 20 minutes, flipping the chicken halfway through.
- After 20 minutes, remove the lid. The chicken should be fork-tender and the sauce slightly reduced. If you prefer a thicker glaze, prepare a cornstarch slurry: in a small bowl, stir the cornstarch with 2 tablespoons cold water until smooth. Drizzle the slurry into the simmering sauce while stirring gently, and cook for 1-2 minutes until the sauce is glossy and thickened.
- Remove the pan from the heat. Taste the sauce and adjust if needed: add a pinch more brown sugar for sweetness, or a splash more vinegar for tang. Remember that the sauce will concentrate further as it cools.
- Transfer the chicken to a serving platter and spoon the sauce over the top. Garnish with sliced green onions. Serve immediately over steamed white rice or with a side of macaroni salad for the full plate lunch experience.
- For leftovers, refrigerate in an airtight container for up to 3 days. To reheat, place chicken and sauce in a skillet over medium-low heat with a splash of water, cover, and warm for 5-7 minutes until heated through. The microwave works too — cover and heat at 70% power for 2-3 minutes, but the stovetop maintains better texture.
Notes
Store in an airtight container in the refrigerator for up to 3 days. To freeze, place cooled chicken and sauce in a freezer-safe container for up to 2 months. Thaw overnight in the fridge before reheating. Reheat gently on the stovetop over medium-low heat, adding a splash of water if the sauce has thickened too much. The sauce will thicken as it cools, so it may appear thin while hot — that’s normal.
Nutrition
- Calories: 420
- Sugar: 21g
- Sodium: 1380mg
- Saturated Fat: 4g
- Carbohydrates: 24g
- Fiber: 1g
- Protein: 43g
- Cholesterol: 215mg
Keywords: shoyu chicken, Hawaiian chicken, Hawaiian shoyu chicken, easy shoyu chicken, chicken thighs, soy sauce chicken, Hawaiian plate lunch, one-pot chicken, weeknight dinner, island chicken