 Kendric adan
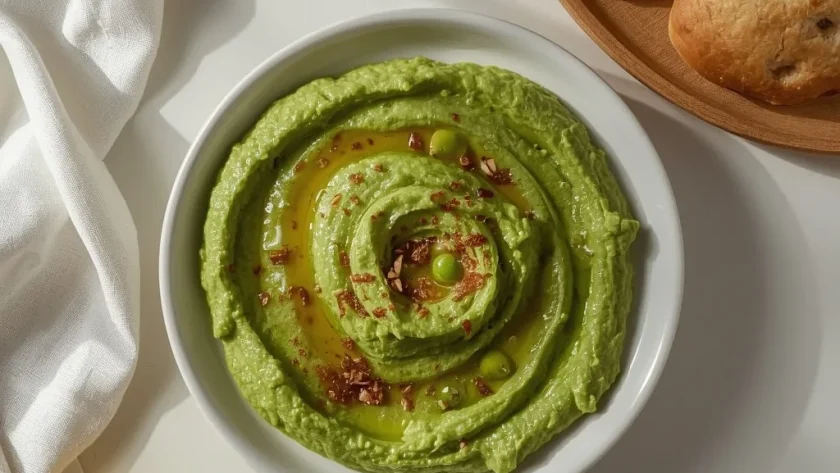
 Green Pea Hummus is a fresh, vibrant twist on the classic chickpea dip. It swaps out the usual beans for sweet green peas, creating a naturally creamy texture and a milder, slightly sweet flavor that pairs beautifully with lemon and tahini.
This no-cook recipe comes together in just 10 minutes, making it perfect for last‑minute snacks, quick appetizers, or a healthy spread for lunch wraps. The only real step is thawing the peas, and the food processor does all the work—so even a beginner can pull it off on the first try.
Why You’ll Love This Recipe
- Ready in minutes — no cooking, no soaking, no waiting. Just a quick blitz in the food processor and you’re done.
- Brighter, lighter flavor — green peas bring a natural sweetness that balances the rich, nutty tahini and bright lemon juice.
- Healthier twist — peas pack extra fiber and vitamin C compared to traditional chickpea hummus, with a silky texture that needs very little oil.
What Makes This Recipe Special
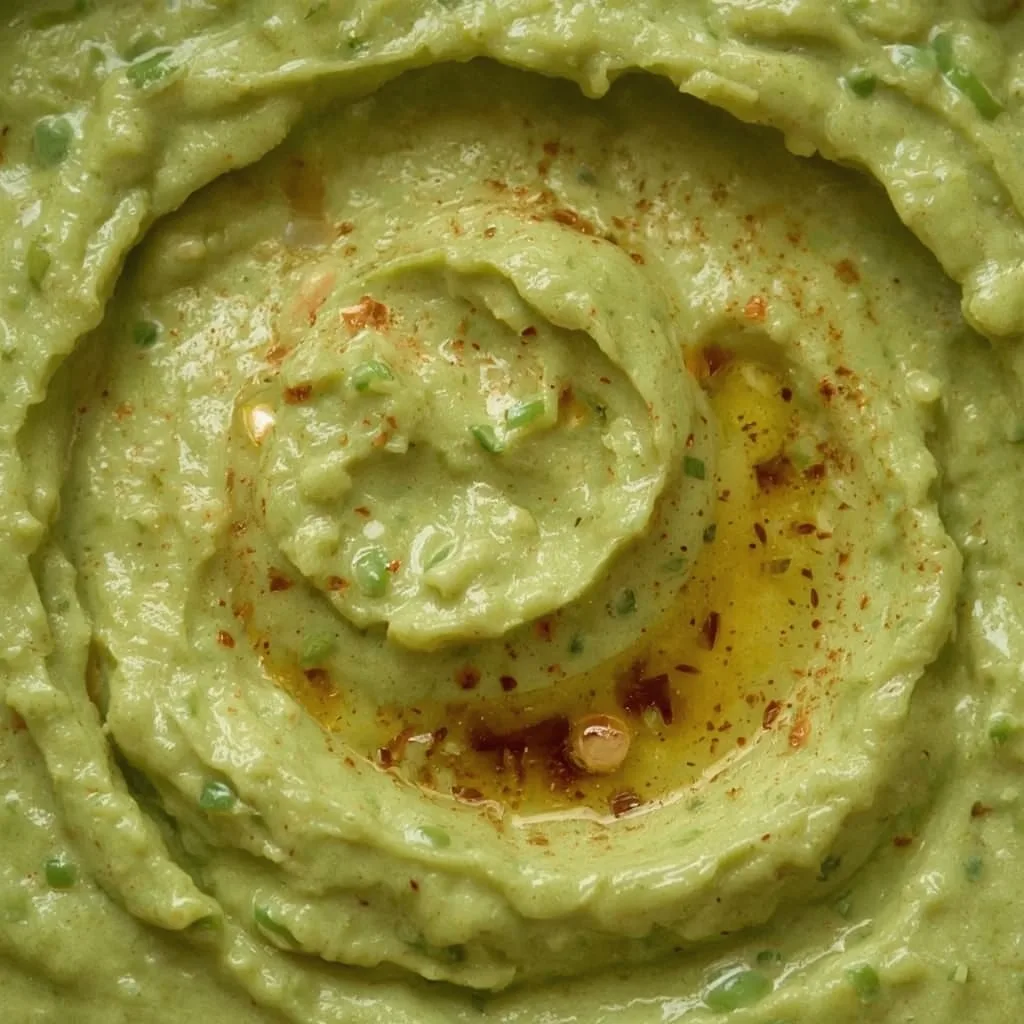
Frozen green peas are the star here—they give the hummus a velvety, almost whipped consistency without the grittiness that can sometimes come from canned chickpeas. The combination of toasted tahini, fresh lemon, and a hint of cumin adds depth while still letting the sweet pea flavor shine through. It’s light enough for a warm‑weather snack yet satisfying enough to serve alongside hearty crudités or crusty bread.
Ingredients You’ll Need
You’ll find everything at a standard grocery store. Here’s what each ingredient does and a few easy swaps.
Base Ingredients
- 2 cups frozen green peas, thawed and drained — the backbone of this hummus. Thaw them completely and shake off excess water; any extra moisture will make the texture too loose.
- 1/4 cup tahini, well stirred — adds creamy richness. Tahini separates, so stir it thoroughly before measuring to avoid a bitter, clumpy result.
- 2 tablespoons fresh lemon juice (from about 1 lemon) — brightens the whole dish. Bottled lemon juice works in a pinch, but fresh gives a cleaner, more vibrant flavor.
- 1 small garlic clove, minced — a little goes a long way. If you prefer a milder hummus, use just half a clove or roast it first for a sweeter note.
- 1/4 cup extra‑virgin olive oil — used both in the food processor and as a final drizzle. A good‑quality oil makes a noticeable difference.
- 1/2 teaspoon fine sea salt or kosher salt — balances the sweetness of the peas. Start with this amount, then adjust after tasting.
- 1/4 teaspoon ground cumin (optional) — adds a warm, earthy undertone. You can leave it out or swap in smoked paprika for a different spin.
- 2 tablespoons cold water, plus more as needed — thins the hummus to a spoonable consistency. Add it slowly while the processor runs.
Equipment Needed
- Food processor — the only tool that gives the ultra‑smooth, creamy texture you want. A high‑speed blender can work, but you’ll need to scrape down the sides more often.
- Colander — for rinsing and draining the thawed peas. A fine‑mesh strainer is even better to catch small bits.
- Rubber spatula — essential for scraping down the bowl to ensure everything gets blended evenly.
- Measuring spoons and a liquid measuring cup — precise amounts matter here; too much water or oil will make the hummus runny.
- Shallow serving bowl — a wide bowl shows off the beautiful green color and gives you room to create that signature swirl on top.
Instructions to Prepare Green Pea Hummus
This method is straightforward, but paying attention to each step ensures the creamiest result. Follow the order below and don’t rush the blending.
- Thaw the peas — Place the frozen peas in a colander and rinse with warm running water for about 30 seconds, or let sit at room temperature for 10 minutes until fully thawed. Shake off excess water and drain well to avoid a watery hummus.
- Combine the base ingredients — Add the peas, tahini, lemon juice, minced garlic, salt, cumin (if using), and 2 tablespoons of the olive oil to the food processor bowl. Pulse 5–6 times to break down the peas before continuous blending.
- Process and scrape — Process the mixture for 30 seconds, then stop and scrape down the sides and bottom of the bowl with a rubber spatula. This ensures even texture and prevents unblended chunks.
- Add the remaining oil and water — With the processor running, slowly drizzle in the remaining 2 tablespoons of olive oil through the feed tube. After the oil is incorporated, add the water in a slow stream. The mixture will become smooth and creamy; if it looks too thick, add another tablespoon of water until the desired consistency is reached—similar to soft, spoonable hummus.
- Adjust seasoning — Taste and add more salt for savoriness, more lemon juice for brightness, or an extra pinch of cumin for warmth. Process for another 5 seconds to blend any adjustments.
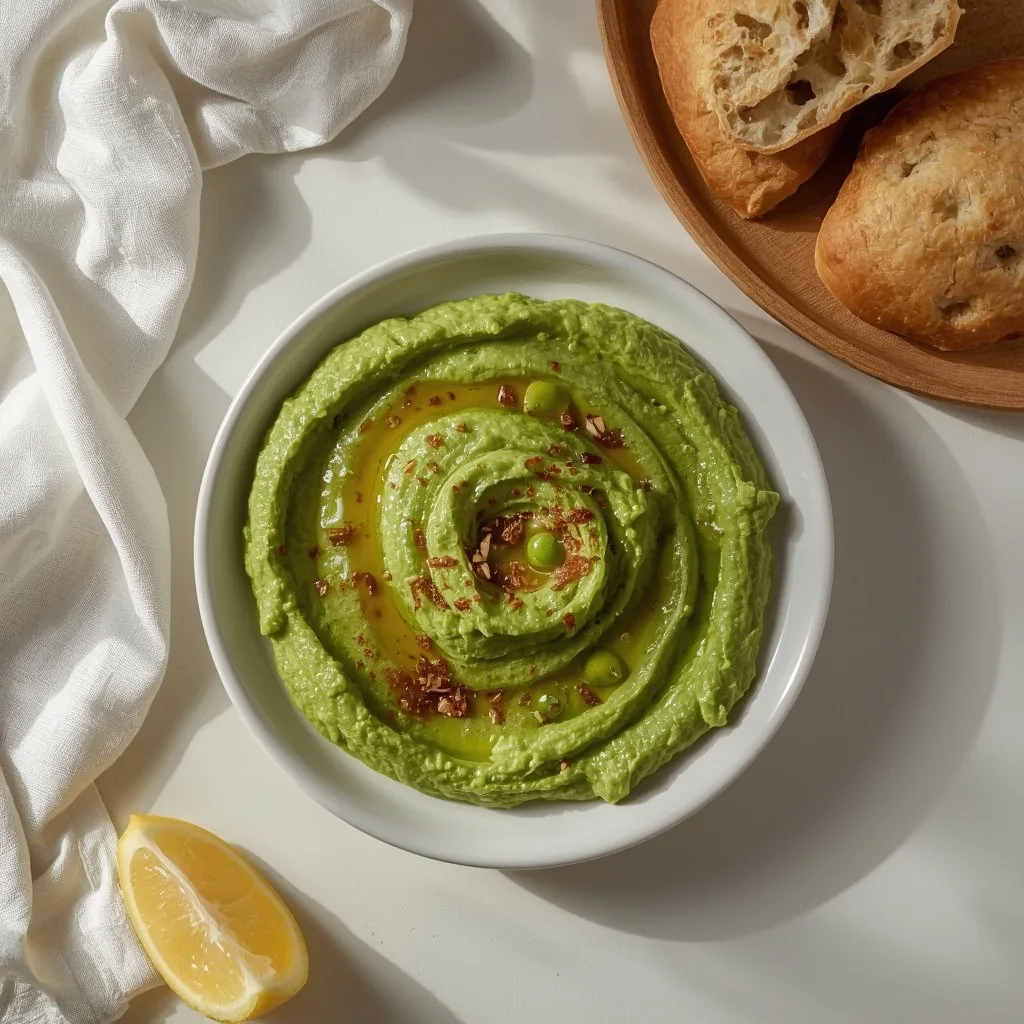
- Transfer and garnish — Spoon the hummus into a shallow serving bowl. Use the back of a spoon to create a swirl in the center, then drizzle with a little extra olive oil. For garnish, sprinkle with fresh mint leaves, smoked paprika, or toasted pine nuts, if desired. Serve immediately with pita chips, raw vegetables, or as a spread on wraps.
Expert Tips for a Standout Green Pea Hummus
- Dry the peas thoroughly — After thawing, pat them with a paper towel or let them sit in the colander for a few extra minutes. Excess water thins the hummus and dilutes the flavor.
- Let the food processor run long enough — 30 seconds of continuous blending is the minimum. If the hummus still looks grainy after that, process another 15–20 seconds until it turns silky.
- Use well‑stirred tahini — Tahini that hasn’t been stirred can be thick and bitter. Mix it vigorously in the jar before measuring to ensure an even, creamy consistency.
- Add water a tablespoon at a time — The hummus should be thick enough to hold a soft peak. Adding too much water at once makes it soupy; you can always add more, but you can’t take it out.
- Chill before serving if you have time — Refrigerating the hummus for 30 minutes allows the flavors to meld. If you’re serving it right away, it will still taste great, but the flavors will be less integrated.
- Reserve a few whole peas for garnish — Drop a handful of the thawed peas on top before drizzling the oil. It adds a pop of color and shows off the main ingredient.
- Taste twice — Frozen peas vary in sweetness and saltiness. Always taste after blending and adjust the lemon, salt, or cumin before calling it done.
Common Mistakes to Avoid
- Skipping the drainage step — Watery peas lead to a thin, bland hummus. Always let the thawed peas sit in a colander for a minute, then gently squeeze out any remaining moisture with your hands.
- Using a warm food processor bowl — If the bowl is hot from a previous use, the hummus can warm up and lose its fresh taste. Let the bowl cool to room temperature before starting.
- Over‑processing after adding water — Once you add the water, blend just until smooth. Over‑processing can cause the hummus to become gummy as the starches break down too much.
- Adding all the oil at once — Pouring the olive oil in while the processor is off makes it hard to emulsify. Always add it in a slow stream with the machine running.
- Under‑seasoning with salt — Peas are naturally sweet, so they need enough salt to bring out their savory side. Don’t be shy; taste and add a pinch more if the flavor seems flat.
- Making it too thick — A hummus that looks stiff in the bowl will be hard to dip. Aim for a consistency that mounds slightly but still spreads easily with a cracker.
Variations & Ways to Customize Green Pea Hummus
- Herb‑infused version — Add a handful of fresh mint, basil, or parsley along with the peas. Process until smooth; the herbs brighten the color and add a garden‑fresh note.
- Spicy kick — Toss in a small jalapeño (seeded) or a pinch of cayenne pepper with the garlic. The heat balances the sweetness of the peas.
- Roasted garlic twist — Swap the raw garlic for 2–3 cloves of roasted garlic. The caramelized flavor is milder and sweeter, perfect for a more delicate hummus.
- Lemon‑tahini boost — Increase the lemon juice to 3 tablespoons and add an extra tablespoon of tahini for a tangier, nuttier profile. Great for serving with roasted vegetables.
- Avocado addition — Blend in half a ripe avocado with the peas. It makes the hummus extra creamy and gives it a pale green shade, plus adds healthy fats.
- Smoky variation — Replace the cumin with 1/2 teaspoon smoked paprika and omit the mint garnish. Use smoked paprika as a topping too for a barbecue‑style hummus.
What to Serve With Green Pea Hummus
This dip pairs well with a wide range of dippers and sides. Try any of these for a complete snack board or light meal.
- Pita chips or warm flatbread — The salty crunch of pita chips contrasts nicely with the creamy hummus. Naan or lavash also work well.
- Crudité platter — Carrot sticks, cucumber rounds, bell pepper strips, and snap peas all complement the green pea flavor.
- Crispy roasted chickpeas — Toss canned chickpeas with olive oil and salt, roast until crunchy, and sprinkle over the hummus for added texture.
- Rice cakes or crackers — Look for plain or lightly salted varieties so the hummus stays the star. Whole‑grain crackers add a nice nuttiness.
- Grilled chicken or fish — Use the hummus as a sauce for grilled skewers. It’s especially good with lemon‑herb chicken or white fish like cod.
- Stuffed pita pockets — Spread a generous layer inside a pita, add lettuce, tomatoes, and grilled halloumi or tofu for a quick vegetarian lunch.
Make-Ahead Instructions
- Prepare up to 2 days in advance — Make the full recipe, store it in an airtight container in the fridge, and hold off on the final olive oil drizzle. Add the oil just before serving for the best presentation.
- Thaw and drain peas ahead — You can thaw the peas the night before, drain them well, and keep them in a sealed container in the fridge. Then you only need to measure and blend when you’re ready.
- Portion for lunches — Divide the hummus into small containers (about 1/4 cup each) for easy grab‑and‑go snacks. Add a squeeze of lemon to each portion to keep the color bright.
- Keep garnishes separate — If you’re bringing the hummus to a party, pack the mint or paprika in a separate small bag and sprinkle on at the last minute. Pre‑garnished hummus can look wilted after a few hours.
Storage and Reheating
Storage
- Airtight container in the fridge — Store any leftover hummus in a sealed container for up to 4 days. Press a piece of plastic wrap directly onto the surface before closing the lid; this prevents a skin from forming.
- Add a thin layer of olive oil — Pour a tiny amount of oil over the top of the hummus before refrigerating. It helps lock in moisture and keeps the color from darkening.
- Do not freeze — Green peas have a high water content, and freezing causes the hummus to turn grainy when thawed. If you absolutely must, freeze in an ice cube tray and use the cubes in soups rather than as a dip.
Reheating
- Serving straight from the fridge — This hummus is meant to be eaten cold or at room temperature. If it has thickened after chilling, stir in 1–2 teaspoons of water or lemon juice to restore its creamy consistency.
- Microwave for a few seconds (optional) — If you prefer a slightly warmer dip, microwave in a microwave‑safe bowl on medium power for 15–20 seconds. Stir well and check the temperature; it can quickly become hot and lose its fresh taste.
- Let it sit on the counter — For room‑temperature serving, take the container out of the fridge 15–20 minutes before you plan to eat. Stir once before transferring to a bowl.
Nutritional Breakdown (Per Serving)
Based on 1 serving = 1/4 of the entire recipe (about 1/2 cup).
- Calories: 261
- Protein: 7g
- Fat: 20g
- Saturated Fat: around 3g
- Carbohydrates: 13g
- Fiber: about 4g
- Sugar: about 4g
- Sodium: roughly 100mg
Frequently Asked Questions
Can I use canned green peas instead of frozen?
Frozen peas work best because they are picked and flash‑frozen at peak sweetness. Canned peas are softer and often packed in brine, which can make the hummus watery and too salty. If you only have canned, rinse and drain them thoroughly, but expect a less vibrant color and slightly different texture.
How long does Green Pea Hummus last in the fridge?
Stored in an airtight container, it will stay fresh for up to 4 days. The color may darken slightly over time, but the flavor will remain bright. Before serving, stir in a teaspoon of lemon juice to revive the taste and appearance.
Can I make this hummus without tahini?
Yes, but the texture and flavor will change. Replace the tahini with an equal amount of Greek yogurt or silken tofu for a similar creamy consistency. Alternatively, use 2 tablespoons of sunflower seed butter for a nut‑free version.
Why is my Green Pea Hummus too thick?
Most likely you didn’t add enough water, or the peas were not fully drained. With the processor running, add cold water a tablespoon at a time until the hummus reaches a soft, spoonable consistency. If it’s still thick after 3–4 tablespoons, drizzle in a little extra olive oil.
Can I freeze Green Pea Hummus?
Freezing is not recommended. The high water content of green peas causes the hummus to develop a grainy, icy texture upon thawing. For longer storage, make a double batch and keep it in the fridge for up to 4 days.
How do I make this hummus nut‑free?
The recipe is already nut‑free as written because tahini is made from sesame seeds, not nuts. If you need to avoid sesame as well, replace the tahini with hulled hemp seeds or sunflower seed butter, and use a nut‑free oil like avocado oil.
Final Words
Green Pea Hummus is one of those recipes that proves you don’t need a long ingredient list or complex techniques to create something delicious. It’s quick, forgiving, and endlessly adaptable to your pantry and preferences. Give it a try the next time you want a snack that feels fresh, satisfying, and just a little bit different from the usual.
More Recipes
PrintGreen Pea Hummus
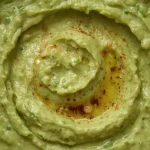
This vibrant green pea hummus offers a fresh twist on the classic chickpea version, with a naturally sweet and creamy texture from green peas. Brightened with lemon and enriched with toasted tahini, it makes a quick, healthy snack or appetizer perfect for any occasion.
- Prep Time: 10
- Total Time: 10
- Yield: 4 1x
- Category: Snack
- Method: No-Cook
- Cuisine: Mediterranean
Ingredients
- 2 cups frozen green peas, thawed and drained
- 1/4 cup tahini, well stirred
- 2 tablespoons fresh lemon juice (from about 1 lemon)
- 1 small garlic clove, minced
- 1/4 cup extra-virgin olive oil
- 1/2 teaspoon fine sea salt or kosher salt
- 1/4 teaspoon ground cumin (optional)
- 2 tablespoons cold water, plus more as needed for consistency
Instructions
- Thaw the peas: Place the frozen peas in a colander and rinse with warm running water for about 30 seconds, or let sit at room temperature for 10 minutes until fully thawed. Shake off excess water and drain well to avoid a watery hummus.
- Combine the peas, tahini, lemon juice, minced garlic, salt, cumin (if using), and 2 tablespoons of the olive oil in the bowl of a food processor fitted with the blade attachment. Pulse 5–6 times to break down the peas before continuous blending.
- Process the mixture for 30 seconds, then stop and scrape down the sides and bottom of the bowl with a rubber spatula. This ensures even texture and prevents unblended chunks.
- With the processor running, slowly drizzle in the remaining 2 tablespoons of olive oil through the feed tube. After the oil is incorporated, add the water in a slow stream. The mixture will become smooth and creamy; if it looks too thick, add another tablespoon of water until the desired consistency is reached—similar to soft, spoonable hummus.
- Taste the hummus and adjust seasoning: add more salt for savoriness, more lemon juice for brightness, or an extra pinch of cumin for warmth. Process for another 5 seconds to blend any adjustments.
- Transfer the hummus to a shallow serving bowl. Use the back of a spoon to create a swirl in the center, then drizzle with a little extra olive oil. For garnish, sprinkle with fresh mint leaves, smoked paprika, or toasted pine nuts, if desired. Serve immediately with pita chips, raw vegetables, or as a spread on wraps.
Notes
Store in an airtight container in the refrigerator for up to 4 days. The hummus will thicken as it chills; before serving, stir in 1–2 teaspoons of water or lemon juice to restore a creamy consistency. This hummus does not freeze well due to the high water content of peas, which can cause a grainy texture upon thawing. If making ahead, prepare without the final olive oil drizzle and add just before serving for the best presentation.
Nutrition
- Calories: 261
- Sugar: 4g
- Sodium: 100mg
- Unsaturated Fat: 3g
- Carbohydrates: 13g
- Fiber: 4g
- Protein: 7g
- Cholesterol: 0mg
Keywords: green pea hummus, pea hummus recipe, vegan hummus, easy appetizer, healthy snack, Mediterranean dip, no-cook hummus, spring appetizer, green peas, tahini dip, gluten-free snack, dairy-free