 Kendric adan
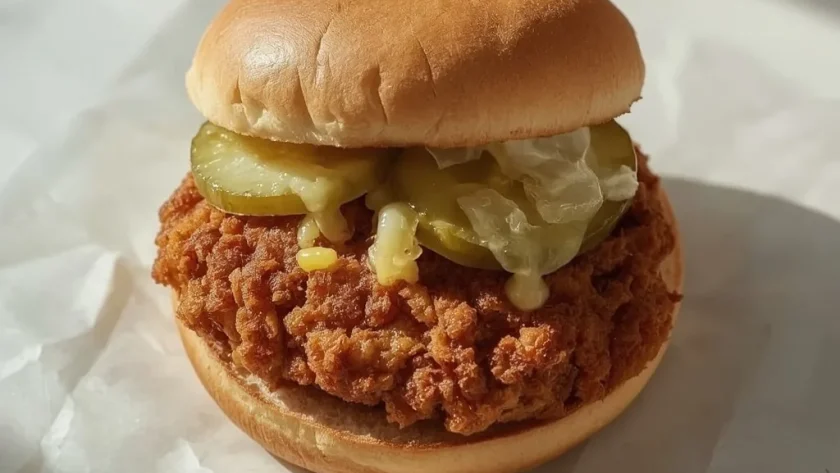
 Making a Shake Shack Chicken Shack Sandwich at home gives you that same juicy, crunchy, and tangy bite without waiting in line or paying fast-food prices. The buttermilk brine keeps the chicken moist inside while the seasoned flour coating turns shatteringly crisp in hot oil.
This recipe takes about 35 minutes of active cooking, though the chicken needs at least an hour to soak in the buttermilk mixture. It’s beginner-friendly with one slightly attention-hungry step: frying at the right temperature is what separates a crispy crust from a greasy one.
Why You’ll Love This Recipe
- Crispy texture — The baking powder in the flour coating creates a craggy, crunchy crust that stays crisp thanks to resting on a wire rack after frying.
- Bold flavor — The tangy Shack Sauce, briny pickles, and seasoned chicken combine for that unmistakable burger-joint flavor profile.
- Weekend-worthy — This sandwich works for casual Friday dinners, game day spread, or when you simply want comfort food done right.
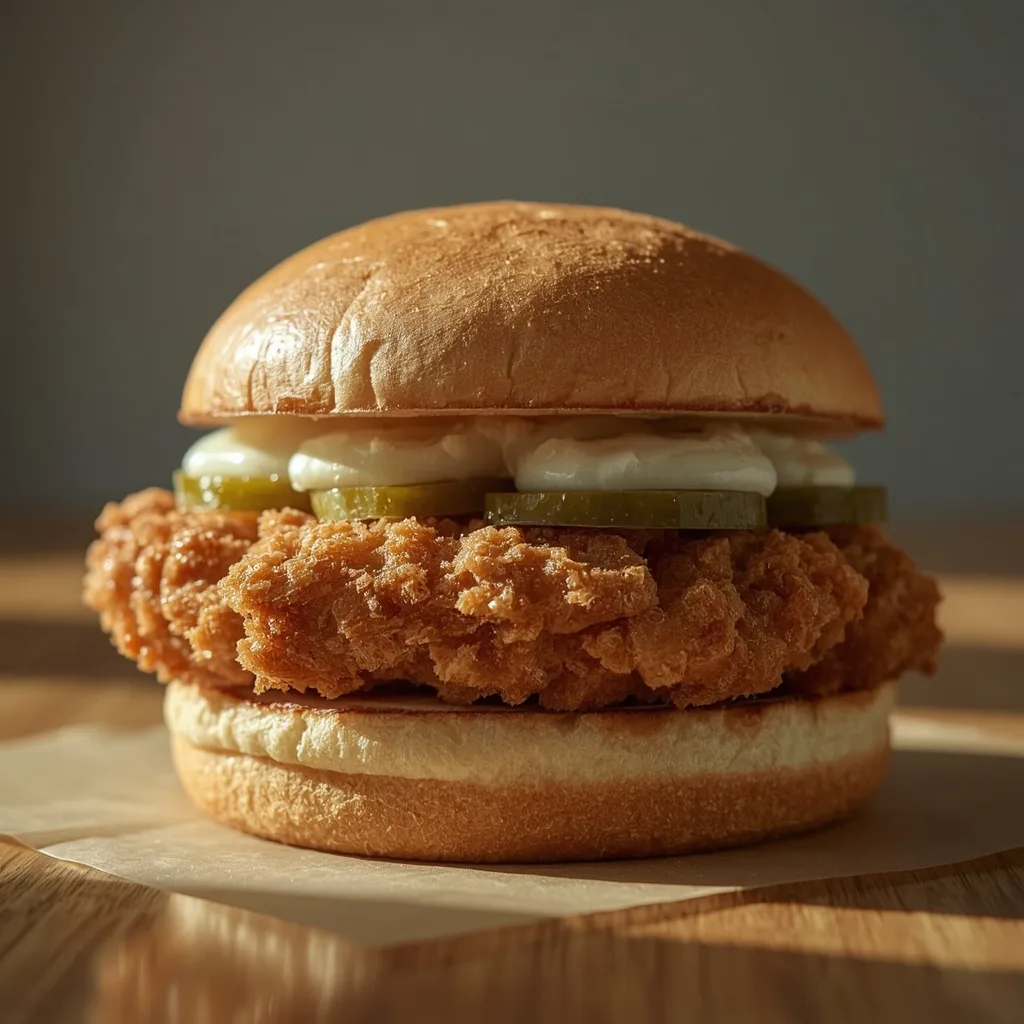
What Makes This Recipe Special
Buttermilk is the backbone here — its gentle acidity tenderizes the chicken breast while infusing subtle tang throughout the meat. The coating relies on paprika, garlic powder, and cayenne for warmth, while the Shack Sauce brings creamy, sweet, and tart notes that tie everything together. Served on a soft potato bun, the contrast between crunchy chicken and pillowy bread is what makes this sandwich genuinely craveable.
Ingredients You’ll Need
Everything on this list is straightforward, but the quality of a few key items genuinely changes the final result.
For the Chicken & Brine
- 4 boneless, skinless chicken breasts — About 6 oz each; pound them to even thickness so they cook uniformly.
- 1 cup buttermilk, well shaken — Shaking ensures the cultured solids are evenly distributed for consistent brining.
- 1 teaspoon kosher salt — Dissolved into the buttermilk to season the meat from within.
- 1/2 teaspoon black pepper, freshly ground — Adds gentle heat without overpowering.
- 1/2 teaspoon garlic powder — Savory depth that complements the crispy coating.
- 1/2 teaspoon onion powder — Sweet, mellow note similar to the flavor of caramelized onions.
- 1/4 teaspoon cayenne pepper — Optional but recommended if you like a subtle kick.
For the Crispy Coating
- 1 1/2 cups all-purpose flour — Standard flour builds the crispy shell; no specialty blends needed.
- 1 teaspoon baking powder — The secret to that craggy, extra-crispy texture as it reacts during frying.
- 1/2 teaspoon paprika — Adds color and a touch of smoky sweetness to the crust.
- 1/2 teaspoon kosher salt — Seasons the flour mixture directly for proper crust flavor.
For the Shack Sauce
- 1/2 cup mayonnaise — Use full-fat for the creamiest, richest sauce base.
- 1/4 cup ketchup — Brings sweetness and that signature pink color.
- 2 tablespoons yellow mustard — Sharp, vinegary note that cuts through the richness.
- 1 tablespoon dill pickle relish — Briny crunch that mirrors the pickle chips on the sandwich.
- 1 teaspoon white vinegar — Brightens the whole sauce with extra tang.
- 1/2 teaspoon paprika — Rounds out the sauce with mild sweet pepper flavor.
For Assembly
- 4 soft potato hamburger buns — Their sweetness and pillowy texture hold up beautifully to the filling.
- 4 leaves green leaf lettuce — Offers crisp, fresh crunch that contrasts the fried coating.
- 4 slices ripe tomato — About 1/4 inch thick; season with a pinch of salt for extra flavor.
- 12 slices dill pickle chips — Three per sandwich delivers that tangy sour contrast.
- 2 cups vegetable oil — Enough to reach 1/2 inch depth in your skillet; neutral flavor works best.
Equipment Needed
- Large cast-iron or heavy-bottomed skillet — Holds steady heat for even frying; alternatives include a Dutch oven if you don’t own one.
- Wire rack set over a baking sheet — Resting the fried chicken here keeps air circulating so the crust stays crisp instead of steaming.
- Deep-fry thermometer — Not mandatory, but it takes the guesswork out of reaching that perfect 350°F oil temperature.
- Shallow dish for dredging — A wide pie plate or casserole dish gives you room to coat the chicken without crowding.
- Tongs — For flipping the chicken safely in hot oil and transferring it to the rack without splashing.
Instructions to Prepare Shake Shack Chicken Shack Sandwich
Follow the steps in order and you will have crispy, restaurant-quality sandwiches ready in about 35 minutes once the brining is done.
- Brine the chicken — Whisk buttermilk, salt, pepper, garlic powder, onion powder, and cayenne in a large bowl. Add the chicken, coat well, cover, and refrigerate for at least 1 hour, up to 4 hours.
- Prepare the coating — Mix flour, baking powder, paprika, and salt in a shallow dish while the chicken soaks.
- Make the Shack Sauce — Combine mayonnaise, ketchup, yellow mustard, pickle relish, white vinegar, and paprika. Whisk smooth, season to taste, and refrigerate until needed.
- Coat the chicken — Remove from the brine, let excess drip off, then dredge in the flour mixture. Press gently to adhere and shake off any excess. Rest on a wire rack for 5 minutes so the coating sets.
- Heat the oil — Warm vegetable oil in your skillet over medium-high heat until it shimmers, about 350°F if using a thermometer. You want roughly 1/2 inch of oil.
- Fry the chicken — Cook in batches to avoid crowding, 4-5 minutes per side until golden brown and crispy, flipping once. The internal temperature must reach 165°F.
- Rest and hold — Transfer to a clean wire rack, sprinkle with salt immediately, and keep warm in a 200°F oven while frying the remaining batches.
- Toast the buns — Place split buns cut-side down in a dry skillet over medium heat until golden and crisp, about 1-2 minutes.
- Assemble — Spread sauce on the bottom bun, add chicken, lettuce, tomato, and 3 pickle chips. More sauce on the top bun, then place it on top.
- Serve right away — Eat while the chicken is still crispy and the buns are warm for the best experience.
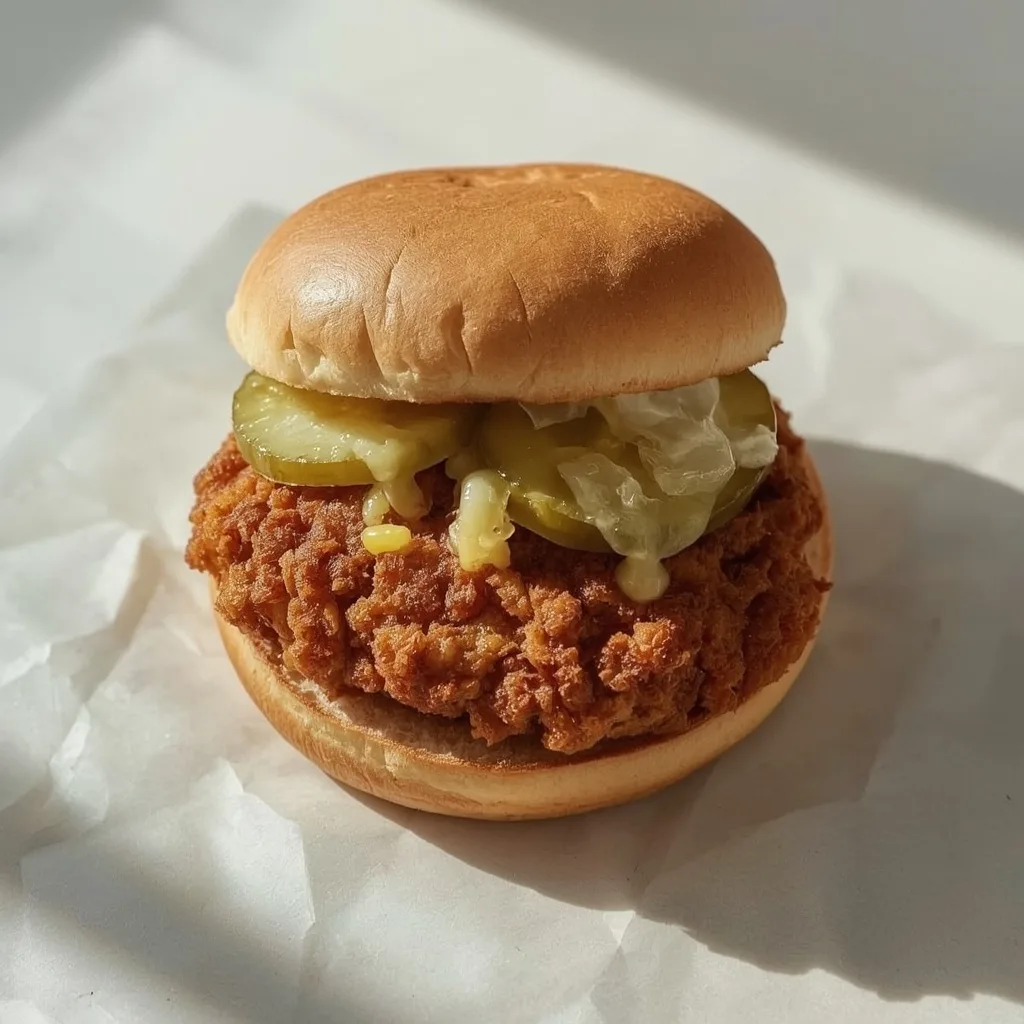
Expert Tips for a Standout Shake Shack Chicken Shack Sandwich
These are the small things that separate a good fried chicken sandwich from a truly memorable one.
- Pound the chicken — Even 1/2-inch thickness means the breast cooks through at the same time the crust turns golden, avoiding raw centers or burnt coating.
- Rest after dredging — Those 5 minutes on the rack let the flour adhere to the buttermilk layer, preventing clumpy spots of raw flour from falling off in the oil.
- Test your oil — Drop a pinch of flour in the oil; if it sizzles immediately, you are ready. If it sinks without bubbling, wait longer.
- Pat dry for extra crisp — Before the buttermilk brine, pat the chicken dry with paper towels. Excess liquid creates steam that steams the crust instead of crisping it.
- Double-dip for thicker crust — Want even more crunch? Dip the coated chicken back in buttermilk and into the flour again, then rest before frying.
- Season the tomato — A pinch of salt on each tomato slice brightens the flavor and keeps the sandwich from tasting flat.
- Fry in batches — Adding too many pieces at once drops the oil temperature, resulting in greasy, less-crispy chicken.
Common Mistakes to Avoid
Here is what tripped me up the first few times I made this at home.
- Skipping the brine — Without the buttermilk soak, the chicken lacks that deep flavor and tender texture. Even 30 minutes helps a bit.
- Overcrowding the pan — Cramped chicken leads to oil temperature crashes, which means a soft, oily crust instead of crispy goodness.
- Flipping too early — If the chicken sticks to the pan, it needs more time. Let the crust set and brown before attempting a flip.
- Using cold chicken — Very cold meat drops the oil temperature and cooks unevenly. Let brined chicken sit at room temperature for 15 minutes before coating.
- Sauce on the bottom only — Putting sauce on both buns layers the flavor throughout and prevents a dry bite at the top.
Variations & Ways to Customize Shake Shack Chicken Shack Sandwich
Once you master the base recipe, these twists keep things exciting for repeat cravings.
- Spicy version — Double the cayenne in the brine, add 1/2 teaspoon to the flour mixture, and stir hot sauce into the Shack Sauce.
- Honey drizzle — Finish with a light drizzle of honey over the chicken before closing the sandwich for a sweet-savory contrast.
- Blue cheese swap — Replace the Shack Sauce with crumbled blue cheese mixed into a little ranch dressing for a totally different flavor direction.
- Slaw addition — Pile crunchy coleslaw on top instead of lettuce for extra texture and a creamy kick.
- Grilled alternative — Skip the frying entirely and cook the brined chicken on a hot grill for a lighter weeknight option.
What to Serve With Shake Shack Chicken Shack Sandwich
Round out the meal with sides and drinks that complement all that crunchy, tangy goodness.
- Crinkle-cut fries — The classic fast-food pairing; sprinkle with a little extra paprika for a custom touch.
- Sweet potato fries — A slightly sweet side that balances the tangy sauce and pickles beautifully.
- Coleslaw — Creamy, crunchy, and cold; it cuts through the richness of the fried chicken.
- Roasted corn on the cob — Sweet kernels with butter and chives add a summery, fresh element.
- Iced tea — Unsweetened with a lemon wedge cleanses the palate between those rich, savory bites.
Make-Ahead Instructions
Meal prep for this sandwich is absolutely doable with a little planning around the frying.
- Brine early — You can soak the chicken in buttermilk overnight, up to 4 hours is ideal but 12 hours still works fine without mushrooming the texture.
- Shack Sauce ahead — Whisk and refrigerate up to 1 week in an airtight container; flavors actually improve as they meld.
- Breading in advance — Coat the chicken, place it on a baking sheet, cover, and refrigerate for up to 4 hours before frying.
- Fried chicken freeze — Freeze the breaded, uncooked chicken in a single layer, then transfer to a zip-top bag for up to 3 months.
Storage and Reheating
While this sandwich is best right off the skillet, you can absolutely salvage leftovers if you know the right techniques.
Storage
- Separate components — Store fried chicken apart from buns and toppings to prevent the bread from getting soggy.
- Airtight container — Refrigerate the chicken for up to 3 days in a sealed container with a paper towel to absorb excess moisture.
- Sauce fridge life — Keep the Shack Sauce in a tightly covered jar for up to 1 week.
Reheating
- Oven method — Place chicken on a wire rack over a baking sheet and heat at 375°F for 10-12 minutes until hot and crisp again.
- Air fryer — Reheat at 375°F for 5-7 minutes, flipping halfway through, for closest-to-fresh results.
- Stovetop pan — Heat a thin layer of oil over medium and crisp each side for 2-3 minutes, pressing gently.
- Skip the microwave — It will soften the coating and make the chicken soggy, so avoid it for this dish.
Nutritional Breakdown (Per Serving)
Based on 1 serving = 1 sandwich out of 4 total.
- Calories — 680
- Protein — 42g
- Fat — 38g
- Carbohydrates — 52g
- Fiber — 3g
- Sugar — 9g
- Sodium — 980mg
Frequently Asked Questions
Can I bake the chicken instead of frying?
Yes, but it will not be nearly as crispy. Coat the chicken with a little oil spray and bake at 425°F for about 20-25 minutes, flipping halfway, until the internal temperature hits 165°F.
How long can I brine the chicken for a Shake Shack Chicken Shack Sandwich?
At least 1 hour is required, but 24 hours maximum keeps the chicken tender without turning mushy. Beyond that, the acid in the buttermilk starts to break down the meat’s structure too much.
Can I freeze Shake Shack Chicken Shack Sandwich?
Absolutely, but freeze the components separately. Cook and cool the chicken first, then freeze it individually. The Shack Sauce freezes well for up to 1 month, but thaw overnight before serving.
What if I don’t have buttermilk?
Mix 1 tablespoon of white vinegar or lemon juice into 1 cup of regular milk and let it sit for 5 minutes. It will thicken slightly and work as a quick substitute.
Can I use chicken thighs instead of breasts?
Definitely. Boneless thighs stay juicier due to their higher fat content, and they take roughly the same time to cook.
More Recipes
Final Words
Crispy chicken, soft potato bun, cool crunch from lettuce and pickles, and a tangy sauce that pulls it all together — this Shake Shack Chicken Shack Sandwich delivers fast-food satisfaction with far better quality. The first bite will make you wonder why you ever paid for the original. Give it a try this weekend and taste what homemade can really do.
PrintShake Shack Chicken Shack Sandwich
A homemade version of the iconic Shake Shack Chicken Shack, featuring a juicy, buttermilk-brined chicken breast coated in a crispy, seasoned flour crust. Served on a soft potato bun with pickles and a tangy, creamy Shack Sauce, this sandwich delivers the perfect balance of crunch, zest, and savory flavor.
- Prep Time: 20
- Cook Time: 15
- Total Time: 35
- Yield: 4 1x
- Category: Main Course
- Method: Stovetop
- Cuisine: American
Ingredients
- 4 boneless, skinless chicken breasts (about 6 oz / 170g each)
- 1 cup buttermilk, well shaken
- 1 teaspoon kosher salt, plus more for seasoning
- 1/2 teaspoon black pepper, freshly ground
- 1/2 teaspoon garlic powder
- 1/2 teaspoon onion powder
- 1/4 teaspoon cayenne pepper (optional, for heat)
- 1 1/2 cups all-purpose flour
- 1 teaspoon baking powder
- 1/2 teaspoon paprika
- 2 cups vegetable oil, for frying (or enough to reach 1/2 inch depth in skillet)
- 4 soft potato hamburger buns, split
- 4 leaves green leaf lettuce
- 4 slices ripe tomato (about 1/4 inch thick)
- 12 slices dill pickle chips (or 4 whole pickles sliced)
- 1/2 cup Shack Sauce (recipe below)
Instructions
- In a large bowl, whisk together the buttermilk, 1 teaspoon kosher salt, 1/2 teaspoon black pepper, garlic powder, onion powder, and cayenne (if using). Add the chicken breasts, turning to coat evenly. Cover and refrigerate for at least 1 hour, or up to 4 hours, to tenderize and flavor the meat.
- In a shallow dish, whisk together the flour, baking powder, paprika, and 1/2 teaspoon kosher salt. Set aside.
- Make the Shack Sauce: In a small bowl, combine 1/2 cup mayonnaise, 1/4 cup ketchup, 2 tablespoons yellow mustard, 1 tablespoon dill pickle relish, 1 teaspoon white vinegar, and 1/2 teaspoon paprika. Whisk until smooth. Season with salt and pepper to taste. Cover and refrigerate until ready to use.
- Remove the chicken from the buttermilk, letting any excess drip off. Dredge each breast in the seasoned flour, pressing gently to adhere. Shake off any excess flour. Set the coated breasts on a wire rack for 5 minutes to allow the coating to set.
- In a large cast-iron or heavy-bottomed skillet, heat the vegetable oil over medium-high heat until it shimmers (about 350°F / 177°C if using a thermometer). You want about 1/2 inch of oil in the pan.
- Carefully place the coated chicken breasts in the hot oil, working in batches if necessary to avoid overcrowding. Cook for 4-5 minutes per side, flipping once, until golden brown and crispy. The internal temperature should reach 165°F / 74°C.
- Transfer the fried chicken to a clean wire rack and immediately sprinkle with a pinch of salt. Keep warm in a 200°F / 93°C oven while frying the remaining batches.
- Lightly toast the potato buns in a dry skillet over medium heat, cut side down, until golden and crisp, about 1-2 minutes.
- To assemble: Spread a generous tablespoon of Shack Sauce on the bottom half of each bun. Top with a piece of fried chicken, a lettuce leaf, a tomato slice, and 3 pickle chips. Spread a little more sauce on the top half of the bun and place on top.
- Serve immediately while the chicken is still crispy and the buns are warm.
Notes
Storage: Assembled sandwiches are best enjoyed fresh. To store, keep the fried chicken separate from the buns and toppings. Refrigerate the chicken in an airtight container for up to 3 days. Reheat: For best crispy texture, reheat the chicken in a 375°F / 190°C oven for 10-12 minutes, or until hot and crisp. Avoid microwave as it will soften the coating. The Shack Sauce can be made ahead and refrigerated in an airtight container for up to 1 week. To freeze: The fried chicken can be frozen, uncooked, after breading. Place in a single layer on a baking sheet and freeze until solid, then transfer to a zip-top bag. Fry from frozen, adding 2-3 minutes to the cooking time. Thaw before reheating if already cooked, or cook from frozen for best results.
Nutrition
- Calories: 680
- Sugar: 9g
- Sodium: 980mg
- Saturated Fat: 7g
- Carbohydrates: 52g
- Fiber: 3g
- Protein: 42g
- Cholesterol: 120mg
Keywords: chicken shack sandwich, shake shack copycat, crispy chicken sandwich, buttermilk fried chicken, homemade fast food, American sandwich, stovetop frying, weeknight dinner, easy chicken sandwich, pickle sandwich