 Kendric adan
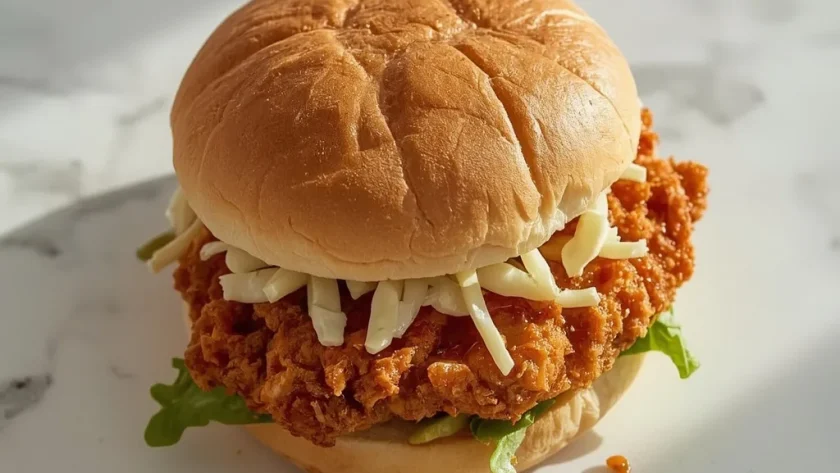
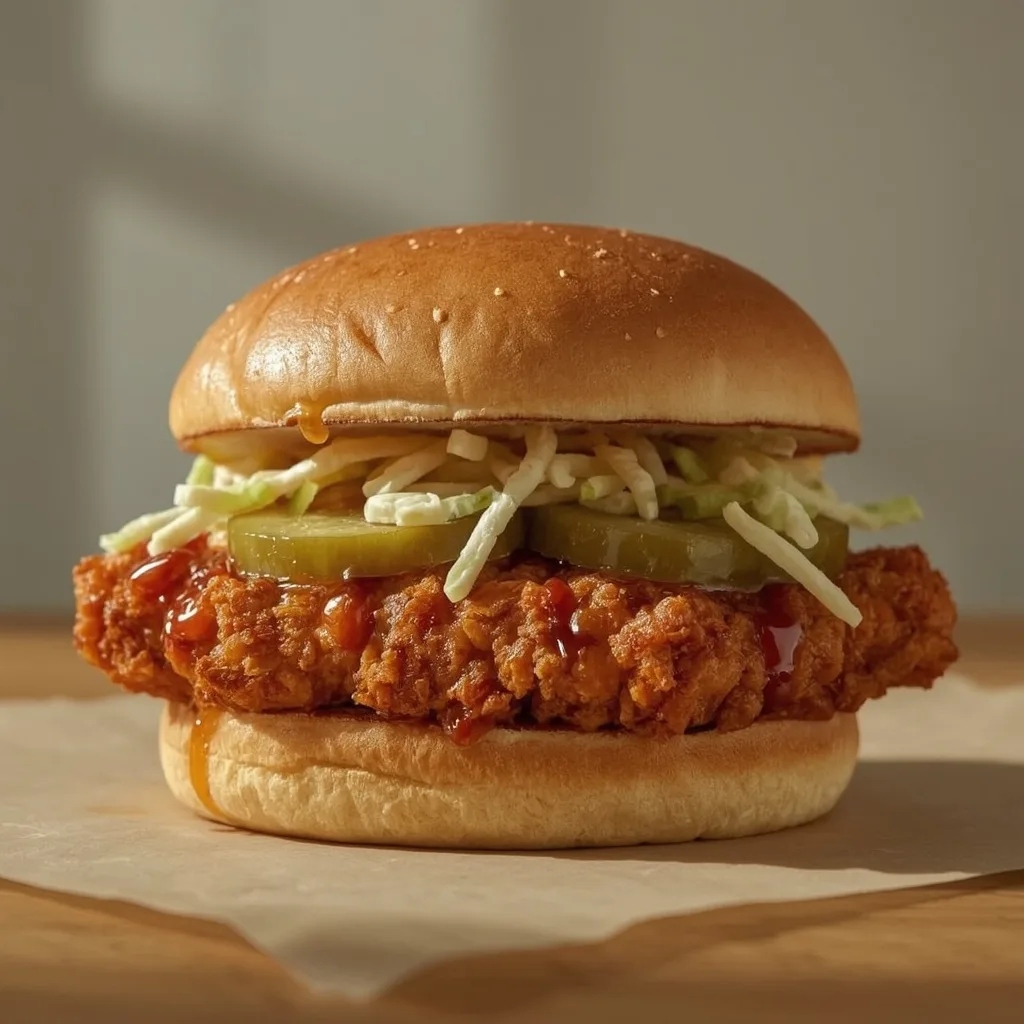
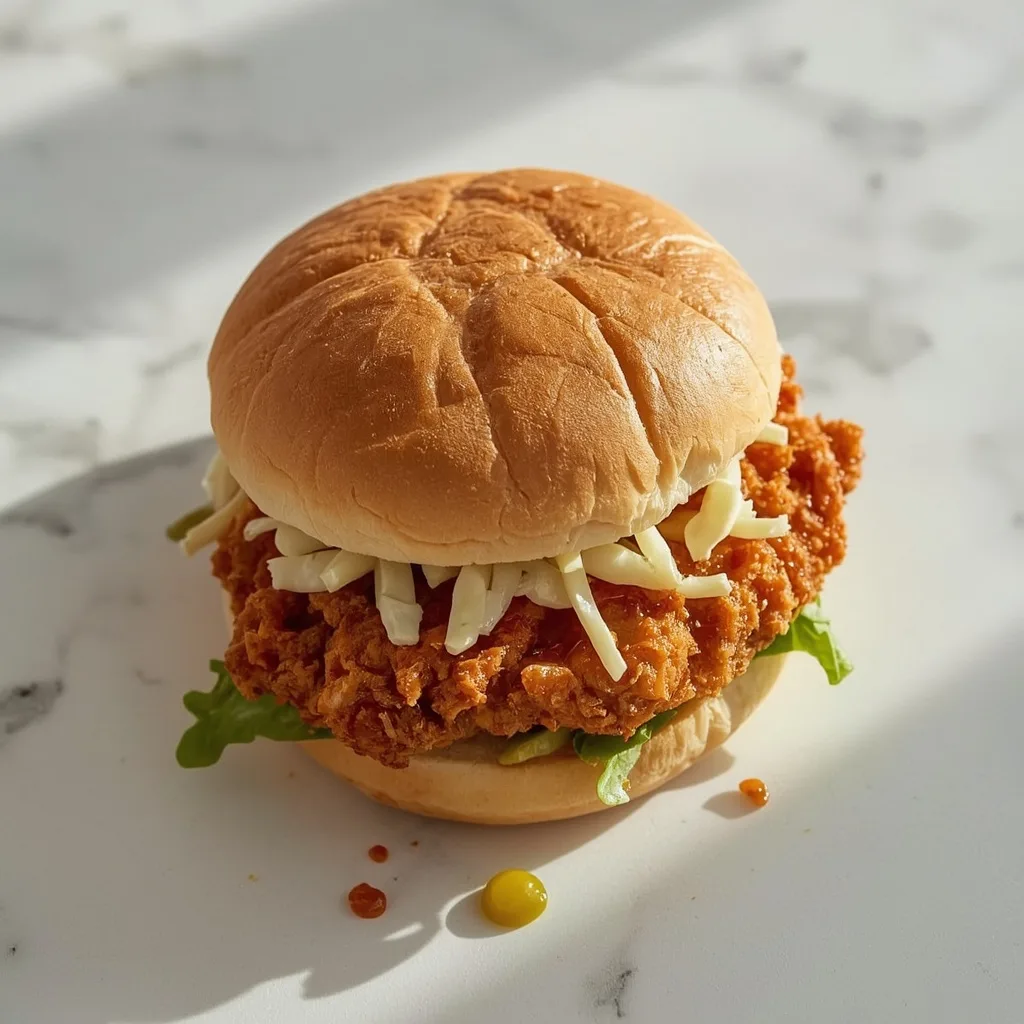
 If you have been craving that bold, sweet-heat crunch from the drive-thru, this homemade version of Zaxby’s Kickin’ Chicken Sandwich brings the flavor straight to your kitchen. It hits all the marks — a crispy fried chicken breast coated in a glossy, spicy glaze, tucked into a soft brioche bun with tangy pickles and creamy coleslaw.
You can have this plate ready in about 37 minutes from start to finish, making it a great weekend project or a fun weeknight treat. The recipe is beginner-friendly if you follow the steps closely, though the double-dredging and glazing process takes a little patience. The only tricky part is keeping the oil at a steady temperature so the crust stays shatteringly crisp.
Why You’ll Love This Recipe
- Bold Flavor Combo — The sweet honey-brown sugar glaze balances the cayenne and hot sauce, creating that signature kick without overwhelming heat.
- Ultra-Crispy Coating — A flour and cornstarch blend with a double-dredge method gives you a craggy, crunchy crust that holds up to the glaze.
- Restaurant-Style Assembly — Pickles, coleslaw, and a toasted brioche bun mimic the original perfectly, right down to the last bite.
What Makes This Recipe Special
The combination of a wet marinade and a dry seasoned coating does most of the heavy lifting here. Buttermilk tenderizes the chicken while the hot sauce in the marinade adds a subtle background heat that builds as you eat. The glaze itself is where the magic happens — it is sticky, tangy, and just sweet enough to keep you reaching for another bite. This sandwich works for game day, casual dinners, or any time you want something indulgent without leaving the house.
Ingredients You’ll Need
Gather these components before you start, and the process will move smoothly. Everything is easy to find at a standard grocery store.
For the Chicken and Marinade
- 4 boneless, skinless chicken breast halves (about 1 lb / 450 g total) — Pound them to an even thickness so they cook uniformly and stay juicy. Aim for an oval shape that fits your buns.
- 1 cup / 240 ml buttermilk — This tenderizes the meat and adds a slight tang that complements the spicy glaze.
- 1 tbsp / 15 ml hot sauce (like Frank’s RedHot) — A mild vinegary heat that wakes up the marinade.
- 1 tsp / 2 g garlic powder — Adds savory depth to the buttermilk soak.
For the Breading
- 1 cup / 120 g all-purpose flour — The base of the crispy coating that clings to the chicken.
- 1/2 cup / 60 g cornstarch — This is the secret to extra crunch; it creates a lighter, crispier crust than flour alone.
- 1 tsp / 3 g paprika — Gives the coating a warm color and subtle smoky flavor.
- 1/2 tsp / 1 g cayenne pepper — Adds a gentle heat that lingers on the palate.
- 1 tsp / 6 g kosher salt — Seasons the crust properly; don’t skip it or the coating will taste flat.
- 1/2 tsp / 1 g black pepper — A classic seasoning that ties everything together.
- 1 large egg — Mixed with water, this acts as the glue between the first and second coat of flour.
- 2 cups / 500 ml vegetable oil, for frying — You need about half an inch of oil in the skillet; neutral oil is best.
For the Kickin’ Glaze
- 1/4 cup / 60 ml water — Used in the egg wash to thin it out for an even coating.
- 2 tbsp / 30 ml hot sauce — The main source of heat in the glaze, giving it that signature zing.
- 1/4 cup / 60 ml honey — Brings natural sweetness and helps the glaze cling to the crust.
- 2 tbsp / 30 g brown sugar, packed — Adds molasses notes and deepens the sticky texture.
- 1 tsp / 2 g chili powder — Rounds out the heat with a mild, earthy warmth.
- 1/2 tsp / 1 g garlic powder — Savory balance for the sweet and spicy elements.
- 1/2 tsp / 1 g onion powder — A subtle background flavor that ties the glaze together.
For Assembly
- 4 brioche hamburger buns, split and toasted — The soft, buttery buns hold up well against the glaze and slaw.
- 12 dill pickle chips — Their tangy crunch cuts through the richness of the fried chicken.
- 1 cup / 100 g prepared coleslaw — Use a creamy, vinegar-based slaw for that authentic balance; the recipe notes include a quick homemade version.
Equipment Needed
You likely have most of these in your kitchen already. Here is what makes the process easier.
- Large heavy-bottomed skillet (cast iron is ideal) — It holds heat steadily, which keeps the oil temperature consistent while frying.
- Instant-read thermometer — This takes the guesswork out of knowing when the chicken hits 165°F / 74°C inside.
- Wire rack set over a baking sheet — Draining the fried chicken here keeps it crisp instead of soggy.
- Shallow dishes and bowls — You need separate containers for the flour mixture, egg wash, and buttermilk marinade.
- Tongs — These give you a safe grip when flipping the chicken in hot oil and when tossing it in the glaze.
Instructions to Prepare Zaxby’s Kickin’ Chicken Sandwich
Follow these steps in order, and you will have a platter of glazed, crispy chicken ready to stack. The key is to move through the breading and frying without rushing.
- Pound the Chicken — Place each breast between plastic wrap and flatten to 1/2-inch / 1.25 cm thickness so it cooks evenly. Shape it roughly like your buns for the best sandwich fit.
- Marinate — Whisk the buttermilk, 1 tbsp hot sauce, and 1 tsp garlic powder in a bowl. Add the chicken, coat it well, and refrigerate for at least 30 minutes or up to 2 hours.
- Prepare the Breading Station — In a shallow dish, mix flour, cornstarch, paprika, cayenne, salt, and black pepper. In another bowl, beat the egg with 1/4 cup water until frothy.
- Dredge the Chicken — Let the excess buttermilk drip off, then coat each breast in the flour mixture, pressing firmly. Dip it into the egg wash, then back into the flour for a second coating. Place on a wire rack.
- Heat the Oil — Warm the vegetable oil in your skillet over medium-high heat until it shimmers and a pinch of flour sizzles immediately. The oil should be about 1/2-inch deep.
- Fry in Batches — Lower two breasts into the hot oil and fry for 4 to 5 minutes per side until golden brown and cooked to 165°F / 74°C internally. Do not overcrowd the pan.
- Drain and Season — Transfer the chicken to a wire rack and sprinkle with a pinch of salt while still hot. Let the oil come back to temperature before the next batch.
- Make the Glaze — In a small saucepan over medium-low heat, stir together the hot sauce, honey, brown sugar, chili powder, garlic powder, and onion powder. Cook until the sugar dissolves, about 2 minutes, then keep warm.
- Toast the Buns — Place the brioche buns cut-side down on a dry skillet or in a 350°F / 177°C oven for 3-4 minutes until golden and warm.
- Glaze the Chicken — Put the fried chicken in a large bowl, pour the warm glaze over it, and toss gently until each piece is fully coated. The glaze should cling, not soak through the crust.
- Assemble the Sandwiches — On each bottom bun, layer 3 pickle chips, add the glazed chicken, top with 1/4 cup coleslaw, and close with the top bun. Serve right away.
- Oven Alternative — For a lighter version, bake the breaded chicken at 400°F / 204°C on a greased sheet for 18-20 minutes, flipping once, until it reaches 165°F / 74°C. Glaze and assemble as directed.
Expert Tips for a Standout Zaxby’s Kickin’ Chicken Sandwich
These details make the difference between a good sandwich and one that rivals the original. Pay attention to these small but important steps.
- Pound Evenly — Uneven thickness means dry edges and undercooked centers. Take the extra minute to flatten each breast to a uniform 1/2-inch.
- Let the Marinade Sit — Even 30 minutes in the buttermilk transforms the chicken’s texture. The acidity breaks down fibers, leaving the meat tender and moist.
- Press the Breading Firmly — The coating needs to adhere completely or it will slide off in the oil. Press the flour mixture into every nook and cranny.
- Maintain Oil Temperature — If the heat drops, the chicken absorbs oil and turns greasy. Fry in small batches and let the oil recover between rounds.
- Toss Gently in Glaze — Rough handling will tear the crispy crust. Use a light hand and turn the chicken just until every surface is coated.
- Toast Your Buns Well — A properly toasted bun creates a barrier against the glaze and coleslaw, so the bread stays firm and doesn’t get soggy.
- Season While Hot — That extra pinch of salt right after frying locks in flavor while the crust is still porous enough to absorb it.
Common Mistakes to Avoid
Over the years, I have seen a few pitfalls trip up home cooks. Here is what to steer clear of.
- Skipping the Buttermilk Soak — Without it, the chicken comes out drier and the seasoning doesn’t penetrate as deeply. Even a quick 30-minute soak makes a difference.
- Overcrowding the Pan — Too many pieces at once drops the oil temperature, leading to a soggy, oily crust. Fry two at a time for the best results.
- Using Thin, Runny Glaze — If your glaze is too watery, it will wash right off the chicken. Simmer it until it thickens slightly and coats the back of a spoon.
- Flipping Too Early — Move the chicken before the crust sets, and it will stick to the pan. Wait until the edges look golden before turning.
- Adding Slaw Too Early — Assemble the sandwiches right before serving so the slaw stays crisp and doesn’t make the bun mushy.
- Skipping the Wire Rack — Draining fried chicken on paper towels traps steam and ruins the crunch. A wire rack lets air circulate on all sides.
Variations & Ways to Customize Zaxby’s Kickin’ Chicken Sandwich
Once you have mastered the classic, try these twists to keep things interesting. They all start with the same base recipe.
- Honey Mustard Twist — Swirl a tablespoon of honey mustard into the glaze for a sweeter, tangier profile that complements the heat beautifully.
- Extra Heat Level — Double the cayenne in the breading and add a dash of your favorite hot sauce to the coleslaw for those who like serious spice.
- Grilled Version — Skip the frying entirely and grill the marinated chicken over medium-high heat for 5-6 minutes per side, then glaze as usual.
- Add Cheese — A slice of melted pepper jack on top of the hot glazed chicken adds creaminess and another layer of mild heat.
- Use Chicken Tenders — Cut the breasts into strips and reduce the frying time to 3-4 minutes per side for a snackable, shareable version.
- Swap the Bun — A pretzel bun or sturdy kaiser roll works great if brioche isn’t available, giving the sandwich a different texture profile.
What to Serve With Zaxby’s Kickin’ Chicken Sandwich
This sandwich is a full meal on its own, but the right sides round it out perfectly. Here are some ideas that pair well.
- Crinkle-Cut Fries — Salty, crispy fries are the classic companion to a fried chicken sandwich, especially when dunked in extra hot sauce.
- Sweet Potato Wedges — Their natural sweetness balances the spicy glaze and adds a hearty, satisfying side.
- Fresh Coleslaw — Another scoop of creamy slaw alongside the sandwich reinforces the cooling, tangy notes.
- Pickle Spears — Extra vinegar-brined pickles cut through the richness and refresh your palate between bites.
- Iced Tea or Lemonade — A cold, sweet drink is the perfect foil to the heat of this sandwich.
- Simple Green Salad — A light, crisp salad with a citrus vinaigrette balances the richness of the fried chicken.
Make-Ahead Instructions
If you want to get ahead on a busy day, a little prep work makes dinnertime effortless. Here is what you can do in advance.
- Marinate the Chicken — The chicken can sit in the buttermilk mixture for up to 2 hours in the fridge. Any longer and the texture starts to change.
- Prep the Glaze — The glaze comes together in minutes and keeps well for up to a week in the refrigerator. Reheat it gently before using.
- Bread the Chicken Early — Dredge the chicken and keep it on a wire rack in the fridge for up to 4 hours before frying. This helps the coating adhere better.
- Mix the Coleslaw — A homemade or store-bought slaw can be prepared a day ahead and chilled. Stir it well before serving.
Storage and Reheating
Leftovers are rare with this sandwich, but if you have some, here is how to handle them properly.
Storage
- Unglazed Fried Chicken — Keep it in an airtight container in the fridge for up to 3 days. Store it without the glaze to preserve the crust.
- Freezer Option — Freeze unglazed fried chicken in a single layer, then transfer to a freezer bag for up to 2 months.
- Glaze Storage — The glaze keeps in a sealed jar in the refrigerator for up to 1 week. Reheat it on the stove over low heat, adding a splash of water if too thick.
Reheating
- Oven Method — Place the unglazed chicken on a baking sheet and warm it at 375°F / 190°C for 8-10 minutes until crispy. Glaze after reheating.
- Air Fryer Option — Heat at 350°F / 175°C for 5-6 minutes. This method restores the crunch better than any other, so the crust stays crisp.
- Skillet Reheat — Warm the chicken in a dry skillet over medium-low heat for 2-3 minutes per side, then glaze and assemble fresh.
- Microwave (Last Resort) — It will soften the crust, but if you are in a hurry, use 30-second bursts until just warm. Add the glaze right before serving.
Nutritional Breakdown (Per Serving)
Based on 1 serving = 1 sandwich out of 4 total.
- Calories — 613
- Protein — 36 g
- Fat — 23 g
- Saturated Fat — 5 g
- Carbohydrates — about 58 g
- Fiber — 2 g
- Sugar — around 22 g
- Sodium — roughly 1350 mg
- Cholesterol — 130 mg
Frequently Asked Questions
Can I use chicken thighs instead of breasts for Zaxby’s Kickin’ Chicken Sandwich?
Yes, thighs work beautifully here. They have more fat, which keeps them juicy, and the same breading and frying method applies. Just make sure they reach 165°F / 74°C inside.
How do I keep the chicken from getting soggy after adding the glaze?
The double-dredge creates a thick, sturdy crust that holds up to the glaze. Toss gently, serve immediately, and don’t let the glazed chicken sit around before assembling.
Can I make Zaxby’s Kickin’ Chicken Sandwich without frying?
Absolutely. The oven-baked alternative in the instructions works well. Bake at 400°F / 204°C for 18-20 minutes, flipping halfway, then glaze as usual.
What if I don’t have buttermilk?
You can make a quick substitute by adding 1 tablespoon of lemon juice or vinegar to 1 cup of milk and letting it sit for 5 minutes. It will do the same tenderizing job.
How long does the glaze last in the fridge?
The glaze keeps for up to a week when stored in an airtight container. Reheat it gently on the stove over low heat, adding a teaspoon of water if it has thickened too much.
Is this sandwich very spicy?
The heat is noticeable but balanced by the honey and brown sugar, so it won’t overwhelm you. If you prefer milder flavors, reduce the cayenne and hot sauce, or skip the cayenne entirely in the breading.
More Recipes
Final Words
Making Zaxby’s Kickin’ Chicken Sandwich at home is easier than you think, and the payoff is a crispy, sweet-heat packed bite that beats takeout any day. The combination of textures and flavors — crunchy coating, sticky glaze, cool slaw — is seriously hard to beat. Give this one a try on a weekend, and I think it will become a regular in your rotation.
PrintZaxby’s Kickin’ Chicken Sandwich
This iconic sandwich features a crispy, juicy fried chicken breast coated in a spicy, sweet-hot glaze, layered with pickles and creamy coleslaw on a soft brioche bun. It’s a perfect balance of heat, tang, and crunch that delivers restaurant-quality flavor at home.
- Prep Time: 25
- Cook Time: 12
- Total Time: 37
- Yield: 4 1x
- Category: Main Course
- Method: Stovetop
- Cuisine: American
Ingredients
- 4 boneless, skinless chicken breast halves (about 1 lb / 450 g total), pounded to 1/2-inch / 1.25 cm thickness
- 1 cup / 240 ml buttermilk
- 1 tbsp / 15 ml hot sauce (like Frank’s RedHot)
- 1 tsp / 2 g garlic powder
- 1 cup / 120 g all-purpose flour
- 1/2 cup / 60 g cornstarch
- 1 tsp / 3 g paprika
- 1/2 tsp / 1 g cayenne pepper
- 1 tsp / 6 g kosher salt
- 1/2 tsp / 1 g black pepper
- 1 large egg
- 2 cups / 500 ml vegetable oil, for frying
- 1/4 cup / 60 ml water
- 2 tbsp / 30 ml hot sauce
- 1/4 cup / 60 ml honey
- 2 tbsp / 30 g brown sugar, packed
- 1 tsp / 2 g chili powder
- 1/2 tsp / 1 g garlic powder
- 1/2 tsp / 1 g onion powder
- 4 brioche hamburger buns, split and toasted
- 12 dill pickle chips
- 1 cup / 100 g prepared coleslaw (store-bought or homemade, see notes)
Instructions
- Pound each chicken breast between two sheets of plastic wrap to an even 1/2-inch / 1.25 cm thickness. This ensures uniform cooking and maximum crispiness. Aim for an oval shape roughly the size of your buns.
- In a medium bowl, whisk together buttermilk, 1 tablespoon hot sauce, and 1 teaspoon garlic powder. Add the pounded chicken, turning to coat, then cover and marinate in the refrigerator for at least 30 minutes, or up to 2 hours, to tenderize and infuse flavor.
- In a shallow dish, combine flour, cornstarch, paprika, cayenne pepper, 1 teaspoon kosher salt, and black pepper. Stir until well blended. In a separate shallow bowl, beat the egg with 1/4 cup water until frothy.
- Remove a chicken breast from the buttermilk, letting excess drip off. Dredge it in the flour mixture, pressing firmly to adhere. Dip into the egg wash, then return to the flour mixture for a second coating, ensuring every crevice is covered. Place on a wire rack. Repeat with remaining chicken.
- In a large, heavy-bottomed skillet (cast iron is ideal), heat the vegetable oil over medium-high heat until the oil shimmers and a pinch of flour dropped in sizzles immediately (about 350°F / 175°C if you’re using a thermometer). The oil should be about 1/2-inch / 1.25 cm deep.
- Carefully place two breaded chicken breasts into the hot oil. Fry for 4 to 5 minutes per side, turning once, until golden brown and cooked through. Use an instant-read thermometer to check the internal temperature reaches 165°F / 74°C. Avoid overcrowding the pan; adjust heat to maintain a steady sizzle.
- Transfer fried chicken to a clean wire rack set over a baking sheet to drain. Sprinkle lightly with an extra pinch of salt while hot. Repeat with the remaining chicken, making sure the oil returns to temperature between batches.
- While the chicken fries, prepare the kickin’ glaze. In a small saucepan over medium-low heat, combine 1/4 cup hot sauce, honey, brown sugar, chili powder, 1/2 teaspoon garlic powder, and onion powder. Stir until the sugar dissolves and the mixture is smooth, about 2 minutes. Remove from heat and keep warm.
- Toast the brioche buns on a dry skillet or in the oven at 350°F / 177°C for 3-4 minutes until golden and warm. This adds a buttery crunch and prevents sogginess from the glaze and slaw.
- Place the fried chicken into a large bowl. Pour the warm glaze over the top and toss gently until every piece is evenly coated. The glaze should cling to the crisp coating, not saturate it.
- Assemble each sandwich: on the bottom bun, layer 3 pickle chips. Place the glazed chicken on top. Add about 1/4 cup of coleslaw over the chicken, then cover with the top bun. Serve immediately while the chicken is still crispy and the bun is warm.
- For an oven-baked alternative, preheat oven to 400°F / 204°C. Place the breaded chicken on a lightly greased baking sheet, drizzle with a little oil, and bake for 18-20 minutes, flipping halfway, until internal temperature reaches 165°F / 74°C. Then glaze and assemble as directed.
Notes
Coleslaw: Use a creamy, vinegar-based coleslaw for authenticity. To make homemade: combine 1 cup shredded cabbage, 2 tbsp mayonnaise, 1 tsp apple cider vinegar, 1 tsp sugar, and salt to taste. Chill for 30 minutes before serving. Storage: Cooked, unglazed chicken can be refrigerated in an airtight container for up to 3 days. Freeze unglazed fried chicken for up to 2 months. Reheat in a 375°F / 190°C oven for 8-10 minutes until crispy, then glaze. Glaze can be refrigerated for up to 1 week; reheat gently on the stove.
Nutrition
- Calories: 613
- Sugar: 22
- Sodium: 1350
- Unsaturated Fat: 5
- Carbohydrates: 58
- Fiber: 2
- Protein: 36
- Cholesterol: 155
Keywords: chicken sandwich, spicy fried chicken, kickin chicken, Zaxby’s copycat, crispy chicken, buttermilk chicken, fried chicken sandwich, sweet and spicy glaze, Southern fast food, homemade sandwich