 Kendric adan
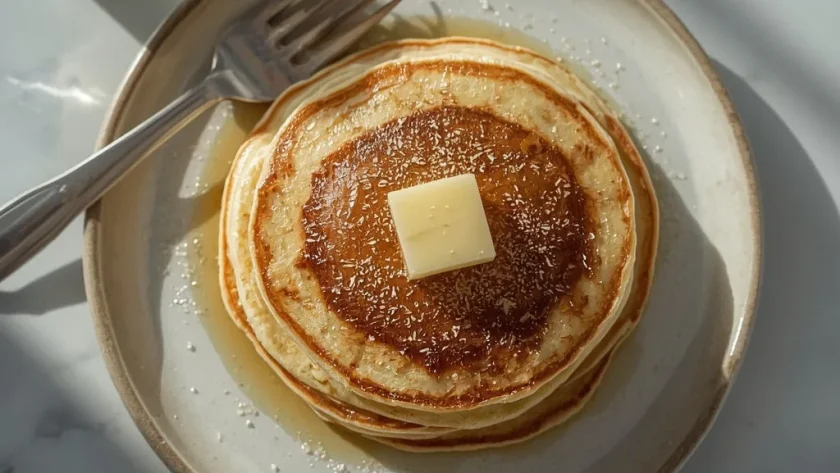
Alton Browns Perfect Pancakes are the kind of breakfast that makes you slow down and actually enjoy your morning. These pancakes hit that sweet spot between fluffy and tender, with crisp golden edges and a soft, airy center that soaks up syrup beautifully.
The whole process takes about 30 minutes from start to finish, and I’d call it beginner-friendly — the only real tricky part is knowing when to flip. This is the recipe you want for lazy weekend mornings when you have a bit of time and a craving for something genuinely good.
Why You’ll Love This Recipe
- The texture — Crisp on the outside, cloud-soft on the inside. Every bite gives you that satisfying contrast.
- Real buttermilk flavor — That tangy, slightly sour note you just can’t fake with regular milk and vinegar substitutes.
- Simple ingredients — Everything comes from your pantry and fridge. No fancy equipment, no specialty flours, no fuss.
What Makes This Recipe Special
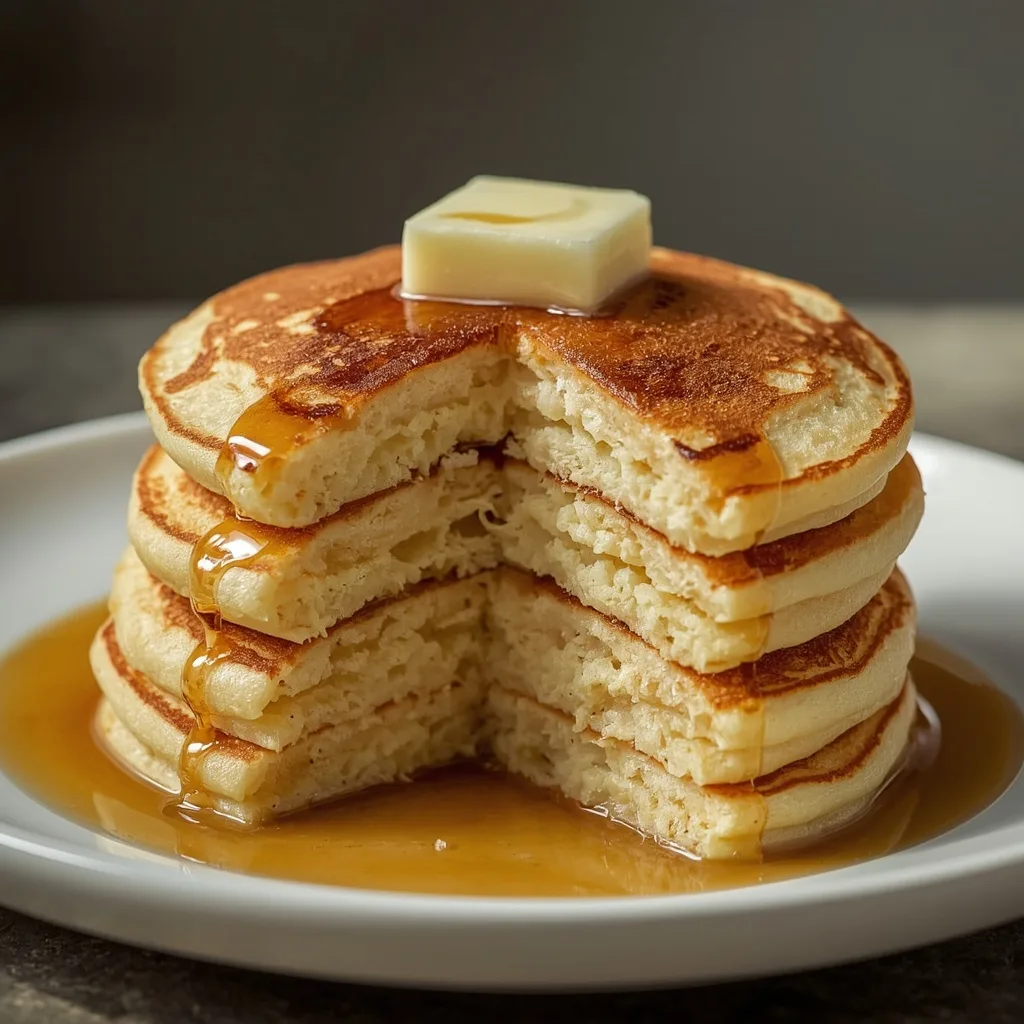
The combination of buttermilk and whole milk does the heavy lifting here. The buttermilk reacts with the baking soda to create those light, airy bubbles, while the whole milk adds just enough richness to keep the crumb tender. Resting the batter for five minutes before cooking lets the flour fully hydrate, which gives you a thicker, fluffier pancake that doesn’t turn into a flat, sad disc on the griddle.
The melted butter folded in at the end takes the flavor up a notch and helps create that golden-brown crust you’re after. This recipe belongs on your weekend breakfast table, plain and simple.
Ingredients You’ll Need
Everything here is straightforward, but quality matters. Fresh buttermilk makes a noticeable difference, and room-temperature eggs blend more smoothly into the wet mix.
Dry Ingredients
- 2 cups all-purpose flour — Spoon and level it rather than scooping, or you’ll end up with dense pancakes from too much flour.
- 2 tablespoons granulated sugar — Just enough sweetness to balance the tangy buttermilk without making these dessert-like.
- 1 teaspoon fine sea salt — Balances the flavors and keeps the pancakes from tasting flat.
- 1/2 teaspoon baking powder — Gives the pancakes a gentle lift.
- 1/2 teaspoon baking soda — The main leavening agent here; it reacts with the buttermilk’s acidity to create those airy bubbles.
Wet Ingredients
- 1 1/2 cups buttermilk, well-shaken — The star of the show. Shake the carton before measuring since it separates as it sits.
- 1/3 cup whole milk — Adds richness and thins the batter just enough for the right consistency.
- 1 large egg, at room temperature — Room temperature blends more evenly and helps the batter come together smoothly.
- 3 tablespoons unsalted butter, melted — Folded in at the end for richness and that golden, crispy exterior.
- 1 teaspoon vegetable oil — Added to the griddle to keep the butter from burning during cooking.
Equipment Needed
Nothing complicated here — you probably own most of this already.
- Large mixing bowl — Big enough to whisk dry ingredients without making a mess on your counter.
- Medium mixing bowl — For combining the wet ingredients before adding them to the dry.
- Cast-iron skillet or nonstick griddle — Cast iron holds heat better for consistent browning, but a good nonstick works too.
- Thin, flat spatula — A flexible metal or offset spatula makes flipping cleaner and less likely to tear the pancake.
- 1/4-cup measuring cup — The perfect scoop size for evenly-sized pancakes.
Instructions to Prepare Alton Browns Perfect Pancakes
The method here is straightforward, but each step matters. Follow them in order and don’t rush the process.
- Mix the dry ingredients — Whisk the flour, sugar, salt, baking powder, and baking soda thoroughly. This ensures the leaveners are evenly distributed so you don’t get bitter pockets of baking soda in any bite.
- Combine the wet ingredients — Whisk the buttermilk, whole milk, and egg together until fully incorporated and homogeneous.
- Fold wet into dry — Pour the wet mixture into the dry and fold gently with a spatula until just combined. Lumps are okay — overmixing develops gluten and gives you tough, rubbery pancakes.
- Add the melted butter — Fold it in with 2-3 strokes, just until mostly incorporated. Too much stirring here overworks the gluten again.
- Rest the batter — Let it sit for 5 minutes at room temperature. This hydrates the flour and lets the baking soda start producing bubbles, which means lighter pancakes. Meanwhile, preheat your griddle over medium heat.
- Test the griddle — Sprinkle a few drops of water on the surface. If they sizzle and evaporate immediately, you’re ready. Add a small pat of butter and the oil, swirling to coat evenly.
- Pour the batter — Use the 1/4-cup measuring cup and leave at least 2 inches between pancakes so they have room to spread. Cook 2-3 at a time to keep the griddle temperature steady.
- Cook untouched — Wait 2-3 minutes until the edges look set and small bubbles form and begin to pop. That’s your cue to flip. Peeking or flipping too early tears the pancake and leaves it pale.
- Flip and finish — Flip in one confident motion and cook another 1-2 minutes until the second side is golden brown. The center should spring back lightly when pressed.
- Keep warm — Transfer cooked pancakes to a wire rack set in a warm oven (around 200°F) while you finish the remaining batter. The rack prevents soggy bottoms from trapped steam.
- Repeat — Add a fresh pat of butter and a drizzle of oil to the griddle before each batch. Adjust the heat down if they’re browning too fast, up if they’re taking too long.
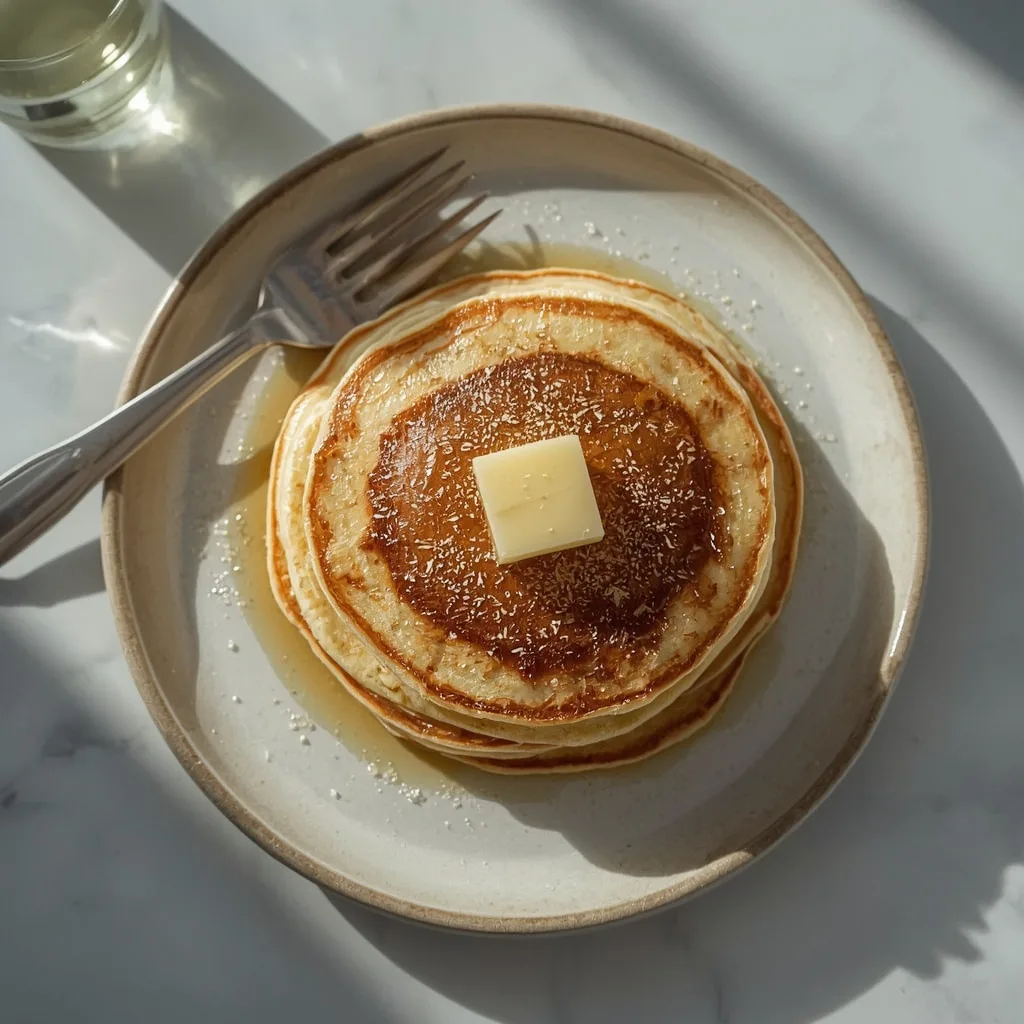
- Serve immediately — Top with butter, syrup, fruit, or jam. These are best eaten warm, fresh off the griddle.
Expert Tips for a Standout Alton Browns Perfect Pancakes
A few small tweaks separate good pancakes from great ones. These are the details I’ve learned matter most.
- Rest the batter fully — Don’t skip the 5-minute rest. That brief pause lets the flour absorb liquid and the leaveners activate, giving you noticeably fluffier results.
- Keep the butter from burning — The vegetable oil mixed with butter on the griddle raises the smoke point, so you get butter flavor without blackened bits.
- Watch the heat, not the clock — Medium heat works best. If the pancakes brown too fast, the inside stays undercooked; too slow and they turn dry and tough.
- Resist the urge to press — Never flatten the pancakes with your spatula. That squeezes out the air bubbles and ruins the texture completely.
- Use a wire rack — Stacking hot pancakes traps steam and softens those crisp edges you worked for. A rack in a warm oven keeps them perfect.
Common Mistakes to Avoid
These are the pitfalls I see most often with homemade pancakes — and they’re all easy to fix once you know what to look for.
- Overmixing the batter — Stirring until completely smooth develops gluten and makes pancakes tough and rubbery. A few lumps are fine.
- Flipping too early — If the top still looks glossy and wet, the bottom isn’t ready. Wait for bubbles to pop and edges to set.
- Crowding the griddle — Four pancakes at once drops the pan temperature, leading to uneven browning. Stick to 2-3 per batch.
- Using cold ingredients — Cold buttermilk and eggs seize up the melted butter into small clumps. Room temperature gives you a smoother, better batter.
- Skipping the wire rack — Piling pancakes on a plate makes them sweat and go soggy. The few extra seconds to transfer them pays off.
- Grinding spices — Wait, that’s not this recipe. But seriously, don’t skip the resting step — it makes a bigger difference than you’d think.
Variations & Ways to Customize Alton Browns Perfect Pancakes
Once you’ve mastered the base recipe, it’s fun to play around. Here are my favorite ways to change things up.
- Blueberry pancakes — Fold 1 cup of fresh or frozen blueberries into the batter after the butter. Frozen ones work fine, but toss them in a little flour first to keep them from sinking.
- Cinnamon sugar version — Add 1 teaspoon of ground cinnamon to the dry ingredients and sprinkle the cooked pancakes with a cinnamon-sugar mix while they’re still warm.
- Chocolate chip pancakes — Fold in 3/4 cup of mini chocolate chips after the butter. Mini chips distribute more evenly than regular-sized ones.
- Banana pancakes — Mash one ripe banana and whisk it into the wet ingredients before combining. You might need an extra splash of milk to thin the batter slightly.
- Salted maple butter — Whisk softened butter with a pinch of flaky sea salt and a splash of maple syrup. Spread that on top instead of plain syrup.
- Whole wheat swap — Replace half the all-purpose flour with whole wheat flour. The pancakes turn out slightly denser but with a nice nutty flavor.
What to Serve With Alton Browns Perfect Pancakes
These pancakes are filling on their own, but the right sides turn them into a full breakfast spread worth lingering over.
- Crispy bacon — The salty, smoky crunch cuts through the sweetness of the pancakes and syrup. A classic pairing for good reason.
- Scrambled eggs — Soft, buttery eggs add protein and balance the sweet breakfast flavors without overpowering them.
- Fresh fruit salad — A bowl of berries, sliced peaches, or melon adds brightness and a fresh contrast to the rich pancakes.
- Maple syrup — Pure maple syrup is worth the splurge here. The complex, woodsy flavor beats artificial syrup every time.
- Whipped cream — A dollop of lightly sweetened whipped cream makes these feel more decadent, especially with berries on top.
- Hot coffee — A strong, dark roast balances the sweetness and gives you that caffeine kick to start the day right.
Make-Ahead Instructions
Weekend mornings are better when you’re not chained to the stove. Here’s how to get ahead without sacrificing quality.
- Dry mix in advance — Whisk all the dry ingredients together and store in an airtight container for up to 2 weeks. Just add the wet ingredients when you’re ready to cook.
- Full batter ahead — Mix the batter and refrigerate for up to 24 hours. Rest it a few minutes at room temperature before cooking, and expect slightly fluffier pancakes from the extra resting time.
- Cooked pancakes — Make the full batch, cool completely on a wire rack, then stack with parchment between each pancake. Freeze for up to 2 months.
- Portion the butter — Melt and measure the butter ahead of time, storing it in a small jar in the fridge. Warm it slightly before using.
Storage and Reheating
Leftovers are a real possibility here — and they reheat surprisingly well if you do it right.
Storage
- Refrigerator — Store leftover pancakes in an airtight container in the fridge for up to 3 days. Place parchment between them to prevent sticking.
- Freezer — Freeze cooled pancakes in a single layer on a baking sheet until solid, about 1 hour. Then transfer to a zip-top bag with parchment between pancakes.
- Counter — Keep cooked pancakes at room temperature for no more than 2 hours if you’re eating them throughout the morning.
- Batter — Leftover batter keeps in the fridge for a day, but it may need a splash of milk to thin it back to the right consistency.
Reheating
- Toaster — For refrigerated pancakes, pop them in on a medium setting. This crisps the edges better than any other method.
- Oven — Reheat refrigerated pancakes in a 350°F oven for 5-7 minutes. Frozen ones take about 10 minutes.
- Microwave — Warm refrigerated pancakes for 20-30 seconds. This softens them, so don’t expect crispy edges — perfect for quick weekday breakfasts.
- Frozen to toaster — Frozen pancakes go straight into the toaster on medium. No thawing needed, and they come out surprisingly close to fresh.
Nutritional Breakdown (Per Serving)
Based on 1 serving = 2 pancakes out of a total of 8 (the recipe makes about 4 servings).
- Calories — 350
- Protein — 8g
- Fat — about 10g
- Carbohydrates — 56g
- Fiber — 1g
- Sugar — about 9g
- Sodium — around 650mg
Frequently Asked Questions
Can I use regular milk instead of buttermilk for Alton Browns Perfect Pancakes?
You can, but the texture and flavor will change noticeably. Add 1 tablespoon of lemon juice or vinegar to a cup of regular milk and let it sit for 5 minutes as a quick substitute. The flavor won’t be quite as tangy, and the pancakes may be slightly less fluffy.
Why are my pancakes tough and rubbery?
Overmixing the batter is almost always the culprit. Stiring until completely smooth develops gluten, which makes pancakes dense and chewy. Mix just until the dry ingredients are moistened — lumps are fine.
Can I freeze Alton Browns Perfect Pancakes?
Absolutely. Cool them completely on a wire rack, then freeze in a single layer on a baking sheet for about an hour. Once solid, transfer to a zip-top bag with parchment between pancakes. They’ll keep for up to 2 months.
Why does the first batch come out worse than the rest?
The griddle hasn’t reached an even temperature yet. That’s normal for cast iron. Let the pan preheat longer before the first batch, and the second batch usually comes out more evenly browned.
Can I make the batter the night before?
Yes, and the pancakes might even turn out fluffier thanks to the extra resting time. Store the batter covered in the fridge overnight, then let it sit at room temperature for a few minutes before cooking. Give it a gentle stir and add a splash of milk if it thickened too much.
How long does Alton Browns Perfect Pancakes last in the fridge?
Cooked pancakes stay good in the refrigerator for up to 3 days when stored in an airtight container. Reheat them in a toaster for the best texture, or a 350°F oven for 5-7 minutes.
More Recipes
Final Words
There’s something deeply satisfying about pulling a perfect stack of pancakes off the griddle. The crisp edges, the fluffy centers, that classic buttermilk tang — Alton Browns Perfect Pancakes delivers all of it without any fuss or pretension. Give this one a try next weekend, and I think you’ll find yourself coming back to it again and again.
PrintAlton Brown’s Perfect Pancakes
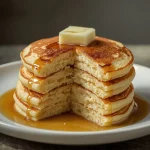
These pancakes strike the perfect balance between fluffy and tender, with a crisp golden exterior and a soft, airy crumb. The tangy buttermilk and rich butter create a classic flavor that’s both comforting and refined, making them the ultimate weekend breakfast.
- Prep Time: 10
- Cook Time: 20
- Total Time: 30
- Yield: 4 1x
- Category: Breakfast
- Method: Stovetop
- Cuisine: American
Ingredients
- 2 cups all-purpose flour, spooned and leveled
- 2 tablespoons granulated sugar
- 1 teaspoon fine sea salt
- 1/2 teaspoon baking powder
- 1/2 teaspoon baking soda
- 1 1/2 cups buttermilk, well-shaken
- 1/3 cup whole milk
- 1 large egg, at room temperature
- 3 tablespoons unsalted butter, melted, plus more for the griddle
- 1 teaspoon vegetable oil, for the griddle
Instructions
- In a large mixing bowl, whisk together the all-purpose flour, granulated sugar, fine sea salt, baking powder, and baking soda. Whisking thoroughly ensures the leaveners are evenly distributed throughout the dry mix, which prevents any bitter pockets of baking soda in the finished pancakes.
- In a separate medium bowl, combine the buttermilk, whole milk, and the room-temperature egg. Whisk until the egg is fully incorporated and the mixture is homogenous. The combination of buttermilk and whole milk gives the pancakes a tangy flavor with just enough liquid richness to keep them tender.
- Pour the wet ingredients into the dry ingredients all at once. Use a spatula or wooden spoon to gently fold the mixture together, mixing until just combined. It’s okay if the batter is slightly lumpy, as overmixing develops gluten and results in tough, rubbery pancakes.
- Pour the melted butter into the batter and fold it in gently with 2-3 strokes, just until the butter is mostly incorporated. The melted butter adds richness and helps create a golden, crispy exterior, but stirring too much at this stage will overwork the gluten.
- Let the batter rest for 5 minutes at room temperature. This rest allows the flour to fully hydrate and the baking soda to begin producing bubbles, which results in lighter, fluffier pancakes. Meanwhile, place a large cast-iron skillet or nonstick griddle over medium heat.
- To test if the griddle is ready, sprinkle a few drops of water onto the surface; if they sizzle and evaporate immediately, the pan is hot. Add a small pat of butter and 1 teaspoon of vegetable oil to the griddle, swirling to coat the bottom. The butter adds flavor, while the oil prevents the butter from burning.
- Using a 1/4-cup measuring cup (or a ladle), pour the batter onto the hot griddle, leaving at least 2 inches of space between each pancake to allow for spreading. Cook 2 to 3 pancakes at a time to avoid overcrowding and making the griddle temperature drop.
- Cook the pancakes untouched for 2 to 3 minutes, until the edges appear set and small bubbles form on the surface and begin to pop. This visual cue signals that the bottom is golden and the pancake is ready to flip. Peeking or flipping too early will tear the pancake and leave it pale.
- Flip the pancakes with a thin, flat spatula in one confident motion. Cook for another 1 to 2 minutes, until the second side is golden brown and the pancake is cooked through. The center should spring back lightly when pressed with a fingertip.
- Transfer the cooked pancakes to a wire rack set in a warm oven (about 200°F / 93°C) while you cook the remaining batches. Keeping them on a wire rack prevents the bottoms from becoming soggy from trapped steam.
- Repeat with the remaining batter, adding a fresh pat of butter and a small drizzle of oil to the griddle before each new batch. Adjust the heat down slightly if the pancakes are browning too quickly, or up if they’re taking too long to color.
- Serve the pancakes immediately while they’re still warm, topped with butter and your favorite syrup, fruit, or jam. Alton Brown’s method ensures a stack that’s fluffy, tender, and full of classic buttermilk flavor.
Notes
Storage: Leftover pancakes can be stored in an airtight container in the refrigerator for up to 3 days. Freezing: Place cooled pancakes in a single layer on a baking sheet, freeze until solid (about 1 hour), then transfer to a zip-top freezer bag with parchment between them; they can be frozen for up to 2 months. Reheating: For refrigerator pancakes, warm in a toaster or in a 350°F / 177°C oven for 5 to 7 minutes, or microwave for 20-30 seconds. For frozen pancakes, pop them directly in the toaster on a medium setting, or reheat in a 350°F / 177°C oven for 10 minutes. Avoid stacking hot pancakes before serving, as steam will soften the crisp edges.
Nutrition
- Calories: 350
- Sugar: 9g
- Sodium: 650mg
- Unsaturated Fat: 5g
- Carbohydrates: 56g
- Fiber: 1g
- Protein: 8g
- Cholesterol: 65mg
Keywords: Alton Brown’s Perfect Pancakes, buttermilk pancakes, fluffy pancakes, homemade pancakes, breakfast recipe, pancake recipe, stovetop pancakes, classic pancakes, easy pancakes, weekend breakfast